Shared course · by demo

Digital Photography in Manual Mode

Leave automatic behind: control exposure with aperture, shutter and ISO, and know which one to reach for when a picture is not coming out right.

lessons
79
to learn
19h 54m
questions
237
written
79/79
Start reading BeginnerEnglish

The path

WrittenNot yet

  1. How a digital camera captures light20 min3 questions
  2. Camera obscura to digital sensor10 min3 questions
  3. Light path through the lens10 min3 questions
  4. The aperture mechanism10 min3 questions
  5. The shutter mechanism10 min3 questions
  6. Image sensor and pixels10 min3 questions
  7. Understanding exposure and the light meter25 min3 questions
  8. Exposure: amount of light captured10 min3 questions

Lesson 1

How a digital camera captures light

You will be able to describe the path light takes from the scene to the sensor, and name the parts that control exposure. Covers the camera obscura principle, lens, aperture, shutter, and sensor. Prevents the belief that the camera sees the same way your eye does.

20 min3 assessments

You've seen photos that are too dark or too bright, and you know the camera has settings like aperture and shutter speed. But what do they actually do to the light? Before you can control exposure, you need to understand the journey light takes from the scene to the sensor.

A camera captures light the same way a camera obscura does: light reflects off the scene, travels in straight lines, and passes through a small opening to project an inverted image onto a surface. In a modern camera, that opening is a lens, which focuses the light. Inside the camera body, three parts control how much light reaches the sensor:

  • Lens – Focuses the light and directs it toward the sensor.
  • Aperture – An adjustable diaphragm that opens wide or closes down to control the amount of light passing through.
  • Shutter – A curtain that opens for a precise duration to let light hit the sensor.

Once light reaches the sensor, it is converted into an electrical signal that becomes a digital image. The combination of aperture size and shutter speed determines the total exposure. This is why you can have many different combinations of settings that still produce a properly exposed picture – as long as the total light reaching the sensor is the same.

The path of light from scene to digital image, showing the three exposure controls.

Analogy

Imagine filling a bucket with water from a tap. The bucket is the sensor – its capacity is fixed (like ISO sensitivity). The tap is the aperture – how far you open it controls the flow rate of water. The time you leave the tap open is the shutter speed – the duration water flows. The total water in the bucket is the exposure.

If you open the tap wide (large aperture) for a short time (fast shutter), you get the same amount of water as opening the tap slightly (small aperture) for a long time (slow shutter). This is why different combinations of aperture and shutter can give the same exposure.

Where the analogy breaks down

The aperture also affects how much of the scene is in focus (depth of field), which has no equivalent in the bucket analogy. And the bucket's capacity (ISO) can be changed in a camera, but a real bucket's size is fixed.

Common misconception

“The camera sees the same way my eye does.”

Both have a lens, an aperture (pupil), and a light-sensitive surface (retina/sensor). Both form an inverted image.

What is actually true

Your eye constantly adjusts its pupil and adapts to brightness automatically, while a camera's aperture and shutter are fixed for each shot. Your brain also processes the image continuously, filling in details and adjusting for color. A camera captures a single, static moment with the settings you choose – it cannot adapt mid-shot the way your eye does.
Check yourself

Check your understanding of how a digital camera captures light.

1Multiple choiceChecked instantly

Which part of the camera controls the duration of time that light is allowed to hit the sensor?

  • AThe lens
  • BThe aperture
  • CThe shutter
  • DThe sensor
2Short answerMarked by AI

In 2–3 sentences, describe the path light takes from the scene to the digital file, naming the three main components that control exposure.

Graded on Lists the three exposure control components (lens, aperture, shutter) and their roles. · Describes the light path correctly from scene to sensor to digital file.

3EssayMarked by AI

Write a short paragraph (200–400 words) comparing the camera's light capture to the human eye's vision. Explain why the camera cannot adjust to varying brightness as quickly as your eye can, and what this means for exposure settings.

Graded on Identifies key similarities and differences between camera and eye. · Explains why the camera cannot adjust quickly and the implication for exposure settings.


Lesson 2

Camera obscura to digital sensor

Traces the history from the camera obscura to modern digital sensors, illustrating the fundamental principle of light projection.

10 min3 assessments

The camera obscura was a dark room with a tiny hole that projected an outside scene upside-down on the opposite wall. Artists used it for tracing, but they could never take the projection home with them. The image existed only while the room was dark and the hole was open. The first breakthrough came when Joseph Nicéphore Niépce coated a pewter plate with bitumen and exposed it in a camera obscura for eight hours. The bitumen hardened where light hit, and washing away the soft parts left a permanent record. That was the first photograph. But eight hours was impractical—portraits were impossible. The daguerreotype cut exposure to minutes, but each plate was a unique, fragile mirror-like image. You could not copy it. In 1888, George Eastman's roll film made photography portable: a box camera, a flexible film strip, and a processing lab. Anyone could take a hundred pictures and mail the roll to be developed. But film still required chemical processing, you could not see the result until hours or days later, and each frame cost money. The digital sensor, invented at Kodak in 1975, turned light into electrical charges. A CCD (charge-coupled device) captured the image as an array of pixels, stored it as a file, and displayed it instantly. No chemicals, no waiting, no cost per shot. The sensor could be reused indefinitely. The evolutionary path from camera obscura to digital sensor is a story of solving one problem after another: first, how to capture the image permanently; then, how to capture it quickly; then, how to make it portable and affordable; finally, how to make it instant and reusable.

How it got here
  1. 4th century BCE

    Camera obscura described

    Chinese philosopher Mozi describes the camera obscura—a dark room with a pinhole that projects an inverted image of the outside. Problem solved: none. Projection existed but could not be captured.

  2. 1826

    First permanent photograph

    Niépce uses bitumen on a pewter plate in a camera obscura, creating the first permanent image after an 8-hour exposure. Problem solved: captured the projection permanently. New problem: exposure time was too long for practical use.

  3. 1839

    Daguerreotype introduced

    Louis Daguerre's process reduces exposure to minutes on a silver-coated copper plate, but each image is a unique, fragile mirror-like positive. Problem solved: faster exposure. New problem: no copies, expensive, and delicate.

  4. 1888

    Roll film camera

    George Eastman's Kodak camera uses flexible roll film, allowing 100 exposures per roll. Users mail the roll for processing. Problem solved: portable, affordable, multiple exposures. New problem: chemical processing delay, cost per shot.

  5. 1975

    First digital sensor

    Kodak engineer Steven Sasson builds the first digital camera using a CCD sensor. The image is captured as an array of pixels, stored on a cassette tape, and displayed instantly. Problem solved: instant feedback, no chemicals, no cost per shot, reusable.

To understand why digital sensors dominate, compare them with film on the axes that matter most to a photographer.

Film

Cost per shot
$0.50–$1.00 per frame (film + processing)
Time to see result
Hours to days (after processing)
Reusability
Single use; each frame is a unique negative
Noise at high sensitivity
Grain increases with ISO; predictable

Best for Artists who prefer the look of grain and have a controlled workflow.

Digital sensor

Cost per shot
$0.00 per shot after camera purchase
Time to see result
Instant (on-screen preview)
Reusability
Reused indefinitely; thousands of shots per card
Noise at high sensitivity
Noise increases with ISO; can be reduced in post-processing

Best for Learning and experimentation: immediate feedback and zero marginal cost.

Go deeper

These Wikipedia articles provide a thorough history of the camera and the camera obscura.

Check yourself

Check your understanding of the evolution from camera obscura to digital sensor.

1Put in orderChecked instantly

Arrange these inventions in the order they were developed, from earliest to latest.

  • ACamera obscura described
  • BFirst permanent photograph (Niépce)
  • CDaguerreotype
  • DRoll film camera (Kodak)
  • EFirst digital sensor (Kodak)
2Short answerMarked by AI

Explain why the transition from film to digital sensors was significant for photographers. Mention at least two specific problems that digital sensors solved that film could not.

Graded on Identification of problems · Explanation of significance · Clarity and structure

3Multiple choiceChecked instantly

What was the primary limitation of the camera obscura that led to the invention of photographic film?

  • AIt could not project a clear image.
  • BIt could not permanently record the image.
  • CIt required a lens to focus.
  • DIt was too large to carry.

Lesson 3

Light path through the lens

Explains how the lens focuses light from the scene onto the sensor, including the role of refractive elements and focal length.

10 min3 assessments

You already know that light enters the camera through an opening – the prior node showed you the pinhole principle. But a pinhole alone gives a dim, blurry image because light spreads in all directions. A lens solves this by refraction: light slows down when it enters glass and bends toward the normal (the line perpendicular to the surface). A convex lens (bulging outward) is shaped so that parallel rays from a distant point all bend and meet at a single focal point. The distance from the lens to that point is the focal length, measured in millimeters. When you focus at infinity, the sensor sits exactly at the focal point, so a 50mm lens means the sensor is 50mm behind the lens. The lens gathers far more light than a pinhole, allowing fast shutter speeds. But this power comes with complexity: a real camera lens is a stack of multiple glass elements that correct for color errors (chromatic aberration) and distortions so the image is sharp and true across the frame.

Light path through a simple convex lens in a camera.

  • A convex lens bends parallel light rays so they converge to a single focal point.
  • The focal length is the distance from the lens to the focal point (sensor when focused at infinity).
  • Longer focal length = narrower field of view + greater magnification.
  • Shorter focal length = wider view + less magnification.
  • Real camera lenses are multi-element assemblies that correct aberrations.
Analogy

Hold a magnifying glass in sunlight: it gathers parallel rays and concentrates them into a tiny, bright spot that can burn paper. That spot is the focal point. Your camera lens does the same: it takes light from a distant scene and focuses it onto the sensor. The sensor is like the paper – it's where the concentrated light forms a sharp image.

Where the analogy breaks down

A camera lens is not a simple single-element magnifying glass; it uses multiple elements to reduce color fringes and distortions. Also, moving the lens forward or backward (focusing) shifts where the rays converge, but a magnifying glass only focuses at one fixed distance – you have to move the glass up and down, not change its internal shape.

Focal length in practice

Imagine a 50mm lens on a full-frame camera. Focused on a distant mountain, the lens-to-sensor gap is 50mm. Parallel rays from the mountain converge exactly on the sensor – the image is sharp. Now switch to a 100mm lens. The sensor sits 100mm behind the lens. The same mountain now appears twice as large because the rays have twice the distance to spread before hitting the sensor. But the field of view narrows: you see only half the width. If you want to fit more in the frame, you need a shorter focal length or more distance. A zoom lens lets you adjust focal length continuously, changing the light path inside the lens by moving glass elements.

Check yourself

Test your understanding of how a lens controls light.

1Multiple choiceChecked instantly

What property of a convex lens makes parallel light rays converge?

  • ARefraction – the bending of light as it passes through glass.
  • BReflection – the bouncing of light off the lens surface.
  • CDiffraction – the spreading of light around edges.
  • DAbsorption – the taking in of light by the glass.
2Short answerMarked by AI

You have a 35mm lens. You focus on a tree 10 meters away. Describe what happens to light rays from a single point on the tree as they pass through the lens and where they form a sharp image.

Graded on Describes refraction and convergence · Relates focusing to finite object distance

3EssayMarked by AI

You need to photograph a bird in a tree 30 meters away. You have two lenses: a 24mm wide-angle and a 200mm telephoto. Evaluate the trade-offs in terms of light path, field of view, magnification, and light gathering. Which lens would you choose and why?

Graded on Explains light path difference and magnification · Links focal length to field of view and light gathering · Justifies a choice given the scenario

Lesson 4

The aperture mechanism

Describes how the aperture diaphragm opens and closes to control the amount of light passing through, and its effect on exposure.

10 min3 assessments

The scene in front of you can be full of light, yet the photo still comes out dark. One place that decision gets made is inside the lens, at the aperture mechanism: a ring of thin metal blades arranged like an iris. The blades slide over one another, so the circular opening in the lens can be made larger or smaller while you look through it.

The mechanism has one job: regulate how fast light passes through the lens. Widen the opening and more photons reach the sensor every second; narrow it and fewer do. With shutter speed and ISO held steady, that makes it a direct brightness control — larger opening, brighter image; smaller opening, darker image. It does not colour the light, magnify it, or concentrate it. It is a valve.

You already know the path light takes from subject to sensor. The aperture diaphragm is the adjustable gate at the middle of that path, and it is one of the controls you turn when an exposure is off.

The two states of the aperture diaphragm: wide and narrow, and what each does to exposure.

Analogy

Treat the aperture like a window blind. Pull the cord to open the slats and daylight floods the room; close them and the same sunlight arrives as a thin trickle. The diaphragm is the set of blades that performs that opening and closing inside the lens — one control, continuously adjustable, changing how much light gets through.

Where the analogy breaks down

A window blind only changes brightness, while an aperture also affects depth of field, and the f-number scale is reversed — f/16 names a smaller opening than f/2.

Common misconception

“A larger f-number like f/16 must mean a larger aperture opening, because 16 is bigger than 2.”

In everyday measurement, bigger numbers mean bigger amounts: 16 cm is longer than 2 cm, so f/16 should let in more light.

What is actually true

The f-number is a fraction: focal length divided by the diameter of the opening, written f/16 for "focal length divided by 16". Dividing by a larger number gives a smaller diameter, so f/16 is actually a narrow aperture and f/2 is a wide one. That is why the diaphragm closes as the f-number rises.

Check yourself

Check that you can predict what the diaphragm does.

1Multiple choiceChecked instantly

You are holding shutter speed and ISO constant. You turn the aperture ring so the diaphragm blades close down to a smaller opening. What happens to the exposure?

  • AThe image becomes brighter because the smaller opening concentrates the light.
  • BThe image becomes darker because fewer photons reach the sensor in the same time.
  • CThe image stays the same because the sensor automatically compensates.
  • DThe image becomes darker because the blades block colour as well as light.
2Short answerMarked by AI

You are photographing a friend indoors near a window. Your shutter speed and ISO are already chosen, but the image is too dark. In two to four sentences, describe what you would do with the aperture mechanism to correct the exposure, and state clearly whether the opening gets larger or smaller and what that does to the light reaching the sensor.

Graded on Applies aperture to the stated exposure problem · Connects opening size to light reaching the sensor · States the exposure result

3EssayMarked by AI

A beginner says: "I'll close the aperture to make my photos darker, and I never need to touch shutter speed or ISO." In 200 to 400 words, explain why closing the aperture does darken the image, but also why it is not a free fix. Describe what happens to the amount of light reaching the sensor and what a photographer must consider when the diaphragm closes down. Use the behaviour of the aperture mechanism in your answer.

Graded on Explains the aperture mechanism's exposure effect · Handles the compensation dependency · Evaluates the quoted claim

Lesson 5

The shutter mechanism

Covers the types of shutters (focal-plane and leaf) and how they control the duration of light hitting the sensor.

10 min3 assessments

The shutter is a light-tight barrier that opens and closes to expose the sensor for a precise duration. There are two main types: focal-plane shutters (found in most DSLRs and mirrorless cameras) and leaf shutters (often in compact cameras and some medium format systems).

A focal-plane shutter consists of two curtains (first and second) that travel across the sensor plane. When you press the shutter, the first curtain opens, exposing the sensor gradually from one side to the other. After the set time, the second curtain closes, also traveling across. This creates a moving slit that exposes different parts of the sensor at different times. The fastest speed is limited by how fast the curtains travel; typically around 1/4000s or 1/8000s.

A leaf shutter uses overlapping blades that open from the center outward and close in reverse order, like an iris. It is located in the lens itself. Because the entire sensor is exposed at once (not a moving slit), the flash can sync at any speed. However, leaf shutters are mechanically complex and typically have lower maximum speeds (around 1/500s).

The choice affects not only exposure but also your ability to use flash (sync speed) and the duration of exposure for motion control.

State transitions for focal-plane and leaf shutters showing how each type exposes the sensor.

Analogy

Think of the shutter as a door that opens and closes quickly. The longer the door is open, the more light enters the room. That is exactly how shutter speed controls exposure: it sets how long the sensor 'sees' the scene.

But the analogy breaks down because a door opens equally across its entire opening, whereas a focal-plane shutter exposes the sensor through a moving slit. That means different parts of the sensor start and stop receiving light at different times. This is why high-speed flash sync is limited with focal-plane shutters — the flash fires for only a few milliseconds, and the slit may not have uncovered the whole sensor yet. Also, a door doesn't create motion blur; blur comes from the sensor being exposed while the scene moves, which the door analogy doesn't capture.

Where the analogy breaks down

A door opens the whole opening at once, but a focal-plane shutter exposes in a moving slit, affecting flash sync and motion appearance. Also, a door doesn't cause motion blur — that's a sensor integration effect.

Common misconception

“A fast shutter speed is only for freezing action; a slow shutter speed is just for low light.”

It's true that fast speeds freeze motion and slow speeds let in more light, so many beginners think those are the only uses.

What is actually true

Shutter speed fundamentally controls exposure time. Freezing action and letting in more light are consequences, not separate purposes. In bright conditions you might use slow speeds for creative blur (e.g., waterfall), and in low light you may actually need a fast shutter to avoid camera shake — forcing you to open the aperture or raise ISO to compensate.

Go deeper

Read this for a detailed technical breakdown of shutter types and historical development.

Check yourself

Check your understanding of the shutter mechanism.

1Multiple choiceChecked instantly

Which statement best describes the key difference between a focal-plane shutter and a leaf shutter?

  • AFocal-plane shutters are faster but cannot sync with flash at high speeds because they expose the sensor via a moving slit.
  • BLeaf shutters are faster and allow flash sync at any speed.
  • CFocal-plane shutters are only found in medium format cameras.
  • DLeaf shutters use two curtains moving across the sensor, similar to focal-plane shutters.
2Short answerMarked by AI

Explain why a leaf shutter can synchronise with a flash at any shutter speed while a focal-plane shutter cannot. Include the concept of the moving slit.

Graded on Describes the moving slit of a focal-plane shutter · Explains that leaf shutter exposes full sensor at once

3Short answerMarked by AI

You are photographing a fast-moving cyclist in daylight. You want to freeze motion. Select an appropriate shutter speed and explain why. Also mention which shutter type concerns may affect your choice (e.g., flash sync if using flash).

Graded on Shutter speed selection and freezing motion rationale · Consideration of shutter type and flash sync

Lesson 6

Image sensor and pixels

Explains how the sensor converts light into electrical signals, the role of pixels, and the difference between CCD and CMOS at a high level.

10 min3 assessments

From the previous node, you learned how light travels through the lens, aperture, and shutter to reach the sensor. Now let’s zoom into that sensor—the heart of every digital camera.

A digital camera sensor is a grid of millions of tiny photosites, each called a pixel. When light hits a photosite, it generates electrons through the photoelectric effect. The number of electrons collected is proportional to the brightness of the light at that spot.

After the exposure ends, the sensor reads each pixel’s charge, converts it to a voltage, then passes it through an analog-to-digital converter (ADC). The result is a digital number—typically 0–255 for an 8-bit JPEG or 0–4095 for a 12-bit raw file. That number represents the brightness of that pixel in the final image.

To capture colour, most sensors use a Bayer filter: a mosaic of red, green, and blue filters over individual pixels. The camera’s processor then interpolates the missing colours to produce a full-colour image.

There are two main sensor architectures:

  • CCD (Charge-Coupled Device) – Charge is shifted across the chip row by row to a single ADC. This design produces very clean images with low noise, but it consumes more power and is slower to read out.
  • CMOS (Complementary Metal-Oxide-Semiconductor) – Each pixel has its own amplifier and the ADC is often on‑chip. CMOS sensors are faster, use less power, and are cheaper to manufacture. Early CMOS sensors had more noise than CCD, but modern designs have largely closed the gap, making CMOS the dominant type in consumer cameras today.

Signal chain from photon to digital pixel value inside a CMOS image sensor.

Analogy

Think of each pixel as a bucket left out in the rain. The amount of rain collected is like the light captured. The bucket’s capacity is the pixel’s full‑well capacity—once it overflows (blooming), extra rain spills into neighbouring buckets, ruining the image. After a set time (the shutter speed), you measure the water level and record it as a number.

Larger buckets (larger pixels) can catch more rain before overflowing and are more sensitive to light drizzle—just like large pixels perform better in low light. Smaller buckets need a longer downpour or a higher ISO boost to register the same amount, which adds noise.

Where the analogy breaks down

Rain falls at a constant rate regardless of the bucket’s material, but photodiodes have a quantum efficiency that varies with wavelength. Also, you cannot instantly empty a bucket between exposures without moving it; a sensor resets its pixels electronically in microseconds. Finally, buckets do not have colour filters—real pixels need a Bayer pattern to record colour, so a single pixel only captures one colour channel.

Cross‑section diagram of a CMOS image sensor pixel showing the microlens, colour filter, photodiode, transfer gate, floating diffusion, and amplifier.
GPL· Shape source
Common misconception

“More pixels always mean a better image quality.”

Higher resolution captures more detail, and detail is a key factor in image quality. More pixels should always be an improvement.

What is actually true

Pixel size matters equally. Larger pixels collect more light each, reducing noise and improving dynamic range. A 12MP full‑frame sensor often outperforms a 48MP smartphone sensor because its pixels are much larger. Additionally, lens sharpness can limit the benefit of very high pixel counts.

  • A digital camera sensor is a grid of millions of photosites (pixels), each converting photons into electrons.
  • The charge from each pixel is converted to a voltage and then to a digital number by the analog‑to‑digital converter (ADC).
  • Colour is captured using a Bayer filter array over the sensor, with each pixel seeing only red, green, or blue light.
  • CCD sensors shift charge to a single ADC, producing low noise but consuming more power and slower readout.
  • CMOS sensors have amplifiers on each pixel and on‑chip ADCs, offering faster readout and lower power at the cost of historically higher noise.
  • Pixel size directly affects low‑light performance: larger pixels gather more light and produce cleaner images.
Check yourself
1Multiple choiceChecked instantly

Which of the following best describes a key difference between CCD and CMOS sensors?

  • ACCD sensors consume less power than CMOS sensors.
  • BCMOS sensors typically integrate more processing circuitry on the same chip.
  • CCCD sensors are more common in modern consumer cameras.
  • DCMOS sensors always produce higher resolution images than CCD sensors.
2Short answerMarked by AI

Explain why a camera with a 12‑megapixel full‑frame sensor can capture better low‑light images than a 48‑megapixel smartphone sensor. Mention at least two factors.

Graded on Identifies pixel size as the main factor · Discusses light‑gathering area and noise relationship · Clarity and completeness

3EssayMarked by AI

You are choosing between two cameras for astrophotography: one with a CCD sensor and one with a CMOS sensor. Evaluate which sensor type is better suited for long‑exposure night sky images and justify your choice based on noise, power consumption, and readout speed.

Graded on Compares noise performance of CCD and CMOS for long exposures · Considers power consumption and its impact on usage · Makes a well‑reasoned conclusion with trade‑offs

Lesson 7

Understanding exposure and the light meter

You will be able to read the camera's light meter and explain what it is measuring. Covers the concept of exposure, the 18% gray standard, and how the meter guides your settings. Prevents blindly trusting the meter without understanding its limitations.

25 min3 assessments

You point your camera at a scene, half-press the shutter, and see a little scale light up in the viewfinder with a tick mark sliding left or right. That scale is the light meter, and it is telling you one thing: if you take this picture now, with your current settings, the sensor will record the scene as middle gray.

Middle gray — technically 18% reflectance gray — is the average tone the camera assumes every scene should be. A sunlit beach, a coal cellar, a wedding dress: the meter wants them all to come out the same shade of neutral gray. That sounds crazy. But it works for most scenes, and it fails in predictable ways that you can learn to spot.

The meter measures reflected light — the light bouncing off the scene into the lens. It cannot see the color or texture of the subject; it just sums the brightness and says: if you give me an aperture of f/8, a shutter of 1/250 and ISO 400, this will be an 18% gray picture. If the actual scene is brighter than gray (snow, white wall), the meter's recommendation will underexpose — make it look dim. If the scene is darker than gray (black cat, shadow), the meter overexposes — lightens it toward gray.

You are not supposed to obey the meter blindly. You are supposed to read it, decide whether the scene is lighter or darker than average, and then override its suggestion by adjusting aperture, shutter or ISO. That decision is what manual mode gives you control over.

The path of light through the camera's metering system. The meter reads reflected light, measures the scene's average brightness, compares it to 18% gray, and shows the result on the exposure scale. You then adjust settings to bring the exposure to where you want it.

Analogy

Think of the light meter as a chef who tastes every soup in the kitchen and says: "Add enough salt to make this taste like chicken broth." Most soups benefit from that advice — tomato, minestrone, vegetable all come out balanced. But when you bring in a dark miso paste soup, the chef tells you to oversalt it until it tastes like chicken broth, which ruins it. And when you bring a bowl of clear consommé, the chef tells you to undersalt it. The chef has only one reference taste.

Where the analogy breaks down

This analogy breaks down because the chef is comparing taste (a subjective quality), while the light meter compares brightness (a measurable quantity). In photography, 18% gray is not an arbitrary standard — it is a physical reference that corresponds to the middle of the sensor's dynamic range. The chef analogy suggests the meter is making a subjective judgment, when actually it is making a consistent, predictable measurement based on a fixed standard.

Common misconception

“If the light meter says 0 (perfectly centered), the picture will be correctly exposed.”

The camera's manual and every tutorial show the scale centered as the goal. When you do center it, most pictures come out fine. It feels like a target you should always hit.

What is actually true

The meter-centered reading is only correct when the scene's average brightness matches 18% gray. For a bright scene (snow, sand, backlit subject), centering the meter underexposes — the snow comes out gray. For a dark scene (night sky, black fabric), centering overexposes — the black turns gray. The correct exposure is the one that makes the scene look as you want it to look, which may be +1 or -2 stops from where the meter sits.

Decide

You are photographing a black cat sitting on a white sheet of paper. Your camera's meter shows +2 (overexposed by two stops). The cat should remain nearly black, and the paper should remain white.

Your meter says +2. The camera recommends you close the aperture or increase shutter speed to bring the scale back to 0. What do you do?

Check yourself
1Multiple choiceChecked instantly

Your camera's light meter displays -1 (underexposed by one stop) on the exposure scale. You are photographing a dark forest scene. What does the meter's reading actually mean?

  • AThe scene is one stop darker than the camera's reference of 18% gray, so the meter recommends you add light (open aperture or slow shutter) to bring the exposure to 0.
  • BThe image will be too dark, so you should increase the exposure by one stop to match the scene's average brightness.
  • CThe meter has malfunctioned because the forest is dark — it should read 0 for a correct exposure.
  • DThe scene is perfectly exposed at -1; you should not adjust anything.
2Short answerMarked by AI

You are photographing a white sand beach on a bright day. The meter shows 0 when you frame the shot. What will the resulting image look like?

3Short answerMarked by AI

Explain in 2-3 sentences why the 18% gray standard can cause the light meter to give an incorrect exposure recommendation for a scene that is mostly white snow. State what the meter will recommend, what the resulting image will look like if you follow that recommendation, and what you should do instead.

Graded on Identifies the 18% gray assumption and its effect on the meter reading · Describes the resulting image if the meter is followed · Provides the correct corrective action

Lesson 8

Exposure: amount of light captured

Defines exposure as the total light reaching the sensor, and explains that correct exposure depends on the desired brightness of the scene.

10 min3 assessments

Exposure is the total quantity of light that reaches your camera's sensor while the shutter is open. It is not a matter of right or wrong—it is a matter of what you want the final image to look like.

The camera's light meter, as you learned in the previous node, measures the scene's average brightness and recommends settings that render everything as middle gray (18% gray). If you follow that recommendation for a snow-covered field, the snow will come out gray. If you follow it for a black cat in a coal cellar, the cat will turn gray. The meter does not know what you are pointing at; it assumes the whole scene averages to medium brightness.

A "correct" exposure is simply the one that makes the scene appear as bright as you intend. You may want a high-key portrait that is intentionally overexposed, or a moody night scene that is underexposed. The exposure value is a quantity of light; the interpretation is yours.

This node is about that quantity—what it is, how it is built, and why the idea of a single perfect exposure is a trap.

How exposure is built from scene light through the camera and how ISO converts it to brightness. Note that exposure itself does not include ISO; ISO is the amplification step that follows capture.

Analogy

Think of exposure as filling a bucket with water from a faucet.

  • Aperture is the width of the faucet opening — a wider opening lets more water through per second.
  • Shutter speed is how long you leave the faucet open.
  • Total water in the bucket is the exposure.

You can achieve the same bucket level by using a wide faucet for a short time or a narrow faucet for a long time — just as you can get the same exposure with different aperture/shutter combinations.

  • ISO is not part of the bucket filling. It is like having a ruler that marks the water level differently — a higher ISO marks the same water level as "fuller" (brighter). But the water amount itself does not change.

Where the analogy breaks down

ISO is not adding water; it is amplifying the charge after capture. If you extend the analogy to include ISO as a bigger bucket, you would mistakenly think ISO changes the amount of light hitting the sensor. It does not.

  • Exposure is the total light energy reaching the sensor, nothing more.
  • There is no single 'correct' exposure; correct depends on desired image brightness.
  • The camera's light meter recommends settings that yield 18% gray, not necessarily your intention.
  • A scene can have many equally valid exposures depending on creative choice.
  • ISO is not part of exposure — it is post-capture amplification applied to the already-captured signal.
Common misconception

“There is exactly one correct exposure for a scene, and the light meter tells you what it is.”

Auto modes and the meter's '0' indication make it feel like a target you must hit. The camera was designed to help beginners get a usable result, so it reinforces the idea of a single right setting.

What is actually true

The meter's recommendation is a starting point based on a gray-world assumption. You can deliberately overexpose (brighter than meter) or underexpose (darker) to match your creative vision. The 'correct' exposure is the one that produces the image you want.

For you · never graded

Think of a photo you took that came out too dark or too bright. Can you recall what the camera's light meter showed? Knowing what you now know about exposure being a choice, how would you approach that scene differently — would you trust the meter or override it? What would you want the final brightness to convey?

Check yourself

These questions check your understanding of exposure as the total light captured.

1Multiple choiceChecked instantly

Which statement best defines exposure in digital photography?

  • AThe sensitivity of the camera's sensor to light (ISO).
  • BThe total amount of light reaching the sensor during the capture.
  • CThe brightness of the image as shown on the camera's LCD screen.
  • DThe combination of shutter speed and aperture that the camera selects in auto mode.
2Short answerMarked by AI

Define exposure in your own words. Then explain why a photographer might deliberately choose an exposure that is brighter than what the camera's light meter suggests.

Graded on Defines exposure correctly as total light reaching sensor. · Explains why a photographer would go brighter than the meter.

3EssayMarked by AI

Imagine you are photographing a snow-covered landscape on a bright day. The camera's light meter suggests 1/500s at f/8, ISO 100. However, you want the snow to appear brilliantly white, not gray. Write a short essay (200–400 words) answering the following: (a) What is exposure, and why does the meter's suggestion produce gray snow? (b) How would you adjust your settings (aperture, shutter, or ISO) to achieve the desired brightness? (c) Explain how this situation demonstrates that exposure is a matter of intent, not a fixed correct value.

Graded on Defines exposure and correctly explains the 18% gray standard's effect on the snow scene. · Proposes a plausible adjustment to achieve white snow. · Connects the scenario to the idea that exposure is a creative choice.

Lesson 9

How the light meter works

Describes the camera's built-in reflective light meter, how it measures light from the scene, and its assumption of 18% gray.

10 min3 assessments

Your camera’s light meter is a reflective meter: it measures the light that bounces off your subject and enters the lens. Inside the camera, a sensor reads the luminance and compares it to an internal reference: 18% gray (also called middle gray). The meter assumes every scene it measures averages out to that same 18% gray – the brightness of a typical green leaf or weathered asphalt.

When you press the shutter halfway, the meter calculates the exposure settings that would make the scene look like 18% gray in the final image. If your subject is actually much brighter than that (a snowfield, a white wall), the meter sees ‘too much light’ and tells you to reduce exposure – which would turn the snow gray. If the subject is darker (a black cat, a night scene), the meter sees ‘too little light’ and tells you to increase exposure – which would wash out the darkness.

This is why experienced photographers use exposure compensation (in semi‑automatic modes) or manually override the meter’s suggestion. Understanding the built‑in assumption of 18% gray is the key to knowing when the meter is lying to you – and when it’s perfectly accurate.

How the camera's reflective light meter uses 18% gray as its target. The meter does not measure the light falling on the scene – it measures what bounces off it.

Analogy

Imagine a librarian who assumes every book you hand them is exactly 300 pages long. When you give them a thin pamphlet (50 pages), they think it's missing pages and tell you to add more paper. When you hand them a thick encyclopedia (1000 pages), they think it's too bulky and tell you to remove pages. The librarian has never seen the actual book – they only measure how many pages they think are there based on the physical thickness of the paper block.

The camera’s light meter works the same way: it measures how bright the scene appears and then assumes it should be 18% gray. A bright scene (snow) is like the encyclopedia – the meter says ‘too bright, let’s darken it.’ A dark scene (shadows) is like the pamphlet – the meter says ‘too dark, let’s lighten it.’

Where the analogy breaks down

The analogy breaks down because the librarian can count pages but the meter cannot measure absolute brightness – it can only compare relative to its fixed 18% reference. Also, the librarian would eventually learn that books come in different lengths, while the meter never learns: every scene, every time, gets the same 18% gray assumption.

Metering a Snowy Landscape vs. a Dark Forest

Scene 1 – Snowfield

  • Meter reading: +2 stops above 0
  • Meter thinks: “This scene is too bright.” It suggests settings that would make the snow appear 18% gray – a dull, muddy white.
  • What you should do: Increase exposure by about +2 stops (or use exposure compensation) to keep the snow white. That means a slower shutter, wider aperture, or higher ISO.

Scene 2 – Dark forest floor with black soil

  • Meter reading: -2 stops below 0
  • Meter thinks: “This scene is too dark.” It suggests settings that would make the soil appear 18% gray – a washed‑out gray instead of deep black.
  • What you should do: Decrease exposure by about -2 stops to preserve the dark mood. Or switch to spot metering on a mid‑tone area like a tree trunk.

In both cases, the meter did its job correctly by its own logic – it tried to render the scene as 18% gray. The photographer’s art is knowing when to override that logic.

Common misconception

“"The light meter measures the light that falls on the whole scene – like a handheld incident meter."”

Both are called light meters, and the camera's meter sits inside the body, so it must be measuring the light in the same way. Also, many photographers use the terms interchangeably.

What is actually true

Your camera's meter is a reflective meter: it measures light that has already bounced off the subject. A handheld incident meter measures the light that falls on the scene (pointed toward the camera). Reflective metering is affected by the subject's reflectance – a white card gives a higher reading than a black card under the same light. Incident metering is not affected by subject color, which is why it's often more accurate for tricky subjects like snow or coal.

  • The camera's built‑in meter measures reflected light, not incident light.
  • The meter assumes any scene it measures averages to 18% gray (middle gray).
  • Bright scenes (snow, white walls) cause the meter to underexpose – it tries to darken them to gray.
  • Dark scenes (black fabric, deep shadows) cause the meter to overexpose – it tries to lighten them to gray.
  • Exposure compensation (or manual override) lets you correct the meter's assumption: add positive compensation for bright subjects, negative for dark subjects.
  • The meter's reading is always relative to its 18% target – it does not measure absolute brightness.
Check yourself

Test your understanding of how the light meter works and its 18% gray assumption.

1Multiple choiceChecked instantly

Why does your camera's light meter tell you to underexpose a snowy landscape?

  • ABecause it measures the light falling on the snow (incident light) and expects snow to be white.
  • BBecause it reflects light off the lens elements and not off the scene itself.
  • CBecause it assumes the scene should be 18% gray, and snow is brighter than that, so it tries to darken the exposure.
  • DBecause it is designed to work only in bright sunlight and fails in overcast conditions.
2Short answerMarked by AI

You point your camera at a snow-covered field. The light meter shows +2 stops above 0 on its scale. Explain why the meter gives this reading and describe what you must do to ensure the snow appears white in the final photo.

Graded on Identifies the reason for the meter reading · Describes correct action to preserve white snow · Clarity and completeness

3Short answerMarked by AI

A friend says, 'I always trust the camera's light meter because it's built into the camera and knows the light.' Evaluate this statement using your understanding of the light meter's assumption of 18% gray. Provide one specific example where trusting the meter would lead to a poor exposure.

Graded on Critical evaluation of the statement · Specific example demonstrating failure · Clarity and depth

Lesson 10

Interpreting the exposure scale

Teaches how to read the exposure indicator in the viewfinder, understand over/underexposure, and use the scale to adjust settings.

10 min3 assessments

The exposure scale in your camera's viewfinder or LCD is a horizontal bar, typically marked from −3 to +3 with a 0 at the center. A blinking indicator shows how far your current settings are from what the camera's light meter considers 'correct' exposure (based on 18% gray).

  • Negative numbers (−1, −2, −3) mean the scene will be underexposed – too dark.
  • Positive numbers (+1, +2, +3) mean overexposed – too bright.

Your goal is to adjust aperture, shutter speed, or ISO until the indicator sits exactly at 0. You already know the meter reads reflected light; now you'll use the scale to make that reading useful.

Decision flow for interpreting the exposure scale

Steps
0/6

Follow these steps every time you check exposure in manual mode.

  1. Locate the exposure scale

    In most cameras, the scale is at the bottom of the viewfinder or on the rear LCD in live view. Look for a horizontal bar with numbers −3, −2, −1, 0, +1, +2, +3.

    Some cameras show a vertical scale or use EV markings. If you don't see it, press the info button or half-press the shutter to wake the meter.

    You see the scale with a moving indicator (triangle or line).

  2. Read the indicator position

    Note where the indicator sits relative to 0. If it's exactly at 0, exposure is correct. If it's to the left, you're underexposed; to the right, overexposed.

    In fully automatic modes the scale may be hidden or unresponsive. Switch to M (manual) or Av/Tv (aperture/shutter priority) for practice.

    You can name the number (e.g., −1.5 or +2).

  3. If indicator is at 0 – stop

    Your settings will produce the exposure the meter thinks is correct. No adjustment needed. Take the shot.

    The meter assumes average brightness; very bright or dark scenes may require intentional over/underexposure (compensation).

    Indicator is still at 0 after you recompose.

  4. If indicator is negative (underexposed)

    Let more light hit the sensor. Choose one:

    • Larger aperture (smaller f‑number, e.g., f/8 → f/5.6)
    • Slower shutter speed (e.g., 1/250 → 1/125)
    • Higher ISO (e.g., 200 → 400)

    Adjust by 1 stop (a full click or one third of the way on some cameras).

    Don't change more than one setting at a time – you won't know which one worked.

    The indicator moves right toward 0.

  5. If indicator is positive (overexposed)

    Reduce light. Choose one:

    • Smaller aperture (larger f‑number, e.g., f/5.6 → f/8)
    • Faster shutter speed (e.g., 1/125 → 1/250)
    • Lower ISO (e.g., 400 → 200)

    Adjust by 1 stop.

    If you are already at maximum shutter speed (e.g., 1/4000) or minimum ISO, you may need a neutral density filter.

    The indicator moves left toward 0.

  6. Repeat until indicator is at 0

    Continue making single‑stop adjustments and re‑checking the scale. For fine‑tuning, use 1/3‑stop increments if your camera supports them.

    The meter reading may change when you recompose or move the camera; always check again before shooting.

    Indicator stays at 0 after half‑pressing the shutter again.

Checklist
0/5

Exposure Scale Field Check

Keep this list handy while you shoot until the steps become automatic.

Correcting Underexposure in a Portrait

Situation: You're shooting a portrait in open shade. Your settings: f/8, 1/250s, ISO 200. The exposure scale shows −1.5.

Step 1: Open the aperture from f/8 to f/5.6 (one stop more light). The scale now shows −0.5.

Step 2: Slow the shutter from 1/250s to 1/125s (another stop). The scale now shows 0.

Result: The portrait is properly exposed. You could also have raised ISO to 400 instead of slowing the shutter – the choice depends on whether you want to freeze motion or keep the lowest noise.

Key takeaway: Each one‑stop adjustment moves the indicator by one unit on the scale.

  • The exposure scale runs from −3 to +3, with 0 as the target for correct exposure.
  • A negative indicator means the image will be underexposed; positive means overexposed.
  • Adjust aperture, shutter speed, or ISO to move the indicator toward 0.
  • Change one setting at a time and re‑check the scale after each adjustment.
  • The meter is calibrated for an average 18% gray scene; extremely bright or dark subjects may require intentional over/underexposure (exposure compensation).
Check yourself

Test your ability to interpret the exposure scale.

1Put in orderChecked instantly

Arrange these steps in the correct order for using the exposure scale to adjust exposure.

  • ALocate the exposure scale in the viewfinder
  • BCheck the indicator position relative to 0
  • CAdjust one setting (aperture, shutter, or ISO) by one stop
  • DRe‑check the scale after the adjustment
  • ERepeat steps until indicator is at 0
2Short answerMarked by AI

Your exposure scale shows +1.5. What two adjustments could you make to bring it to 0? Name the specific change (e.g., 'increase shutter speed from 1/125 to 1/250') and explain why each works.

Graded on Names two specific adjustments that decrease exposure · Explains why each adjustment works (reduces light) · Mentions that adjustments should be made one at a time

3Short answerMarked by AI

You are photographing a snowy landscape. The scale shows −2, but you have already opened the aperture to maximum (f/2.8) and set the shutter to 1/30s (handheld limit). What should you do next and why? Consider the scene's brightness.

Graded on Identifies that the meter is misled by the bright snow (18% gray assumption) · Suggests a specific adjustment to increase exposure · Explains why the meter reading is not ideal for this scene

Lesson 11

When the meter can be fooled

Highlights situations like snow, backlight, and dark scenes where the meter's 18% gray assumption fails, and how to compensate.

10 min
Decide

You're photographing a snowy landscape. The camera's light meter shows 0 (perfect exposure), but the resulting photo is dark and the snow looks gray.

What should you do?

Decision tree for diagnosing exposure problems when the meter reads 0

Common misconception

“The light meter always gives the correct exposure.”

Because it works for most average scenes, like a portrait in a studio or a landscape on an overcast day.

What is actually true

The meter assumes everything reflects 18% gray. For very bright or dark scenes, it is consistently wrong and you must compensate manually.

Snow Scene Comparison

Left: Meter at 0, no compensation The snow appears gray, the subject is dark, and the whole image looks underexposed.

Right: +1.3 EV compensation The snow is white, the subject is properly exposed, and the image looks natural.

The only change was adding positive exposure compensation; all other settings remained the same.

  • The light meter assumes every scene reflects 18% gray, which is wrong for very bright or dark scenes.
  • Snow, sand, and bright skies fool the meter into underexposing; you need +1 to +2 EV compensation.
  • Dark scenes (night, black objects) fool the meter into overexposing; you need -1 to -2 EV compensation.
  • Backlit subjects fool the meter into exposing for the bright background; use spot metering on the subject or add +EV.
  • Exposure compensation is the quickest fix: dial it in, check the histogram, and adjust until the tones look right.

Lesson 12

Aperture: controlling light and depth of field

You will be able to set the aperture to control the amount of light entering the camera and the depth of field in your image. Covers f-stops, how aperture affects sharpness from front to back, and the creative use of shallow versus deep focus. Prevents the misconception that a smaller f-number means less light.

30 min3 assessments

You've learned to read the light meter. Now you need a way to control how much light reaches the sensor — and decide which parts of your scene stay sharp. That's aperture.

Aperture is the opening inside your lens. Think of it like a window: the wider it is, the more light pours in. But a wide window also makes the view outside softer beyond a certain distance. In photography, that 'softness' is called depth of field — the zone of acceptable sharpness from front to back.

Aperture is measured in f-stops: f/1.4, f/2, f/2.8, f/4, f/5.6, f/8, f/11, f/16, f/22. Here's the twist: a smaller f-number means a larger opening. f/2.8 lets in four times as much light as f/5.6. And the larger the opening, the shallower the depth of field — your subject stays sharp while the background melts into blur.

This node gives you the one thing you need to do: set the aperture to control both light and depth of field. You'll use your camera's Aperture Priority mode so you only worry about one dial while the camera handles the rest.

  • Aperture is the lens opening that controls how much light reaches the sensor.
  • F-stops are written like f/2.8; a smaller number means a larger opening.
  • Each full stop (e.g., f/5.6 → f/4) doubles the light; going the other way halves it.
  • Wide apertures (small f-number) create shallow depth of field — blurry background.
  • Narrow apertures (large f-number) create deep depth of field — everything sharp.
  • Most lenses are sharpest at mid apertures around f/8 to f/11, not at the extremes.

The standard f-stop scale. Left: wide aperture (more light, shallow DoF). Right: narrow aperture (less light, deep DoF).

Steps
0/5

You'll set aperture using Aperture Priority (A) mode on a Nikon DSLR. The principle is the same on any camera: you choose the f-stop, the camera picks the shutter speed to match the light meter.

  1. Set the mode dial to A

    Turn the mode dial on top of the camera to A (Aperture Priority). On Canon cameras this is Av. The camera will now control shutter speed automatically while you control aperture.

    If you accidentally leave it in M (Manual), the camera won't adjust shutter speed for you — you'll have to set both.

    The top LCD or viewfinder shows 'A' in the mode indicator.

  2. Choose your aperture

    Rotate the command dial (near your right thumb) to change the f-stop. Watch the aperture value on the screen change. For a portrait with blurred background, choose a wide aperture like f/2.8 or f/4. For a landscape where everything is sharp, choose f/11 or f/16.

    Your lens may not open wider than f/3.5 or f/5.6 if it's a kit lens. That's normal — you work with what you have.

    The aperture number on the screen matches what you intended.

  3. Check the light meter

    Look at the exposure indicator in the viewfinder or on the rear screen. It should be centered (0) or very close. If it's leaning toward + (overexposed) or - (underexposed), adjust the aperture until the meter is centered. If you can't center it because you've hit the lens's widest or narrowest aperture, change the ISO or use exposure compensation.

    If the meter shows extreme underexposure (e.g., -3), your aperture may be too narrow for the light. Open up to a wider f-stop.

    The meter is at 0 or within ±1 stop.

  4. Use depth of field preview (optional)

    Press the Depth of Field Preview button (usually on the front of the camera, near the lens). This closes the aperture to the selected value so you can see in the viewfinder how much will actually be sharp. The viewfinder will get darker — that's normal.

    Not all cameras have this button. If yours doesn't, take a test shot and review on the LCD.

    You see the background become sharper or blurrier as you press the button.

  5. Take the shot and review

    Press the shutter button halfway to focus, then fully to take the picture. Review the image on the LCD. Zoom in to check sharpness on your subject and in the background. If the depth of field isn't what you wanted, adjust the aperture and shoot again.

    At very wide apertures, focus must be precise — even a small miss shifts the sharp zone away from your subject.

    The image has the depth of field you intended (blurry background or everything sharp).

Checklist
0/5

Field checklist: setting aperture

Keep this list handy while you practice. After a few sessions, it becomes automatic.

Go deeper

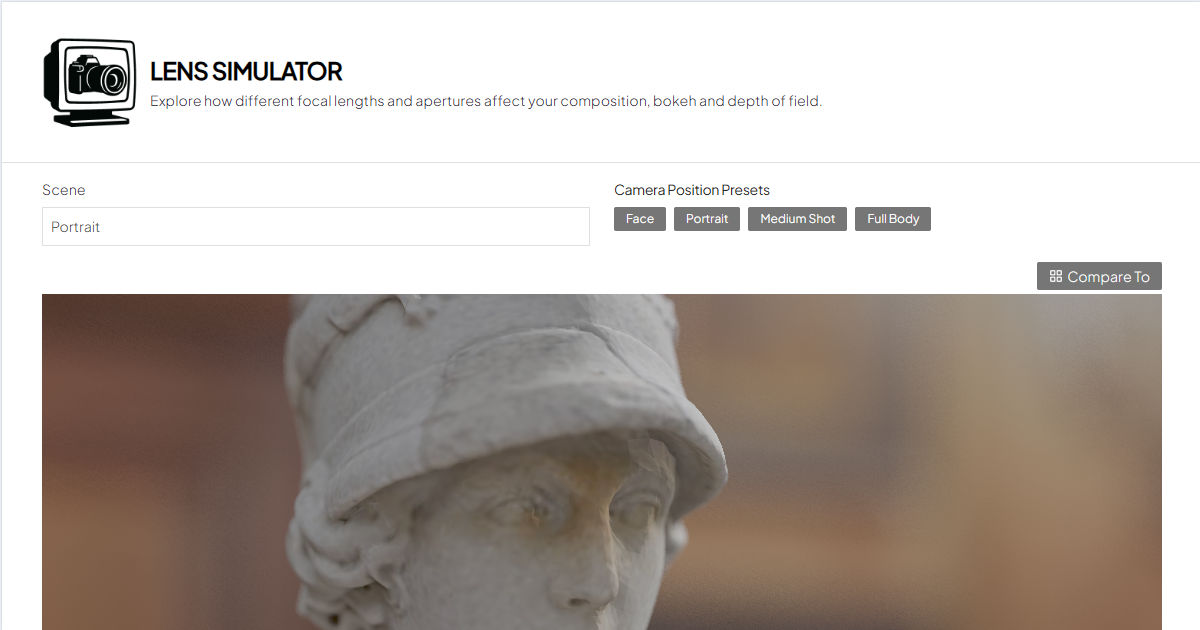
Use the interactive lens simulator (resource 1181) to see how aperture changes depth of field in real time — try different f-stops and focal lengths. The Wikipedia article (resource 1153) explains the physics behind f-stops and diffraction.

Check yourself

Check your understanding of aperture and depth of field.

1Put in orderChecked instantly

Arrange the following steps in the correct order to take a photo in Aperture Priority mode with a specific depth of field.

  • ARotate command dial to select desired f-stop.
  • BSet mode dial to A (or Av).
  • CCheck light meter and adjust if needed.
  • DPress shutter to take the photo.
2Short answerMarked by AI

Explain in 2-4 sentences why an aperture of f/2.8 lets in more light than f/16, even though the number 2.8 is smaller than 16. Include what happens to depth of field in each case.

Graded on Correctly explains why smaller f-number means larger opening · Links aperture size to depth of field · Clarity and conciseness

Project

Compare aperture effects

Take two photos of the same stationary subject (e.g., a flower, a cup, or a person) from the same distance and with the same focal length.

  • Photo 1: Use the widest aperture your lens allows (e.g., f/2.8, f/3.5, or f/4).
  • Photo 2: Use the narrowest aperture your lens allows (e.g., f/16, f/22).

Keep the ISO the same for both shots; let the shutter speed adjust automatically (use Aperture Priority mode).

Deliverables:

  1. 1.Both photos with EXIF data visible (aperture, shutter speed, ISO).
  2. 2.A paragraph (100-200 words) describing the difference in depth of field and how the shutter speed changed to maintain correct exposure.

Deliverables

  • 01Two photos with visible EXIF data.
  • 02A written comparison paragraph.
ProjectMarked by AI

Submit your two photos and comparison paragraph as described in the project brief.

Graded on Photos demonstrate correct aperture settings · Depth of field difference correctly identified · Shutter speed compensation noted

Lesson 13

Camera shake and image stabilization

You will be able to identify and avoid blur caused by camera shake, and use stabilization features effectively. Covers handheld shooting techniques, the reciprocal rule, and in-body versus in-lens stabilization. Prevents blaming the lens for soft images when the real culprit is motion.

15 min3 assessments

You set the aperture, you set the ISO, the light meter says everything is fine – but the photo comes out soft. Not out of focus; not motion blur on a moving subject. Just … not sharp. The culprit is likely camera shake – the tiny movement of your own hands during the exposure.

Camera shake appears as a slight smear, especially at pixel level. It gets worse as the focal length gets longer (telephoto lenses magnify movement) and as the shutter speed gets slower. The classic guideline to avoid it is the reciprocal rule: for a full‑frame camera, your shutter speed (in seconds) should be at least 1 divided by the focal length. A 50 mm lens needs 1/50 s or faster; a 200 mm lens needs 1/200 s. On a crop‑sensor body, multiply the focal length by the crop factor first.

This rule is a starting point. Image stabilization – available in the lens (IS, VR, OS) or in the camera body (IBIS) – can let you shoot two to five stops slower and still get a sharp image. But stabilization doesn’t fix subject motion, and it works best when you also use good hand‑holding technique.

Decision flow for diagnosing and fixing camera shake

Steps
0/5

Walk through these steps the next time you pick up your camera for handheld shooting. Each step is a checkpoint; when you hit a blurry result, start from step 1.

  1. Check your shutter speed

    Look at your camera’s display or viewfinder readout. If you are in aperture‑priority or manual mode, note the shutter speed value (e.g. 1/125, 1/60, 1/30).

    Auto mode may choose a shutter speed that is too slow for handheld use, especially in low light.

    You know the current shutter speed in seconds (e.g. 0.5 s, 1/30 s).

  2. Apply the reciprocal rule

    Divide 1 by your focal length (in mm). For a 50 mm lens on full‑frame, the minimum safe speed is 1/50 s. If you have a crop sensor (e.g. 1.5×), multiply the focal length by the crop factor first (50 mm × 1.5 = 75 mm → minimum 1/75 s).

    The rule is for static subjects. If your subject moves, you need a faster speed regardless of focal length.

    You have a target speed: 1/x s. Compare it with your actual speed from step 1.

  3. Enable image stabilization

    Turn on lens‑based stabilization (IS, VR, OS) via the lens switch, or enable in‑body stabilization (IBIS) in the camera menu. Most lenses default to ON; IBIS may need activation per shooting mode.

    When using a tripod, turn stabilization OFF to avoid false corrections that can introduce blur.

    The stabilization icon appears in the viewfinder or display.

  4. Improve your hand‑holding technique

    Tuck your elbows into your body, stand with feet shoulder‑width apart, hold the camera firmly with both hands, and gently squeeze the shutter release (don't jab). Exhale and hold your breath while pressing.

    Leaning against a wall or a tree can help, but avoid pressing the camera against hard surfaces that transmit vibration.

    Your posture is stable; you feel no tension in your shoulders.

  5. Fire in burst mode

    Switch to continuous shooting (drive mode to high‑speed burst). Take 3–5 frames in quick succession. The middle frame is often the sharpest because the initial press and the release both introduce movement.

    Burst mode reduces the chance of shake but uses more buffer space; it’s not a substitute for a slow shutter speed.

    You captured several frames. Review them later at 100% zoom.

Checklist
0/5

Handheld Shooting Field Checklist

Check this list before every handheld shot when sharpness matters. Over time it becomes habit.

  • Camera shake causes a soft, smeared blur that is distinct from missed focus or subject motion.
  • The reciprocal rule gives a minimum shutter speed: 1 / (focal length × crop factor).
  • Image stabilization (IS/VR/IBIS) can compensate for 2 – 5 stops of handshake, but must be turned OFF on a tripod.
  • Crop‑sensor cameras multiply the effective focal length, so the rule requires a proportionally faster speed.
  • Good hand‑holding technique – tucking elbows, holding breath, using burst – works alongside stabilization.
  • Stabilization does not freeze subject motion; use a faster shutter speed for moving subjects.
Check yourself

Test your understanding of camera shake handling.

1Put in orderChecked instantly

Arrange the following steps in the correct order for diagnosing and fixing camera shake when you get a blurry handheld photo.

  • ACheck shutter speed against reciprocal rule
  • BEnable image stabilization if available
  • CImprove hand‑holding technique (brace, burst)
  • DIf still blurry, increase shutter speed by widening aperture or raising ISO
  • EReview image at 100% zoom to confirm shake
2Short answerMarked by AI

Explain why the reciprocal rule is only a guideline and not a guarantee. Name at least two conditions that change the minimum safe shutter speed.

Graded on Identifies that rule is a baseline, not absolute · Names two specific factors that change minimum speed · Uses correct terminology and reasoning

3ProjectMarked by AI

Go outside (or aim at a static subject indoors) with your camera. Take ten handheld shots of the same stationary subject, using one lens. Start with a shutter speed well below the reciprocal rule (e.g., 1/15 s for a 50 mm lens) and increase by one stop each shot (1/30, 1/60, 1/125, 1/250, etc.) until you are at least two stops above the rule. Keep aperture and ISO fixed if possible. For each shot, note the shutter speed and whether the image is sharp when viewed at 100% zoom. Submit your observations.

Graded on Records shutter speeds and sharpness for each shot · Identifies the approximate threshold where sharpness begins · Reflects on the effect of stabilization or technique

Lesson 14

F-stops and aperture numbers

Covers the f-stop scale, how smaller numbers mean larger openings, and the standard intervals that halve or double light.

10 min4 assessments

The f-stop number is the ratio of the lens's focal length to the diameter of the aperture opening. A smaller number means a larger opening—more light reaches the sensor. The standard f-stop scale runs: f/1.4, f/2, f/2.8, f/4, f/5.6, f/8, f/11, f/16, f/22. Each step (one stop) halves or doubles the amount of light. Moving from f/4 to f/5.6 cuts light in half; moving from f/5.6 to f/4 doubles it. The numbers are spaced by a factor of √2 (~1.4) because the opening area changes by a factor of 2 when the diameter changes by √2. You already know the aperture controls depth of field; now you see that the f-stop scale is the language you use to set it precisely.

  • The f-stop is the ratio of focal length to aperture diameter; a smaller f-number means a larger aperture opening.
  • The standard full-stop scale: f/1.4, f/2, f/2.8, f/4, f/5.6, f/8, f/11, f/16, f/22.
  • Each full stop halves or doubles the light entering the camera.
  • The f-numbers increase by a factor of √2 (≈1.4) between stops because area changes with the square of the diameter.
  • A one-stop change in aperture also changes depth of field noticeably—smaller f-number gives shallower depth of field.
Reference

Full F-Stop Reference

f/1.4

Relative light
1 (largest)
Typical use
Very low light, shallow depth of field

f/2

Relative light
1/2
Typical use
Low light, shallow depth of field

f/2.8

Relative light
1/4
Typical use
Indoor or dim light, moderate shallow depth

f/4

Relative light
1/8
Typical use
Bright indoor, good balance

f/5.6

Relative light
1/16
Typical use
Outdoor shade, standard depth

f/8

Relative light
1/32
Typical use
Bright outdoor, deep depth

f/11

Relative light
1/64
Typical use
Strong sun, very deep depth

f/16

Relative light
1/128
Typical use
Bright sun, maximum depth (diffraction possible)

f/22

Relative light
1/256
Typical use
Very bright sun, diffraction likely

Each full stop halves the light. Most cameras allow 1/2 or 1/3 stops in between. Use this table to quickly decide which f-stop gives the exposure you need.

Practice
0/8 known
1 / 8
Check yourself

Check your understanding of f-stops.

1Multiple choiceChecked instantly

Which of the following is the correct sequence of full f-stops from largest aperture to smallest?

  • Af/1.4, f/2, f/2.8, f/4, f/5.6, f/8, f/11, f/16, f/22
  • Bf/22, f/16, f/11, f/8, f/5.6, f/4, f/2.8, f/2, f/1.4
  • Cf/1.4, f/2.8, f/4, f/5.6, f/8, f/11, f/16, f/22, f/32
  • Df/2, f/4, f/6, f/8, f/10, f/12, f/16, f/20
2Fill the blanksChecked instantly
3Select all that applyChecked instantly

Which of the following statements about f-stops are true? (Select all that apply.)

  • AA smaller f-number means a larger aperture opening.
  • Bf/5.6 lets in twice as much light as f/8.
  • CThe f-stop number is the diameter of the aperture in millimeters.
  • DMoving from f/2.8 to f/4 reduces the light by half.
  • Ef/22 is a larger aperture than f/2.
4Short answerMarked by AI

You are shooting a portrait in low light and need to let in more light while keeping the background blurred. Your lens can open to f/1.4, but you know that will make the depth of field so shallow that one eye might be sharp and the other soft. You decide to use f/2.8 instead. How much light do you lose compared to f/1.4? How many stops is that, and what does that mean in practice for your shutter speed or ISO? Explain your reasoning using the f-stop scale and the factor between stops.

Graded on Identifies the number of stops between f/1.4 and f/2.8 using the standard scale · Calculates the light change correctly and connects it to exposure adjustments · Mentions depth of field as the reason for the choice

Lesson 15

Depth of field: what it is

Defines depth of field as the zone of acceptable sharpness in front of and behind the focus point, and introduces factors that affect it.

10 min4 assessments

When you focus your camera on a subject, only that exact distance is perfectly sharp. But your eye (and the sensor) tolerates a small amount of blur before it looks unsharp. Depth of field (DOF) is the zone of distances – in front of and behind the focus point – where the blur stays small enough to appear acceptably sharp.

That 'acceptable' threshold depends on how large you'll display the image and how close you stand to it. The camera industry uses a standard called the circle of confusion – roughly 0.03 mm on a full‑frame sensor – to decide where the zone ends.

Three factors control DOF:

  • Aperture – a wider opening (smaller f‑number like f/2.8) gives a shallower zone. A narrower opening (larger f‑number like f/16) gives a deeper zone. (You already know this from the previous node.)
  • Focal length – a longer lens (telephoto) compresses perspective and makes the zone shallower. A wider lens (short focal length) keeps more in focus.
  • Subject distance – the closer you stand to your subject, the shallower the zone becomes. Moving further away deepens it.

An important detail: DOF is not symmetric. For most distances, roughly one‑third of the zone lies in front of the focus point and two‑thirds behind it. This matters when you are framing a shot with a foreground element and want everything from that point backward to be sharp.

You cannot get more than one plane perfectly sharp – but you can adjust the width of the acceptable zone around it.

How the three main factors change depth of field. Red boxes indicate conditions that reduce DOF; green boxes indicate conditions that increase it.

Analogy

Think of depth of field as a bookshelf viewed from the side. The book you're looking at directly (the focus point) is perfectly sharp. The books next to it are still readable, but the further away they are, the blurrier they become. Depth of field is the span of books that still look acceptably sharp.

  • A wide aperture is like pulling the bookshelf closer to your eye – only the nearby books stay crisp.
  • A narrow aperture is like stepping back – more books become readable.
  • A long lens (telephoto) is like using magnifying glasses – the same side‑to‑side distance looks wider, so fewer books fit in the sharp zone.
  • Moving closer to the shelf does the same: the near books are huge, the far ones are tiny and blurred.

Where this analogy breaks down: Real depth of field is continuous, not discrete like books. There is no hard edge where sharpness suddenly ends – blur increases gradually. Also, the bookshelf analogy suggests equal depth on both sides of the focus point, but DOF is deeper behind the subject (two‑thirds behind, one‑third in front).

Where the analogy breaks down

The analogy treats depth of field as a fixed, symmetric set of discrete objects (books), but DOF is a continuous gradient that extends farther behind the focus point than in front.

Common misconception

“Depth of field is only controlled by the aperture setting.”

Aperture is the most direct control you have, and many beginner guides say 'wider aperture = blurrier background'. It's also easy to see the change when you turn the dial.

What is actually true

Aperture is one of three equal factors. Focal length and subject distance change DOF just as dramatically. A 50mm lens at f/1.4 gives a different DOF than a 200mm lens at f/1.4 at the same distance. If you can't move your subject or change lenses, aperture is your tool – but you always have a choice among the three.

Go deeper

The Wikipedia article on depth of field provides a deeper dive into the circle of confusion, hyperfocal distance, and exact formulas. Read it after you have practiced with the controls.

Check yourself

Check your understanding of depth of field.

1Multiple choiceChecked instantly

What is depth of field?

  • AThe distance from the camera to the subject.
  • BThe range of distances in a scene that appear acceptably sharp.
  • CThe total amount of light entering the camera through the lens.
  • DThe blurriness of the background in a photograph.
2Short answerMarked by AI

You are photographing a flower 1 meter away with a 100mm lens at f/4. The flower is sharp, but the background is too sharp for your taste. Name two things you could change (besides aperture) to reduce the depth of field and make the background blurrier.

Graded on Correctly identifies two distinct factors (focal length, subject distance) and states how to change them to reduce DOF. · Shows that the answer applies the concept, not just repeats the definition.

3EssayMarked by AI

Explain why two photos of the same subject at the same aperture can have different depths of field. Use the factors that affect DOF in your answer.

Graded on Identifies the two other factors (focal length, subject distance) and explains how they independently affect DOF. · Shows understanding that aperture alone does not determine DOF.

4Fill the blanksChecked instantly

Lesson 16

Using aperture for depth of field

Teaches how changing the aperture adjusts depth of field, with examples of shallow (wide aperture) and deep (narrow aperture) focus.

10 min3 assessments

Depth of field (DoF) is the zone of acceptable sharpness in front of and behind your subject. With a wide aperture (small f-number like f/2.8), that zone is thin: only the plane you focused on is sharp, and everything closer or farther blurs smoothly. With a narrow aperture (large f-number like f/16), the zone stretches from a few meters to infinity. The choice directly controls how much of the scene is in focus.

You already know how to set an f-stop. Now you'll use that control to decide what the viewer sees: isolate a face from a busy background with f/2.8, or keep a mountain range crisp from foreground to summit with f/16.

Wide aperture (left) creates a shallow focus zone; narrow aperture (right) extends it.

Two portraits, two zones

You're photographing a friend at a café. The background has other tables and a window.

Aperture f/2.8: Your friend is sharp from nose to ears. The coffee cup half a meter behind them is soft, and the window is a blur of light and color. The zone of sharpness is roughly 10 cm deep.

Aperture f/16: Your friend is sharp, but so is the coffee cup, the next table, and the window – you can read the café logo. The zone stretches from about 1 m in front of your friend to the back wall. The image feels more documentary, less intimate.

Steps
0/5

Switch your camera to Aperture Priority mode (A or Av). You'll control DoF; the camera picks the shutter speed.

  1. Set aperture priority mode

    Turn the mode dial to A (Nikon) or Av (Canon). You'll see the aperture indicator on the screen or in the viewfinder.

    If you shoot in full Manual mode, you also need to adjust shutter speed – but for this walkthrough, let the camera handle that.

    The display shows an aperture value (e.g., f/5.6) and a shutter speed that the camera is selecting.

  2. Choose your target DoF

    For a shallow DoF (blurry background), dial a small f-number: f/2.8 or f/4. For a deep DoF (everything sharp), dial a large f-number: f/11 or f/16. Turn the main control wheel to change the aperture.

    Very small f-numbers (f/1.4, f/1.8) can make the zone so thin that a slight movement of you or your subject throws the focus off.

    The aperture value on the display matches the f-stop you intended.

  3. Focus on your main subject

    Half-press the shutter button to autofocus on the most important part – a person's eyes, a flower's center, the leading edge of a product. The camera beeps or a green dot confirms focus.

    If you use a wide aperture and focus on the wrong point, that point will be sharp and your intended subject will be soft. Recompose only by moving your aim, not by stepping forward or back.

    The focus indicator stays lit and the image appears sharp on the rear screen for that point.

  4. Take the picture

    Press the shutter fully to capture. Review the image on the LCD and zoom in to check sharpness at the focus point and at a distant background detail.

    At very narrow apertures (f/22 and beyond), diffraction can soften the entire image. The sweet spot for peak sharpness is usually f/8–f/11.

    The focus point is crisp; the background shows the desired amount of blur or detail.

  5. Adjust and reshoot

    If the background is too sharp (you wanted isolation), open the aperture wider (smaller f-number). If the background is too blurry (you wanted context), close the aperture (larger f-number). Repeat steps 2–4.

    You have two frames with different apertures of the same scene – compare them to see the DoF difference.

Checklist
0/6

Depth of field field checklist

Keep this checklist handy when shooting – tick each before pressing the shutter.

  • Aperture is the primary control of depth of field: wide aperture (small f-number) = shallow DoF, narrow aperture (large f-number) = deep DoF.
  • Shallow DoF isolates the subject by blurring foreground and background; deep DoF keeps a large scene sharp from front to back.
  • The zone of acceptable sharpness is not a binary switch – it transitions gradually. The focus plane is sharpest, and blur increases with distance from it.
  • Extremely narrow apertures (f/22+) cause diffraction, reducing overall image sharpness despite deep DoF.
  • In Aperture Priority mode, you set the aperture and the camera automatically selects the shutter speed for correct exposure.
  • Review your images by zooming in to confirm the DoF matches your intent – the LCD at full view can be deceptive.
Go deeper

Read these for deeper technical details on depth of field calculations and aperture’s role in diffraction.

Check yourself

Check your understanding of depth of field control.

1Put in orderChecked instantly

Arrange the following steps in the correct order for capturing a portrait with shallow depth of field:

  • ASet camera to A/Av mode.
  • BDial a wide aperture (e.g., f/2.8).
  • CFocus on the subject's eyes.
  • DPress shutter and review.
  • EAdjust composition if needed.
2Short answerMarked by AI

You are photographing a landscape with a prominent tree in the foreground and mountains in the background. You want both the tree and the mountains to be sharp. What aperture range would you choose, and why? (Answer in 2-4 sentences.)

Graded on Aperture selection · Explanation of depth of field · Practical consideration

3Multiple choiceChecked instantly

A photographer takes a headshot at f/1.8. The subject's eyes are sharp, but the tip of the nose and the ears are slightly soft. What is the most likely explanation?

  • AThe lens is defective and cannot produce edge-to-edge sharpness.
  • BThe wide aperture creates a very shallow depth of field, so only the focus plane is sharp.
  • CThe photographer did not set the correct white balance.
  • DThe camera was set to shutter priority and the shutter speed was too slow.

Lesson 17

Creative uses of shallow and deep focus

Presents how photographers use shallow depth of field for subject isolation and deep focus for landscapes, guiding the artistic choice.

10 min3 assessments

You already know how aperture controls depth of field. Now the question is: when do you reach for shallow focus, and when do you want everything sharp? The choice isn't about 'better' – it's about what the photo needs.

Shallow depth of field

Best use case
Isolate subject from background
Effect on background
Blurred, out of focus
Typical aperture
Wide (f/1.4 – f/2.8)
Common subjects
Portraits, macro, wildlife, product shots

Best for When you want the viewer's eye to land on one subject and nothing else distracts.

Deep depth of field

Best use case
Keep entire scene sharp
Effect on background
Sharp from foreground to infinity
Typical aperture
Narrow (f/11 – f/16)
Common subjects
Landscapes, architecture, group photos, street scenes

Best for When the whole scene matters – a landscape, a building, a crowd – and you want every detail crisp.

Two photos, one choice

Portrait with shallow focus You're photographing a friend in a park. The background has cluttered bushes and a bench. Set your aperture to f/2.0 (or as wide as your lens allows). Focus on the eyes. The background blurs into a soft wash of colour – the subject stands out cleanly.

Landscape with deep focus Standing on a hilltop, you want the flower in the foreground and the mountain range on the horizon both sharp. Set your aperture to f/13. Use a tripod to keep the camera steady because the shutter speed will be slower. Now every blade of grass and every ridge of the mountain is in focus.

Common misconception

“I need a very expensive fast lens to get shallow depth of field.”

Professional portraits often use f/1.4 lenses, and the blurred background is dramatic. It's easy to think that's the only way.

What is actually true

Shallow depth of field also depends on distance to subject and focal length. A kit lens at 55mm, f/5.6, with the subject close (1–2 metres) and the background far, can produce a pleasing blur. You don't need an f/1.4 lens to isolate a subject – just move closer or use a longer focal length.

Decide

You're at a busy market. You want to photograph a single vendor selling fruit, but there are many shoppers behind her. The colourful fruit is the subject, the crowd is distracting. You have a 50mm f/1.8 lens.

What aperture do you choose?

Check yourself

Test your ability to choose shallow or deep focus.

1Select all that applyChecked instantly

Which of the following situations would benefit from shallow depth of field? (Select all that apply.)

  • AA close-up portrait of a person's face
  • BA landscape photo of a mountain range
  • CA macro photo of a single flower
  • DA group photo of 20 people at a reunion
2Short answerMarked by AI

You're photographing a landscape with a large rock in the foreground and a mountain in the distance. What depth of field should you use, and what aperture setting would you start with? Explain why.

Graded on Identifies correct depth of field (deep) · Recommends appropriate aperture · Explains why

3Multiple choiceChecked instantly

A common misconception about deep focus is that using the smallest aperture (e.g., f/22) always gives the sharpest image. What is the actual issue?

  • ADiffraction reduces sharpness at very small apertures.
  • BShutter speed becomes too slow, causing motion blur.
  • CISO must be set too high, introducing noise.
  • DLens flare becomes more pronounced.

Lesson 18

Shutter speed: freezing and blurring motion

You will be able to choose a shutter speed that freezes action or intentionally blurs movement for creative effect. Covers the shutter speed scale, how to read the dial, and the relationship between exposure time and motion. Prevents the common error of setting a shutter speed too slow for a moving subject.

25 min3 assessments

A runner streaking across a soccer pitch, a splash of water hanging mid-air, or the smooth white veil of a waterfall—the difference between these images is one camera setting: shutter speed. Shutter speed controls how long the sensor is exposed to light, measured as fractions of a second ( 1/500, 1/125) or whole seconds (1″, 5″). A fast shutter speed freezes motion by capturing a very short instant. A slow shutter speed blurs moving subjects, creating a sense of motion.

The first decision you make when you see a moving subject is: do I want to freeze this action or show its motion as blur? The answer tells you whether to reach for a fast speed (1/500 or faster for typical human movement) or a slow speed (1/30 or slower for intentional blur). Understanding this one setting is the key to leaving automatic mode behind.

Steps
0/6

Follow this procedure every time you need to decide on shutter speed for a moving subject.

  1. Decide your intent

    Ask yourself: do you want to freeze motion or show motion as blur? Freezing stops action; blurring adds a feeling of movement. Your answer determines the next steps.

    Do not skip this step. Many beginners go straight to the dial without a clear intent and end up with an image that meets neither goal.

    You have stated your intent out loud or written it down.

  2. Estimate subject speed

    Gauge how fast the subject moves across your frame. A person walking: slow (≈ 2 mph). A runner: moderate (≈ 10 mph). A car on a nearby road: fast (≈ 30+ mph). Use the cheat sheet below for rough minimum speeds.

    Perspective matters: a subject moving perpendicular to the camera (across the frame) appears faster and needs a higher shutter speed than one moving directly toward or away from you.

    You have assigned the subject a speed category: slow, moderate, or fast.

  3. Select a shutter speed from the scale

    Using your camera's mode dial, set it to Shutter Priority (Tv or S) so you control speed while the camera adjusts aperture. Choose a speed: For freezing: slow subjects: 1/125; moderate: 1/500; fast: 1/1000 or faster. For blurring: slow: 1/30 to 1/15; medium: 1/8 to 1/2; fast (water smooth): 1/4 to 1 second or longer.

    If you are handholding, the reciprocal rule applies: keep the denominator at or above your focal length (e.g., 1/50 for 50mm). Otherwise motion blur from your hands, not the subject, will ruin the shot.

    The shutter speed shown in the viewfinder matches your chosen value. For handheld, it is faster than 1/(focal length).

  4. Check exposure and adjust

    Look at the exposure meter in the viewfinder. If it shows over- or underexposure, adjust the ISO (increase for dim scenes) or the aperture (widen for more light). In Shutter Priority, the camera handles aperture, but you may need to raise ISO if the aperture reaches its limit and the image is still dark.

    Raising ISO adds noise. Do not exceed ISO 1600 unless unavoidable. Widen the aperture first (smaller f-number).

    The meter shows zero (correct exposure) or just slightly over/under. A test image is not completely black or white.

  5. Take a test shot and review

    Press the shutter button halfway to focus (use continuous autofocus for moving subjects), then fully depress. Review the image. Zoom in on the main subject to check sharpness or blur.

    If you are blurring, check that only the moving parts are blurred. Stationary elements like buildings should remain sharp; if they are blurry too, you have camera shake—use a tripod or faster speed.

    The moving subject is sharp enough to see details (for freezing) or pleasantly blurred while static elements are crisp (for blurring).

  6. Adjust and repeat

    If the motion is not frozen enough, select the next faster shutter speed (e.g., from 1/500 to 1/1000) and re‑adjust exposure. If the blur is too much or too little, adjust by one or two stops in the opposite direction. Retake and compare.

    Do not change ISO and shutter speed simultaneously—change one variable at a time so you know what caused the difference.

    The final image matches your original intent: frozen action or pleasing motion blur.

Checklist
0/8

Shutter Speed Field Checklist

Print this out or keep it on your phone until the steps become automatic.

  • Shutter speed is measured in fractions of a second; higher denominators (e.g., 1/1000) freeze faster action.
  • The first choice is intent: freeze motion or show motion blur—this dictates whether you reach for a fast or slow speed.
  • Subject speed relative to the frame determines the minimum shutter speed: slow ≈ 1/125, moderate ≈ 1/500, fast ≈ 1/1000 or higher.
  • When handholding, the reciprocal rule requires shutter speed ≥ 1 / focal length to avoid camera shake.
  • If exposure is off after setting shutter speed, adjust aperture first (widen), then ISO as a last resort.
  • Review test shots at 100% zoom to judge sharpness; zoom in on both the moving subject and static elements.
  • Blurring requires a stable support (tripod or solid surface) so only the moving subject blurs.
Check yourself

Now apply what you've learned about shutter speed and motion.

1Put in orderChecked instantly

Put the following steps in the correct order for choosing a shutter speed to freeze a running dog.

  • AEstimate the dog's speed across the frame.
  • BSelect a shutter speed (e.g., 1/500) in Tv mode.
  • CDecide whether to freeze or blur the motion.
  • DTake a test shot and review sharpness.
  • EAdjust exposure (aperture or ISO) if the meter is off.
2Short answerMarked by AI

Describe a situation where you would deliberately use a slow shutter speed for creative effect, and explain what specific steps you would take to prevent camera shake while doing so.

Graded on Describes a plausible creative blur scenario (e.g., waterfall, light trails, moving crowd). · Explains at least two concrete techniques to prevent camera shake (tripod, remote/timer, mirror lock-up, stable surface). · Connects the shutter speed choice to the technique (e.g., 'since I'm using 1/2 s, I need a tripod').

3Multiple choiceChecked instantly

You are handholding a 50mm lens and want to freeze a cyclist moving across your field of view about 15 meters away. Which shutter speed is the best choice?

  • A1/30 second
  • B1/125 second
  • C1/500 second
  • D1/2000 second

Lesson 19

The shutter speed scale

Lists common shutter speeds from fast to slow, how they are marked on the camera dial, and their impact on exposure.

10 min3 assessments

You already know that shutter speed freezes or blurs motion. Now you need to know the numbers on the dial and what they mean for exposure. The shutter speed scale is a sequence of values, each letting in half or twice the light of its neighbour.

On most cameras, the dial shows fractions of a second without the slash: 125 means 1/125 s, 60 means 1/60 s. Speeds longer than one second get a double‑prime mark: 0''5 is 0.5 s, 1'' is 1 s, 2'' is 2 s. Full stops on the standard scale are:

• 30″ • 15″ • 8″ • 4″ • 2″ • 1″ • 1/2 • 1/4 • 1/8 • 1/15 • 1/30 • 1/60 • 1/125 • 1/250 • 1/500 • 1/1000 • 1/2000 • 1/4000

Moving one step to the right halves the exposure time (less light); moving left doubles it (more light). Some cameras show intermediate “third‑stop” values (e.g., 1/80, 1/100 between 1/60 and 1/125), but the full stops are what you memorise for manual control.

Practice
0/10 known
1 / 10
Reference

Common Shutter Speeds and Their Uses

4000

Fraction
1/4000
Stops from 1/125 s
+5
Typical Use
Freezing birds in flight, racing cars

2000

Fraction
1/2000
Stops from 1/125 s
+4
Typical Use
Fast sports, splashing water

1000

Fraction
1/1000
Stops from 1/125 s
+3
Typical Use
Portraits with telephoto, moderate action

500

Fraction
1/500
Stops from 1/125 s
+2
Typical Use
Street photography, kids playing

250

Fraction
1/250
Stops from 1/125 s
+1
Typical Use
General hand‑held shooting (with care)

125

Fraction
1/125
Stops from 1/125 s
0
Typical Use
Standard hand‑held for a 50 mm lens

60

Fraction
1/60
Stops from 1/125 s
-1
Typical Use
Low light, still subjects, may need stabilisation

30

Fraction
1/30
Stops from 1/125 s
-2
Typical Use
Indoor without flash – use a tripod

15

Fraction
1/15
Stops from 1/125 s
-3
Typical Use
Night scenes with a tripod

8''

Fraction
8 s
Stops from 1/125 s
-10
Typical Use
Long‑exposure light trails, star trails

The 'stops from 1/125' column tells you how many stops of exposure you gain (negative) or lose (positive) relative to 1/125 s.

Go deeper

Read the shutter speed article for a complete table and the physics behind the scale.

Check yourself

Check your understanding of the shutter speed scale.

1Multiple choiceChecked instantly

How would a camera dial display a shutter speed of 1/250 of a second?

  • A250
  • B1/250
  • C0''250
  • D250''
2Select all that applyChecked instantly

Which of the following shutter speeds are fast enough to freeze a person walking normally (select all that apply)?

  • A1/30 s
  • B1/60 s
  • C1/125 s
  • D1/250 s
  • E1/500 s
3Fill the blanksChecked instantly

Lesson 20

Freezing fast motion

Details how to choose a fast enough shutter speed to stop action, with typical speeds for common subjects like sports or birds.

10 min3 assessments

You've set your camera to manual mode and you're ready to take control. But when you press the shutter to capture a sprinting athlete or a bird taking off, the result is a blurry mess — not the sharp freeze you wanted. The problem isn't your lens or your focus; it's that your shutter speed wasn't fast enough to stop the subject's motion across the frame.

Freezing motion requires a shutter speed at least as fast as the subject's movement relative to your camera. The faster the subject, the shorter the exposure you need. This isn't guesswork — there are reliable starting points for common subjects, and a simple process to dial in the exact speed for your scene.

  • Freezing motion requires a shutter speed faster than the subject's apparent speed across the frame.
  • A walking person is frozen at 1/125 s; a running person needs 1/500 s or faster.
  • Birds in flight typically need 1/2000 s; small fast birds may need 1/4000 s.
  • Fast vehicles (cars, motorcycles) need 1/1000 s to 1/2000 s depending on distance and angle.
  • The closer the subject and the more it moves perpendicular to the lens, the faster the shutter speed required.
  • Using a faster shutter speed reduces light reaching the sensor, so you may need to raise ISO or open the aperture.
Steps
0/5

Follow these steps to freeze a moving subject. You'll be in manual mode (M) or shutter priority (Tv/S).

  1. Assess subject speed and direction

    Watch the subject for a few seconds. Is it walking, running, flying, or moving fast across your frame? Estimate its speed relative to you. Note whether it moves toward you (slower shutter needed) or across the frame (faster shutter needed).

    Don't assume speed — a child running toward you is slower across the frame than a bicycle crossing at 90°.

    You have a mental label: 'walking person', 'running dog', 'bird in flight'.

  2. Choose a starting shutter speed

    Use the reference guide: walking 1/125 s, running 1/500 s, birds in flight 1/2000 s, fast cars 1/1000 s. If the subject is moving diagonally, you can start one stop slower. If it's very close, go one stop faster.

    Choosing too slow a shutter speed is the most common mistake. If unsure, pick a faster speed — you can always slow down later.

    Your shutter speed dial is set to the chosen value (e.g., 1/500).

  3. Set ISO and aperture for correct exposure

    With the shutter speed fixed, adjust ISO and aperture so the exposure meter reads 0. Start with a wide aperture (low f‑number) to let in more light, then raise ISO if needed. Remember: faster shutter speeds require more light.

    If you're in bright sunlight, you may be forced to use a small aperture (high f‑number) even with low ISO. That's fine as long as exposure is correct.

    The exposure meter is centred or within ±1 stop. Your aperture and ISO are set.

  4. Take a test shot

    Frame the subject and press the shutter. Use continuous shooting mode (burst) to capture multiple frames — one of them is likely to be perfectly frozen.

    If you're using a telephoto lens, camera shake can mimic motion blur. Keep your shutter speed at least 1/(focal length) to avoid that, or use a tripod/monopod.

    You've taken at least 3–5 frames in burst mode.

  5. Review and adjust

    Zoom into the image on your LCD screen to 100% and check the subject's edges. If they are sharp, you're done. If there's blur, increase shutter speed by one stop (e.g., from 1/500 to 1/1000) and compensate with ISO or aperture, then retake.

    Don't judge sharpness on the small screen at full-frame view — you must zoom in to see motion blur. Also check for camera shake, which looks different (blur is uniform across the frame).

    At 100% zoom, the subject's edges are crisp. No smearing along the direction of motion.

Freezing a running dog

Scene: You're at a park. A Labrador is running straight across your path, about 15 m away, at a moderate sprint (roughly 25 km/h).

Step 1 — Assess: The dog is moving across the frame (perpendicular), so you need a fast shutter. Estimate: running dog → 1/500 s as a starting point.

Step 2 — Set shutter: Dial 1/500 s in manual mode.

Step 3 — Exposure: It's a bright afternoon, ISO 100. Your meter shows −2 stops with aperture at f/5.6. Open to f/2.8 (two stops more light) → meter reads 0. Good.

Step 4 — Test shot: Burst mode, 5 frames as the dog passes.

Step 5 — Review: Zoom in on the dog's nose and paw. The first frame shows slight blur on the paw (movement). The third frame is sharp everywhere. You keep that one.

Result: A sharp, frozen image of the dog mid-stride. You didn't need to adjust further because 1/500 s was enough for this distance and speed.

Checklist
0/6

Field checklist for freezing motion

Keep this checklist open on your phone or printed in your camera bag. Tick each item before moving to the next subject.

Check yourself

Check your understanding of freezing motion with these questions.

1Multiple choiceChecked instantly

Which of the following is the minimum shutter speed recommended for freezing a bird in flight?

  • A1/60 s
  • B1/250 s
  • C1/2000 s
  • D1/4000 s
2Put in orderChecked instantly

Arrange these steps in the correct order to freeze a moving subject.

  • ASet ISO and aperture for correct exposure
  • BTake a test shot
  • CAssess subject speed and direction
  • DChoose a starting shutter speed
  • EReview and adjust shutter speed if needed
3Short answerMarked by AI

You are photographing a child running at a moderate pace. You set the shutter speed to 1/250 s, but the resulting photo shows slight motion blur on the child's arms and legs. What should you do to get a sharp image, and why?

Graded on Identifies the correct fix (increase shutter speed) · Explains why the current speed is insufficient · Addresses exposure compensation

Lesson 21

Creating motion blur creatively

Explains intentionally using slow shutter speeds to blur moving elements, such as waterfalls, light trails, or moving cars.

10 min3 assessments

You already know that a slow shutter speed blurs moving objects. But creative motion blur is about choosing what blurs and what stays sharp. Panning keeps a moving subject sharp while the background streaks. Long exposure keeps the camera still so stationary objects stay sharp and moving ones turn into smooth trails. Zoom burst adds energy by stretching light from the center outward. The technique you pick depends on the subject, the light, and the feeling you want.

This node helps you discriminate between these approaches so you can reach for the right one in the field.

When you see a scene with motion, ask: What should be sharp? and What can I move? The table helps you decide which technique fits your situation.

Panning

Camera movement
Follows the subject
Subject movement
Stays sharp (if you match speed)
Background appearance
Streaky in direction of motion
Best light conditions
Daylight or bright streets
Main challenge
Keeping the subject centered in frame

Best for A race car, cyclist, or runner where you want them sharp against a blurred background.

Long exposure (static camera)

Camera movement
None (camera locked)
Subject movement
Blurs into a smooth streak
Background appearance
Sharp (stationary)
Best light conditions
Low light or use ND filter
Main challenge
Keeping the camera perfectly still (tripod mandatory)

Best for Waterfalls, rivers, clouds, or light trails at night.

Zoom burst

Camera movement
Zoom during exposure
Subject movement
Can be still or moving
Background appearance
Radial streaks from center outwards
Best light conditions
Medium light (twilight works well)
Main challenge
Zooming at a constant, smooth speed

Best for Abstract architecture shots or adding energy to a static subject.

Making a waterfall look silky

You're shooting a small waterfall in a forest at 4 PM. The scene is shaded, so light is moderate.

Camera settings:

  • Shutter speed: 1/2 second
  • Aperture: f/16 (to get depth of field)
  • ISO: 100 (keep noise low)
  • Support: tripod (mandatory because 1/2 second handheld will shake)
  • Remote release or 2-second timer to avoid pressing the shutter.

Result: The water blurs into a smooth, milky flow while the rocks and trees remain tack sharp. The slow shutter gave enough time for motion to accumulate, turning individual drops into one continuous ribbon.

Why these choices? 1/2 second is slow enough to blur the falling water but not so slow that highlights wash out. f/16 keeps both the foreground rock and the background tree sharp. ISO 100 ensures no unwanted grain.

Decide

You're standing on a pedestrian bridge over a highway at dusk. You want a photo where the car lights turn into continuous streaks across the frame, but you also want the bridge railing to stay sharp. Which technique should you use?

Choose your motion blur technique:

Check yourself

Check your understanding of when and how to use each technique.

1Select all that applyChecked instantly

Which of the following techniques require a tripod or sturdy support to avoid unwanted camera shake? Select all that apply.

  • APanning
  • BLong exposure static camera
  • CZoom burst
  • DFreezing motion with 1/2000s
2Short answerMarked by AI

You see a photo of a waterfall where the water looks silky but the rocks on either side are sharp. The photographer used a shutter speed of 0.5 seconds. Explain why a faster shutter speed (like 1/250s) would not produce the same effect, and what trade-off they made by choosing 0.5s (e.g., did they need a smaller aperture or ND filter?).

Graded on Explains why faster shutter speed does not create motion blur · Identifies the exposure trade-off (aperture or ND filter) required for slow shutter · Links the trade-off to real photographic choices (ISO, aperture, filter)

3Multiple choiceChecked instantly

What is the primary purpose of using a shutter speed of 1/30s when panning a moving subject?

  • ATo freeze the subject completely
  • BTo blur the subject while keeping background sharp
  • CTo blur the background while keeping the subject relatively sharp
  • DTo allow enough light for a night scene
Go deeper

For a deeper dive, the Wikipedia article on motion blur covers technical aspects, while Motion Blur: Graphic Moving Imagemakers explores creative use in graphic design.

Lesson 22

Panning technique

Teaches how to follow a moving subject with the camera to keep it sharp while blurring the background, and the shutter speeds to use.

15 min2 assessments

Panning is a technique that uses a slow shutter speed to capture a moving subject sharply while blurring the background into streaks — making the viewer feel the speed. You move the camera to follow the subject, so its position stays roughly the same on the sensor, while the stationary background sweeps across the frame.

Work in Shutter Priority (Tv or S) or Manual. Use a shutter speed between 1/30s and 1/125s — slower for closer or slower subjects, faster for distant or very fast ones. Keep ISO low (100–400) to avoid overexposure on a bright day. Stand with feet shoulder-width apart, twist from your hips, and follow the subject smoothly. Start tracking before it reaches you, press the shutter as it passes, and continue the motion after the shot. Practice makes the motion fluid.

Steps
0/7

Each step assumes you already understand how to set shutter speed and focus mode from the earlier node. Work through these in order.

  1. Choose your subject and position

    Find a road, track or path where subjects move parallel to you. Stand at least 5 m from the path. Face perpendicular to the direction of travel.

    If you stand too close, the subject will cross the frame too fast; you won't be able to track smoothly.

    The subject will take at least 2–3 seconds to cross your field of view.

  2. Set shutter speed

    Turn the mode dial to Tv (Canon) or S (Nikon/Sony) and dial in the speed: 1/60s for cars (50 km/h), 1/125s for motorcycles (100 km/h), 1/30s for runners or cyclists. Adjust in steps of one stop.

    Too fast (1/250s or quicker) freezes the background, ruining the blur effect. Too slow (1/15s or below) blurs the subject as well.

    The viewfinder shows your chosen speed. In bright sun the aperture should not blink (overexposure warning).

  3. Set ISO and exposure

    Set ISO to 100 or 200. In very bright conditions, the camera may still show overexposure; if so, raise the shutter speed one stop or add a neutral density filter. In overcast light, raise ISO to 400–800.

    High ISO adds noise that sharpness is judged against; don't go above 800 for clean prints.

    The exposure meter is near centre (±0).

  4. Select autofocus mode and burst

    Set AF mode to Continuous (AI Servo for Canon, AF‑C for Nikon/Sony). Set drive mode to Continuous High (burst).

    Single-shot AF will lock on the first frame and then stop tracking, making the subject blurry.

    A burst icon (stacked rectangles) appears in the viewfinder; AF‑C or AI Servo is highlighted in the info screen.

  5. Pre-focus at the expected distance

    Aim at a stationary object at the same distance the subject will be when it passes you. Half-press the shutter to lock focus. Release. This gives the AF system a starting point.

    If you skip this, the camera may hunt for focus as the subject arrives, costing you the shot.

    The distance scale (if visible) shows roughly the number you expect.

  6. Start tracking early

    When the subject is about 3–4 car lengths away, begin swinging your upper body from the hips, keeping the subject in the centre of the frame. Do this before pressing the shutter.

    Starting the swing as you press the shutter causes a jerk that blurs both subject and background.

    You feel a smooth rotation, not a sudden twist.

  7. Capture and follow through

    Half-press to re‑engage AF, then fully press and hold the burst. Keep swinging at the same speed after the last frame for at least half a second.

    Stopping the swing as you release the shutter introduces camera shake that ruins the last frame.

    Review the LCD: the subject should be sharp, the background streaked. If the subject is blurry, your panning speed was inconsistent. If the background is sharp, the shutter was too fast.

Checklist
0/7

Panning field checklist

Tick each item before you press the shutter. A keeper image needs all seven.

  • Panning uses a slow shutter (1/30–1/125s) to blur the background while keeping the subject sharp.
  • Follow the subject by rotating from your hips, not your arms — smooth motion is essential.
  • Start tracking the subject before it reaches your frame and continue moving after the shot.
  • Use continuous autofocus and burst mode to maximise sharp frames.
  • Shutter priority mode lets you control the speed while the camera manages aperture automatically.
Check yourself

Test your understanding of the panning workflow.

1Put in orderChecked instantly

Arrange the following steps of panning in the correct order from first to last.

  • ABegin tracking the subject before it reaches you.
  • BSet shutter speed to 1/60s.
  • CPress shutter fully and hold burst as the subject passes.
  • DFollow through after the shot.
  • EChoose a location with moving subjects.
  • FSelect continuous autofocus and burst mode.
2Short answerMarked by AI

You attempt to pan a car moving at 80 km/h on a highway. You set your camera to 1/30s, ISO 100, and single-shot autofocus with single-frame drive mode. The resulting image shows a completely blurry car and a smeared background. Identify at least two mistakes in your settings or technique, and explain what you should have done differently.

Graded on Identifies shutter speed mistake · Identifies autofocus / drive mode mistake · Explains corrections coherently

Lesson 23

The reciprocal rule for handheld

A rule of thumb to avoid camera shake: use a shutter speed at least the reciprocal of the focal length (e.g., 1/50 for 50mm).

10 min2 assessments

When you shoot handheld, your own body is the tripod — and it's a shaky one. Even if you hold your breath and brace your elbows, your hands move a tiny amount during the exposure. That movement blurs the picture.

The reciprocal rule gives you a safe lower bound: your shutter speed should be at least 1 / focal length seconds. For a 50mm lens, that's 1/50 s. For a 200mm lens, it's 1/200 s. If your camera only offers 1/180 s or 1/250 s, pick the next faster speed (1/250 s).

Crop factor changes the calculation. A lens marked 50mm on an APS‑C camera (1.5× crop) behaves like a 75mm lens on full frame. The rule uses the effective focal length: 1/(50×1.5) = 1/75 s. So you need at least 1/80 s or 1/100 s.

The rule is a starting point, not a guarantee. Image stabilisation (IS/VR) can let you go 2–4 stops slower. And if you're very steady or using a monopod, you might push a stop further. But for a beginner without stabilisation, the reciprocal rule keeps your photos sharp.

You're shooting with a 85mm lens on a full‑frame camera (crop factor 1.0). What is the minimum shutter speed you should use to avoid camera shake? Then repeat for the same lens on an APS‑C camera with a 1.5× crop factor.

  1. 1

    Minimum speed = 1 / focal length = 1 / 85 ≈ 0.0118 s

    The reciprocal rule says you need at least 1/85 s. That's about 0.0118 seconds.

1/5
Try it

Drag the focal length slider from 14 mm to 600 mm. Notice how the required shutter speed gets faster (smaller number) as the lens gets longer. Then increase the crop factor from 1.0 to 1.5 or 2.0 — the required speed jumps again. Try to find a combination that gives exactly 1/100 s (0.01 s). What effective focal length produces that?

50 mm
1.0

Minimum shutter speed (seconds)

—

This browser cannot run the calculation (Web Workers are unavailable).

  • The reciprocal rule: shutter speed ≥ 1 / focal length (in seconds).
  • Always use the effective focal length: marked focal length × crop factor.
  • Round up to the next faster standard shutter speed (e.g., 1/100 s instead of 1/85 s).
  • The rule assumes no image stabilisation — with IS you can go slower.
  • It's a guideline, not a law; your own steadiness and technique matter.
Check yourself

Test your understanding of the reciprocal rule.

1Numeric answerChecked instantly

You have a 135 mm lens on a full‑frame camera (crop factor 1.0). What is the minimum shutter speed (in seconds) you should use according to the reciprocal rule? Give your answer as a decimal rounded to three decimal places. Then, what is the next faster standard shutter speed (e.g., 1/125, 1/250)? Enter the denominator only (e.g., 125 for 1/125 s).

2Short answerMarked by AI

Explain why the reciprocal rule exists and name one situation where it might not be sufficient to guarantee a sharp image.

Graded on Explains the purpose of the rule · Identifies a limitation or exception

Lesson 24

ISO: sensitivity and noise

You will be able to select the ISO setting that balances light sensitivity with image noise. Covers the ISO scale, the visibility of noise at different levels, and when to raise ISO instead of reducing shutter speed. Prevents the fear of high ISO that leads to unnecessarily blurry images.

20 min3 assessments

You've mastered shutter speed for freezing or blurring motion. Now you're in a dim room and your shutter speed is too slow — 1/30s — and your subject is a blur. You could open the aperture, but that might lose depth of field. Or you could raise the ISO.

ISO controls how sensitive the sensor is to light. A low number like 100 means the sensor needs more light to make a bright image. A high number like 6400 means it needs much less — but it also amplifies the electrical noise that's always present in the sensor. That noise shows up as grain (luminance noise) and colored specks (chroma noise).

The fear of noise keeps many photographers stuck at ISO 100, forcing them to use shutter speeds that are too slow. The result: blurry, unusable photos. The skill is knowing when the noise is an acceptable trade-off — and when it's not.

Digital cameras amplify the signal after capture, so raising ISO is like turning up the volume on a quiet recording. The signal gets louder, but so does the hiss. A good image at ISO 3200 is far better than a blurry image at ISO 100.

The table below shows three common ISO ranges and when each works best. The exact numbers depend on your camera's sensor size and generation, but the pattern holds across all modern cameras.

ISO 100–200

Noise visibility
Virtually none — clean images
Light sensitivity (stops relative to ISO 100)
0–1 stop
Shutter speed benefit (at same aperture)
No benefit; you need the most light
Best for
Bright outdoor scenes, studio strobes, landscapes on a tripod

Best for Scenes with abundant light where you can use any shutter speed and aperture you want

ISO 800–1600

Noise visibility
Some fine grain, barely visible in print or social media
Light sensitivity (stops relative to ISO 100)
3–4 stops
Shutter speed benefit (at same aperture)
Allows shutter speed to be 8–16× faster than ISO 100
Best for
Indoor daylight, overcast days, handheld portraits

Best for Situations where you need to freeze moderate motion (1/125s or faster) and don't have a tripod

ISO 6400–12800

Noise visibility
Noticeable grain and possible color specks; may require noise reduction in post
Light sensitivity (stops relative to ISO 100)
6–7 stops
Shutter speed benefit (at same aperture)
Allows shutter speed 64–128× faster than ISO 100
Best for
Concerts, night sports, astrophotography, very dim interiors

Best for When the alternative is a blurry image — noise is the better trade-off

Indoor birthday party: ISO 100 vs ISO 3200

Situation: You're photographing a child blowing out candles in a dimly lit room. Your lens is at f/2.8, the widest aperture. The ambient light meter says:

  • At ISO 100: shutter speed 1/15s
  • At ISO 3200: shutter speed 1/500s

At ISO 100: The shot is well-exposed, but the child's hand is a blur because 1/15s is too slow for a moving subject. The image is useless.

At ISO 3200: The shutter speed is fast enough to freeze the motion. The image is sharp. It has visible grain, but when viewed on a phone or printed at 4×6, the noise is subtle. The story is captured.

The trade-off: Noise that you can mostly fix or ignore vs. a blur that you cannot fix. In this case, ISO 3200 is the right choice.

Here's what the two images would look like side by side:

  • ISO 100: Soft, blurry candle flames, smeared face.
  • ISO 3200: Sharp, clear, grainy texture — but recognizable.
  • ISO controls the sensor's sensitivity to light; higher ISO means less light needed but more noise.
  • Noise comes in two forms: luminance (grainy) and chroma (colored specks). Chroma noise is more distracting.
  • The ISO scale is logarithmic: doubling the ISO number (+1 stop) halves the light needed for the same exposure.
  • Raising ISO is the way to gain a faster shutter speed when aperture is already wide open.
  • A sharp, noisy image is almost always better than a blurry, clean image — noise can be reduced, blur cannot.
  • Modern cameras (especially full-frame and mirrorless) produce usable images at ISO 6400 and beyond.
  • Auto ISO can be helpful, but you must set a maximum ISO to prevent the camera from going too high.
Check yourself

Check your understanding of ISO and noise.

1Select all that applyChecked instantly

Which of the following are valid reasons to increase ISO? (Select all that apply.)

  • ATo allow a faster shutter speed in low light
  • BTo reduce depth of field further than the lens allows
  • CTo avoid using a flash when flash is prohibited
  • DTo make the image more colorful
  • ETo compensate for a smaller aperture when you need more depth of field
2Short answerMarked by AI

You are shooting a concert in dim light. You need a shutter speed of 1/125 to avoid motion blur, and your aperture is at f/2.8. The meter indicates ISO 6400 is needed. Describe the trade-off: what will you see in the image at ISO 6400? What would happen if you used ISO 100 instead? (2-4 sentences)

Graded on Describes the noise trade-off at high ISO · Describes the consequence of using low ISO

3Multiple choiceChecked instantly

What is the primary disadvantage of using a very high ISO (e.g., 25600) on most cameras?

  • AReduced sharpness from noise
  • BReduced dynamic range
  • CBoth increased noise and reduced dynamic range
  • DSlower shutter speeds

Lesson 25

Noise reduction in-camera and in post

You will be able to apply noise reduction during shooting and in editing software to clean up high-ISO images. Covers long-exposure noise reduction, high-ISO noise reduction settings, and basic post-processing sliders. Prevents over-processing that smears detail.

15 min3 assessments
Steps
0/6

Camera noise reduction and post-processing work together. Follow these steps in order to clean up high-ISO images without ruining detail.

  1. Enable high-ISO noise reduction in your camera

    Go to your camera's shooting menu and locate High ISO NR (or similar). Set it to Normal (or Low if you want to preserve more detail). Avoid High unless the noise is extreme – it aggressively blurs detail.

    This setting only applies to JPEGs. If you shoot RAW, camera NR is ignored by most RAW processors; you'll still do post-processing.

    The menu should show 'High ISO NR: Normal' (or your choice).

  2. Enable long-exposure noise reduction (if needed)

    If you are shooting exposures longer than 1 second, find Long Exp. NR (or Long Exposure Noise Reduction) and turn it On. The camera will take a second exposure with the shutter closed (a 'dark frame') and subtract the noise pattern.

    Long Exp. NR doubles the capture time – a 30‑second exposure becomes 60 seconds. It also drains battery. Turn it off for short exposures or burst shooting.

    The menu now shows 'Long Exp. NR: On'.

  3. Import your photo into Lightroom Classic and zoom to 100%

    Open Lightroom Classic, go to the Develop module. Click the photo to select it, then click the image area until the zoom percentage shows 1:1 (or use Ctrl+Alt+0 / Cmd+Option+0). Navigate to a region with flat areas (sky, wall, shadow) where noise is most visible.

    Zooming to less than 100% hides true noise. Zooming beyond 100% shows pixel artifacts, not real noise.

    The Navigator panel should show '1:1' and you can see individual pixels clearly.

  4. Adjust the Luminance slider to reduce brightness noise

    In the Detail panel (right side), find the Luminance slider. Drag it to the right slowly while watching the 1:1 view. Stop as soon as the graininess in flat areas becomes acceptable. A value between 20 and 50 is typical for moderate noise.

    Raising Luminance too high blurs fine edges and makes the image look soft or 'plastic'. Keep an eye on texture details (e.g., fabric, hair).

    The grainy pattern disappears in even tones, but edges in the same area still appear sharp at 1:1.

  5. Adjust the Color slider to remove coloured speckles

    Below Luminance, adjust the Color slider. Drag it right while watching for coloured blotches (magenta, green, blue) in shadow areas. Stop when the blotches vanish – usually Color = 25–50 for moderate noise.

    Color reduction does not blur detail much, but pushing it too high (above 70) can desaturate subtle tints (e.g., skin tones, sky gradients).

    The coloured speckles are gone, but natural colours (like a red brick wall or a blue sky) still look vibrant.

  6. Restore detail and contrast with Detail and Contrast sliders

    After reducing noise, increase Detail (typically 30–60) to bring back edge definition that Luminance smoothed. Then raise Contrast (0–20) to restore micro‑contrast in textures. Stop when the image looks natural and not crunchy.

    Over‑applying Detail can re‑introduce noise. Over‑applying Contrast makes the image look harsh or dirty.

    Side‑by‑side comparison (click the backslash `\` key) shows the image is cleaner while retaining realistic texture.

  • Camera high‑ISO noise reduction works on JPEGs only; RAW shooters rely entirely on post‑processing.
  • Long‑exposure noise reduction is a hardware‑level dark‑frame subtraction that doubles the capture time.
  • Always zoom to 100% or higher when evaluating noise – smaller views hide both noise and detail loss.
  • In post, adjust Luminance first (targets brightness noise), then Color (targets colour speckles), then Detail and Contrast to recover sharpness.
  • Over‑doing Luminance blurs fine edges and creates a waxy, unnatural look.
  • The three sliders (Luminance, Color, Detail) interact: increasing Detail re‑sharpens but may reintroduce noise, requiring a second pass on Luminance.
Checklist
0/7

Noise reduction field checklist

Keep this list visible while working in Lightroom. Tick each item when confirmed.

Check yourself

Check your understanding of the noise reduction workflow.

1Put in orderChecked instantly

Put these steps in the correct order for a complete noise reduction workflow, starting from camera setup through final post‑processing.

  • AEnable high‑ISO noise reduction in the camera menu.
  • BTake the photo (with your chosen exposure settings).
  • CImport the photo into Lightroom Classic and go to the Develop module.
  • DZoom the image to 1:1 (100%) in the Detail panel.
  • EAdjust the Luminance slider to reduce brightness noise.
  • FAdjust the Color slider to remove coloured speckles.
2Short answerMarked by AI

You are editing a RAW photo taken at ISO 6400. After zooming to 100%, you see significant luminance noise (grain) and red/green colour blotches. Describe the correct order in which you would adjust the four Detail panel sliders (Luminance, Color, Detail, Contrast) and explain why that order matters.

Graded on Correct slider order · Explanation of why the order matters

3Short answerMarked by AI

A friend shows you a photo they processed: it looks unnaturally smooth, with waxy skin and no texture in fabrics or foliage. They used heavy noise reduction. Explain what caused this 'plastic look' and describe one specific check they could do to avoid it next time.

Graded on Identifies the cause of the plastic look · Describes a specific check to avoid the problem

Lesson 26

How ISO works in digital cameras

Explains that digitally, ISO amplifies the sensor signal after capture, making the image brighter but also amplifying noise.

10 min3 assessments

You know that raising ISO lets you shoot in dimmer light, but you've also noticed that your pictures get grainier. Most photographers say ISO is the sensor's 'sensitivity' — but that's not what happens inside the camera.

Inside the sensor, each pixel collects photons and converts them into a tiny analog voltage. The brighter the scene, the higher the voltage. That voltage is still very small, so the camera amplifies it before converting it to a digital number. ISO sets the amount of amplification.

ISO 100 applies little amplification; ISO 3200 applies a lot. The amplification makes the signal stronger, so the image looks brighter. But the sensor's electronics also produce a weak, random background signal called read noise. The amplifier cannot tell signal from noise — it amplifies both equally. That's why a high-ISO image is noisier.

Importantly, the sensor's actual light-collecting ability (its quantum efficiency) does not change. The same number of photons reaches the sensor at ISO 100 and ISO 3200. What changes is how much that signal is boosted before the camera stores it.

Signal path from light to digital image. The amplifier applies gain set by ISO; read noise present in the analog signal is amplified alongside the image signal.

Analogy

Imagine you're recording a quiet conversation with a microphone. The microphone captures the voices and a tiny amount of room hiss. If you turn up the volume knob on the recorder, the voices become louder — but so does the hiss. You can't boost the voice without also boosting the background noise.

ISO works the same way. The sensor is the microphone, the analog voltage is the recorded signal, and the ISO setting is the volume knob. Higher ISO = higher volume = brighter image + more visible noise.

Where the analogy breaks down

In audio, you can often apply noise reduction after recording to reduce the hiss. In digital photography, noise reduction is also possible, but it always softens detail because the noise is entangled with the fine textures in the image. The analogy also breaks down because the sensor's voltage is not a continuous audio wave but a sampled signal from discrete pixels, and the noise pattern is spatial rather than temporal.

  • ISO is not sensor sensitivity; it is the amount of analog gain applied to the sensor's voltage signal before digitization.
  • The sensor's intrinsic light collection ability (quantum efficiency) is fixed; raising ISO does not make it collect more photons.
  • Amplification increases the signal level, making the image brighter, but it also amplifies read noise present in the electronics.
  • Higher ISO values produce noisier images because the signal-to-noise ratio degrades as noise is amplified equally.
  • ISO 100 uses the least amplification and gives the cleanest image; ISO 6400 uses heavy amplification and shows significant noise.
  • Blown highlights can occur at high ISO because the amplifier may clip the signal, losing detail in bright areas.
Common misconception

“ISO is how sensitive the sensor is to light — higher ISO lets the sensor collect more light, like using faster film.”

Film ISO really did indicate sensitivity: higher ISO film had larger silver halide crystals that captured light more efficiently. In digital, the outcome (brighter image in low light) is the same, so it's natural to assume the mechanism is similar.

What is actually true

The sensor's sensitivity is fixed — it collects the same number of photons at any ISO. The ISO setting controls how much that collected signal is amplified. Unlike film, you can change ISO from shot to shot without loading different 'film'. The analogy with film breaks because digital amplification also adds noise, and the sensor itself does not become more sensitive.

Check yourself

Check your understanding of ISO amplification and noise.

1Multiple choiceChecked instantly

What happens inside the camera when you change the ISO setting from 100 to 3200?

  • AThe sensor becomes more sensitive to light, collecting more photons per pixel.
  • BThe analog voltage from the sensor is amplified more before being digitized.
  • CThe camera switches to a different, more sensitivity sensor.
  • DThe lens aperture opens wider to let in more light.
2Short answerMarked by AI

A photographer says: 'I always use ISO 100 to keep noise low, but in a dark room I had to use ISO 6400. The image was brighter but very noisy. Could I have used a lower ISO and just brightened the picture in editing instead?' Explain why that would or would not produce the same result, referencing the concept of ISO amplification.

Graded on Explains the difference between analog and digital amplification · Addresses the noise outcome · Uses correct terminology

3Short answerMarked by AI

You are shooting a portrait in a dimly lit room. The correct exposure at ISO 100 gives a shutter speed of 1/15s, which is too slow for a sharp handheld shot (your rule of thumb is 1/60s). You have two options: raise ISO to 400 (which would allow 1/60s) or keep ISO 100 and use a tripod. Evaluate the trade-offs between these two choices in terms of image quality and practical constraints.

Graded on Identifies the key trade-off between noise and motion blur · Considers practical constraints · Provides a reasoned recommendation

Lesson 27

Types of noise: luminance and chroma

Distinguishes between luminance noise (graininess in brightness) and chroma noise (colored specks), and where each is visible.

10 min3 assessments

When you push ISO high, the sensor amplifies the signal — and the noise along with it. But not all noise looks the same. Two distinct kinds appear in digital photos:

  • Luminance noise — random variations in brightness. It looks like film grain: a fine, monochrome texture that can even add a gritty feel to an image.
  • Chroma noise — random variations in color. It shows up as tiny red, green, or blue specks, especially in shadow areas and out-of-focus backgrounds.

Knowing which one you're looking at matters because they behave differently in post-processing. Luminance noise is often tolerable and can be reduced without destroying detail. Chroma noise is more distracting and requires careful color noise reduction that can blur edges if pushed too far.

Reference

Luminance vs. Chroma Noise at a Glance

Nature

Luminance Noise
Brightness variation only
Chroma Noise
Color variation only

Appearance

Luminance Noise
Fine, film-like grain
Chroma Noise
Colored specks (red, green, blue)

Most visible in

Luminance Noise
Midtones and highlights
Chroma Noise
Shadows and uniform areas

Acceptability

Luminance Noise
Often considered natural or artistic
Chroma Noise
Almost always unwanted

Removal difficulty

Luminance Noise
Easy; mild blurring of detail
Chroma Noise
Hard; risks color smearing

Post-processing tool

Luminance Noise
Luminance noise reduction slider
Chroma Noise
Color noise reduction slider

Most RAW editors (Lightroom, Capture One, Darktable) separate these two sliders. Adjust luminance first, then chroma only if needed.

Practice
0/8 known
1 / 8
Go deeper

Read the 'Types of noise' section for a deeper technical explanation of luminance and chroma noise sources.

Check yourself

Check your understanding of the two noise types.

1Fill the blanksChecked instantly
2Multiple choiceChecked instantly

A photographer notices that a high-ISO image has a fine, grainy texture but no color blotches. Which type of noise is present?

  • ALuminance noise only
  • BChroma noise only
  • CBoth luminance and chroma noise
  • DNeither; this is sensor banding
3Short answerMarked by AI

You are editing a night scene taken at ISO 6400. The shadow areas show obvious red and blue specks, while the midtones have a uniform grain. Which type of noise is more problematic for the final image, and why? What would you adjust in post-processing to address it?

Graded on Identifies the problematic noise type correctly · Recommends appropriate post-processing adjustment · Distinguishes between the two noise types in the scene

Lesson 28

Luminance noise

Grain-like noise in the brightness channel, often more acceptable and can be reduced with less detail loss.

5 min4 assessments
  • Luminance noise appears as monochromatic grain in the brightness (lightness) channel of an image.
  • It is more acceptable to the human eye than chroma noise because it resembles film grain and doesn't introduce false colors.
  • Luminance noise can be reduced with less loss of fine detail because the blurring is confined to the lightness layer, leaving color edges intact.
  • High ISO values are the primary cause; each camera model has a unique noise profile at different ISO settings.
  • Photo editing software typically provides a separate Luminance slider for noise reduction, distinct from the Color slider used for chroma noise.

Reducing Luminance Noise in Lightroom

You have a raw file shot at ISO 6400. The sky shows visible grain but no color specks.

Before: The sky looks gritty; edges of the clouds are still sharp.

Action: In Lightroom's Detail panel, raise the Luminance slider from 0 to 30.

After: The grain is noticeably smoother. The clouds retain their edge detail because only the lightness channel was blurred. The chroma noise (colored specks) remains unchanged, confirming it was luminance noise all along.

Reference

Luminance Noise vs Chroma Noise

Appearance

Luminance Noise
Monochrome grain
Chroma Noise
Colored specks (red, green, blue)

Channel affected

Luminance Noise
Lightness / brightness
Chroma Noise
Color (a/b in Lab, Cb/Cr in YUV)

Acceptability

Luminance Noise
Often considered film-like; kept in some styles
Chroma Noise
Almost always objectionable

Ease of removal

Luminance Noise
Easy to blur without losing detail
Chroma Noise
Harder; blurring colors risks artifacts

Common cause

Luminance Noise
High ISO
Chroma Noise
High ISO, especially underexposure

Software control

Luminance Noise
Luminance slider
Chroma Noise
Color slider

Sort by property for quick lookup during editing.

Practice
0/8 known
1 / 8
Go deeper

Read the Wikipedia article on image noise for a technical explanation of how sensor size and amplification affect both luminance and chroma noise.

Check yourself

Check your understanding of luminance noise.

1Multiple choiceChecked instantly

Which of the following best describes luminance noise?

  • AColored specks that appear in the red and blue channels.
  • BMonochromatic grain visible in the brightness channel.
  • CA blurring of edges caused by lens diffraction.
  • DA pattern of vertical stripes caused by sensor overheating.
2Fill the blanksChecked instantly
3Select all that applyChecked instantly

Which of the following are true about luminance noise? (Select all that apply)

  • AIt appears as random variations in brightness.
  • BIt is always colored.
  • CIt can be reduced by increasing ISO.
  • DIt is generally more acceptable than chroma noise.
  • EIt is also known as film grain when present in digital images.
4Fill the blanksChecked instantly

Lesson 29

Chroma noise

Colored specks in shadow areas, more distracting and requires careful post-processing to remove without smearing color.

5 min3 assessments

You already know the difference between luminance noise and chroma noise. Now focus on chroma noise alone: it shows up as red, green, or blue specks scattered across shadow areas. Unlike the grayish grain of luminance noise, chroma noise immediately catches the eye because our visual system is wired to notice color errors. It comes from the same high ISO and sensor heat that produce luminance noise, but the color-channel amplification amplifies random hue variations. In a dark sky, a black jacket, or any large uniform dark region, chroma noise turns smooth tones into confetti. Removing it is tricky: aggressive chroma denoising can smear color and destroy fine details, so you need targeted tools that separate color noise from luminance information.

  • Chroma noise appears as colored specks (red, green, blue) in shadow or flat-color areas.
  • It is more distracting than luminance noise because human vision is sensitive to color errors.
  • It originates from random variations in color channel signals, especially at high ISO or long exposures.
  • Standard luminance denoising tools do not remove chroma noise; dedicated chroma denoising is needed.
  • Over-zealous chroma denoising can cause color smearing and loss of saturation in fine details.
Reference

Chroma Noise vs Luminance Noise

Appearance

Chroma Noise
Colored specks (red, green, blue)
Luminance Noise
Grayish grain, like film grain

Visibility

Chroma Noise
Most visible in dark, uniform areas
Luminance Noise
Visible across all tones, especially midtones

Primary cause

Chroma Noise
High ISO, long exposure, sensor heat
Luminance Noise
High ISO, low light, sensor heat

Denoising sensitivity

Chroma Noise
Requires dedicated chroma denoising
Luminance Noise
Can be reduced with blur/median filters

Risk of over-denoising

Chroma Noise
Color smearing, loss of saturation
Luminance Noise
Loss of sharpness, plastic look

Use this table when choosing a noise reduction strategy: target chroma noise separately from luminance noise.

Practice
0/8 known
1 / 8
Check yourself

Test your understanding of chroma noise.

1Multiple choiceChecked instantly

In which area of a photograph is chroma noise most noticeable?

  • AOverexposed highlights
  • BMid-tone skin areas
  • CDark shadow regions with uniform color
  • DAreas with fine texture like grass
2Select all that applyChecked instantly

Which of the following are true about chroma noise? (Select all that apply.)

  • AIt appears as colored specks in shadow areas.
  • BIt can be effectively removed by applying a strong Gaussian blur to the whole image.
  • CDedicated chroma denoising tools are required to reduce it without smearing color.
  • DIt is equally visible in all parts of the image.
3Short answerMarked by AI

Explain why chroma noise is more detrimental to image quality than luminance noise, and describe one post-processing approach that addresses chroma noise without destroying fine details. (2–4 sentences)

Graded on Identifies visual impact and appropriate denoising technique · Uses correct terminology and logical flow

Lesson 30

Trade-offs with ISO

Discusses how raising ISO allows faster shutter or smaller aperture but adds noise, and the strategic decision of acceptable noise levels.

10 min3 assessments
Common misconception

“I should always use the lowest ISO possible to avoid noise, even if it means a slower shutter speed.”

Lower ISO produces cleaner images, so it feels like the safest choice. Noise is easy to see in a photo, while motion blur can be subtle.

What is actually true

Noise is only one type of image degradation. Motion blur from a slow shutter speed often ruins a photo more than a moderate amount of noise. For a sharp subject, you may need to raise ISO to keep shutter speed fast enough, even if it adds some grain.

When you need more light to reach the sensor, you have three levers. Each one fixes the exposure but changes the image in a different way. The skill is knowing which cost to pay.

Raise ISO

Effect on exposure
Increases sensor sensitivity, so less light needed
Main cost
Adds digital noise (grain), reduces dynamic range
When to choose this
When you need a specific shutter speed or aperture and can't change the other two — e.g., freezing action in dim light.

Best for Dim light with moving subjects, or when you've already reached the widest acceptable aperture and slowest shutter that still lets you hand-hold the camera.

Slow shutter speed

Effect on exposure
Lets in more light by keeping the shutter open longer
Main cost
Motion blur — camera shake or subject movement
When to choose this
When the subject is still and you can use a tripod or steady support (landscapes, architecture, long exposures).

Best for Static scenes where you can brace the camera, or when you want motion blur as a creative effect (waterfalls, light trails).

Wider aperture

Effect on exposure
Opens the lens diaphragm to let in more light
Main cost
Shallower depth of field — less of the scene is in focus
When to choose this
When you want to isolate a subject from the background (portraits, macro) and can accept that the background blurs.

Best for Portraits, close-ups, and situations where background blur adds to the image, or when you need maximum light without raising ISO or slowing shutter.

The indoor portrait needs a faster shutter

Situation: You're photographing a child playing indoors. Current settings: ISO 400, aperture f/5.6, shutter speed 1/60s. The child is moving, so you want 1/250s to freeze motion. That's a 2-stop increase in shutter speed (1/60 → 1/125 → 1/250).

Options to get enough light:

  1. 1.Raise ISO by 2 stops to ISO 1600. The image will have more noise, but the child's face will be sharp. Noise can be reduced in post-processing.
  1. 2.Open aperture from f/5.6 to f/2.8 (2 stops wider). This lets in the same light, but the depth of field becomes very shallow — the child's eyes might be sharp but the nose and ears blur. For a portrait, that's risky.
  1. 3.Slow shutter — but you've already set it to the fastest motion-freezing speed. Going slower defeats the purpose.

Decision: Raise ISO to 1600. The noise is acceptable if you don't crop too heavily, and you can apply noise reduction in editing. The aperture stays at f/5.6 to keep the whole face in focus, and the shutter speed is fast enough to stop the motion.

Decide

You're shooting a night market scene. You want to capture the vibrant colours of food stalls without flash, but the ambient light is low. You're using a 50mm lens and you want to hand-hold the camera. The rule of thumb for hand-holding is 1/(focal length) = 1/50s minimum shutter speed, but you aim for 1/100s to be safe. You set aperture to f/2.8 (widest for your lens) and ISO to 800. The meter reads 1/30s at f/2.8, ISO 800 — that's too slow. You need to increase exposure by 1.5 stops to reach 1/100s (1/30 → 1/60 → 1/125, that's 2 stops, but let's say 1.5 stops if you stop at 1/100). What do you do?

You need 1.5 more stops of light. Which adjustment do you make first?

Check yourself

Check your understanding of ISO trade-offs.

1Multiple choiceChecked instantly

You're photographing a friend's birthday party in a dimly lit room. You're using a 35mm lens, handheld. You want to freeze the moment when the candles are blown out. Which of the following is the most important lever to adjust?

  • ALower ISO to 100 to maximise image quality, even if it means a slow shutter speed.
  • BNarrow aperture to f/16 for deep depth of field, then compensate with a slow shutter.
  • CRaise ISO until the shutter speed is fast enough to freeze movement (e.g., 1/125s or faster).
  • DUse the widest aperture (f/2.8) and keep ISO at 400, but accept that the shutter speed will be slow.
2Short answerMarked by AI

Explain why raising ISO is often a better choice than opening the aperture wider when you are photographing a group of people at a dinner table and you want everyone in focus.

Graded on Identifies the depth of field cost of a wide aperture · Explains that ISO noise can be reduced later · Considers the specific situation (group portrait)

3Select all that applyChecked instantly

Which of the following are valid reasons to raise ISO rather than slow the shutter speed or open the aperture? (Select all that apply.)

  • AYou need to freeze fast action (e.g., sports, wildlife).
  • BYou want a very shallow depth of field for a portrait.
  • CYou are hand-holding the camera and cannot use a tripod.
  • DYou are already at the widest aperture your lens allows.
  • EYou want to capture a long exposure of a waterfall.

Lesson 31

Setting ISO in practice

Provides a workflow for choosing ISO: start low, increase only when needed for exposure, and use Auto ISO with caution.

10 min2 assessments
Steps
0/5

You've already seen that ISO controls how sensitive the sensor is to light, and that higher ISO adds visible grain (noise) to your image. Now you need a repeatable workflow for setting ISO in the field — one that gets you the shot without baking in more noise than necessary. The rule is simple: start at your camera's base ISO and only move up when you must.

  1. Set ISO to base before you raise the camera

    Before taking any photo, set ISO to your camera's lowest native value. For almost all cameras this is ISO 100 (some go down to ISO 50 or 64 — check your manual). If you are in Auto ISO, turn it off for this step. Use the ISO button (often on top of the body) and rotate the main dial until the ISO readout shows 100 (or the lowest value shown in bold in the menu).

    Some cameras list 'L' or 'Lo' as the lowest setting. That's an extended ISO, not the native base — it reduces dynamic range. Stick to the lowest non-extended value.

    The ISO number in your viewfinder or top LCD shows 100, 200, or the lowest value in white (not greyed out or marked 'L').

  2. Set aperture and shutter for the scene

    With ISO locked at base, decide your aperture (depth of field) and shutter speed (motion blur / sharpness) as you normally would. Check the exposure meter in your viewfinder: it should be centred or nearly so. If the meter is far to the left (underexposed) or right (overexposed), do not touch ISO yet — first see if you can adjust aperture or shutter within your constraints.

    If you change aperture or shutter after step 1, re-check the exposure meter. A common mistake is to set ISO, then change everything else and wonder why the meter is off.

    The exposure meter needle or scale is within one stop of zero.

  3. Raise ISO only when shutter or aperture cannot move further

    Ask: am I willing to increase aperture (shallower depth of field) or slow shutter (more motion blur) to centre the exposure? If the answer is no — you need that f/2.8 for bokeh, or that 1/500s to freeze action — then it's time to raise ISO. Increase in full stops: if the meter says you are 2 stops under, go from ISO 100 to ISO 400. Use the ISO button and dial to jump.

    Do not raise ISO more than one stop at a time while checking — overshooting adds noise you cannot undo. A second check: if the histogram still hugs the left side, raise another stop.

    The exposure meter is centred again and the histogram shows data across the middle third with no clipping on the left.

  4. Check the shot for noise before moving on

    Take a test shot at the ISO you chose. Zoom to 100% on the rear screen (press the magnify button, often a magnifying glass icon). Look in the shadow areas — under a tree, a dark jacket, a shaded wall. If you see obvious coloured speckles or a grainy texture, the ISO is too high for this image's purpose. Lower it by a stop if possible, adjusting aperture or shutter instead.

    The camera's rear screen is small and forgiving — what looks clean on the back may be noisy on a monitor. If noise is visible on the camera screen at 100%, it will be obvious in print or on a large display.

    At 100% zoom, shadow areas have no visible coloured noise — only texture that looks like fine film grain at most.

  5. When to use Auto ISO (and when not to)

    Auto ISO is useful in rapidly changing light — a concert, a walk from shade into sun — where you cannot stop to adjust manually. Set the Auto ISO range in your camera menu: a minimum of ISO 100 and a maximum of ISO 3200 or 6400 (whatever your camera produces acceptable noise at). Set a minimum shutter speed too (e.g., 1/125s for general shooting). The camera will then raise ISO only as needed, staying within your limits.

    Auto ISO in manual mode can still over-raise ISO when you do not expect it — e.g., if you set a very small aperture like f/22 and a fast shutter, the camera may push ISO to 12800 to compensate. Always review what ISO the camera chose after a burst.

    The ISO readout is not blinking or red, and it is within the range you set in the menu.

Checklist
0/6

ISO field checklist

Keep this list on your phone or written on a card in your bag until the workflow is automatic.

From underexposed to correct — one stop at a time

Scene: A dancer in dim stage light. You want a shallow depth of field (f/2.8) and a fast shutter (1/250s) to freeze motion.

Step 1: ISO 100, f/2.8, 1/250s. Exposure meter reads –2 stops (underexposed).

Step 2: Can you open aperture? No, f/2.8 is already wide open. Can you slow shutter? No, 1/250s is the minimum to freeze the dancer. So ISO must rise.

Step 3: Raise one stop to ISO 200. Meter now reads –1 stop. Still underexposed. Raise another stop to ISO 400. Meter now reads 0.

Step 4: Take a test shot. At 100% zoom, shadows show fine grain but no coloured speckles. The shot is usable.

Result: ISO 400, f/2.8, 1/250s — correct exposure with acceptable noise.

If you had jumped straight to ISO 800, you would have added a stop of noise you did not need.

Common misconception

“"I should always use the lowest ISO possible, even if it means my photo is dark, because noise ruins every image."”

You learned that noise comes from high ISO, and you see beautiful clean images shot at ISO 100. It feels like the safe choice.

What is actually true

A dark, noisy photo that is too dark to see is worse than a properly exposed photo with moderate noise. Underexposing at low ISO and then brightening in post (called 'pushing') actually produces more noise than raising ISO in-camera to the correct exposure, because the signal was too weak to begin with. The real enemy is not ISO — it is underexposure.

  • Always start at base ISO (100 or lowest native value) before setting aperture and shutter.
  • Raise ISO only after aperture and shutter are fixed for the creative effect you want.
  • Increase ISO in full stops — one stop at a time — and check the exposure meter after each.
  • After a test shot, zoom to 100% and inspect shadow areas for visible noise before committing.
  • Auto ISO is useful in changing light, but cap its maximum in the camera menu to avoid surprises.
  • A correctly exposed shot at ISO 800 is cleaner than an underexposed shot at ISO 100 brightened in editing.
Check yourself
1Put in orderChecked instantly

Arrange these steps for setting ISO in a low-light scene where you need a fast shutter to freeze action. Put them in the order you would do them in the field.

  • ASet minimum shutter speed to 1/500s in Auto ISO menu.
  • BSet ISO to 100 (base).
  • CTake a test shot and check shadow noise at 100% zoom.
  • DCheck the exposure meter — if underexposed, raise ISO in full stops until the meter centres.
  • EIf noise is unacceptable, reduce shutter speed or open aperture, then lower ISO again.
2Short answerMarked by AI

You are photographing a landscape on a tripod at f/11, ISO 100. The exposure meter shows 2 stops underexposed. You could raise ISO to 400, or you could slow the shutter speed from 1/60s to 1/15s. Which do you choose and why? Your answer must name the advantage of the slower shutter in this specific scenario.

Graded on Identifies the correct choice (slower shutter) and names the tripod as the key enabler. · Explains why keeping ISO low is beneficial in this scene. · Acknowledges that the subject (landscape) is stationary, so motion blur is irrelevant.

Lesson 32

In-camera noise reduction

Explains the settings cameras have for reducing noise during processing, and the trade-off with sharpness.

5 min3 assessments

When you push ISO to 1600, 3200 or beyond, the sensor amplifies not just light but also its own electrical noise. Every camera has a built-in noise reduction (NR) system that tries to clean that up before the image is saved as a JPEG. The trade-off? NR works by blurring adjacent pixels — the same mechanism that removes noise also erases fine detail like hair, leaves and fabric texture.

Cameras typically offer two NR controls: High-ISO Speed NR (applies to all shots at high ISO) and Long Exposure NR (kicks in for exposures longer than 1 second). Long-exposure NR takes a second, dark-frame exposure of equal length and subtracts the noise pattern — doubling the capture time.

Your goal is to set NR as low as possible without the noise becoming distracting, because you can always apply stronger NR later in software, but you cannot recover detail that was blurred in-camera.

Steps
0/4

The exact menu labels vary by brand, but the logic is the same. This walkthrough uses a Canon DSLR as an example.

  1. Open the shooting menu

    Press the Menu button, then use the directional pad to navigate to the Shooting tab (the camera icon).

    If you are in a mode that locks settings (e.g., Full Auto), the menu may be greyed out. Switch to M, Av, Tv or P first.

    You see a list of shooting options like Image Quality, White Balance, etc.

  2. Find High-ISO Speed NR

    Scroll down to High-ISO Speed NR and press Set.

    Some cameras bury this under a sub-menu called 'Custom Functions' or 'ISO Noise Reduction'.

    The screen shows four options: Off, Low, Standard, High.

  3. Choose your NR strength

    Select Standard for everyday shooting. Use Low or Off when you need maximum sharpness (e.g., portraits, landscapes). Use High only if you are shooting in very dim light and cannot reduce noise any other way.

    High NR makes images look soft and waxy, especially on faces. You cannot undo this later.

    The setting is saved. Take a test shot and zoom in to check sharpness.

  4. Set Long Exposure NR (optional)

    Return to the shooting menu and find Long Exposure Noise Reduction. Enable it if you plan to shoot exposures longer than 1 second (e.g., night scenes, star trails).

    After each long exposure, the camera takes a second exposure of the same duration with the shutter closed. This doubles your shooting time and drains the battery. For exposures over 30 seconds, consider using the camera's bulb mode with external NR instead.

    After taking a 10-second shot, the camera spends another 10 seconds processing before you can shoot again.

Checklist
0/5

In-camera noise reduction checklist

Keep this list handy when you are adjusting settings on location.

Common misconception

“"In-camera noise reduction always makes my photos better, so I should set it to High."”

Noise is ugly; NR visibly reduces it, and the camera's default setting is usually Standard, so High must be even better.

What is actually true

High NR blurs away fine texture and edges, creating a waxy, plastic look. It is better to use a moderate setting (Standard or Low) and apply stronger NR selectively in post-processing, where you can mask it to protect edges.

  • In-camera noise reduction works by blurring pixels, which removes noise but also reduces sharpness.
  • High-ISO Speed NR applies to all shots at high ISO; Long Exposure NR uses a dark-frame subtraction that doubles capture time.
  • Higher NR settings produce softer, waxy images that cannot be sharpened back to the original detail.
  • Raw files bypass in-camera NR entirely — you control noise reduction later in software.
  • For maximum sharpness, set High-ISO NR to Low or Off and rely on post-processing noise reduction.
Check yourself

Check your understanding of in-camera noise reduction.

1Put in orderChecked instantly

Arrange the steps to enable High-ISO Speed NR on a Canon DSLR in the correct order.

  • APress the Menu button
  • BSelect High-ISO Speed NR from the Shooting menu
  • CNavigate to the Shooting tab (camera icon)
  • DChoose a setting (Off, Low, Standard, High)
2Short answerMarked by AI

Explain why setting in-camera noise reduction to High can ruin a portrait shot, even though it removes noise. What would you do instead?

Graded on Identifies the trade-off (blurring detail) · Recommends a better approach · Clarity and conciseness

3Multiple choiceChecked instantly

You are shooting a landscape with fine foliage at ISO 3200. Which in-camera noise reduction setting gives you the best balance of noise control and sharpness?

  • AHigh – it eliminates noise completely, and you can sharpen the image later.
  • BStandard – it reduces noise moderately while keeping most detail.
  • COff – noise is always acceptable, and you can fix everything in post.
  • DLow – it applies minimal blur and preserves fine foliage detail, and you can apply stronger NR selectively in post.

Lesson 33

Post-processing noise reduction

Describes how to use software to reduce noise after shooting, including luminance and chroma sliders.

10 min2 assessments

You shot at ISO 6400 to keep the shutter fast, and now the image looks speckled. That's noise — random brightness or colour variations that degrade the clean look you want. In-camera noise reduction is aggressive and often blurs detail you wanted to keep. Post-processing noise reduction gives you control: you decide how much grain to trade for smoothness.

Noise has two personalities. Luminance noise looks like film grain — grayscale speckles that add texture but can make skin look rough. Chroma noise appears as red, green or blue blobs, especially in shadows. Your editing software has separate sliders for each, plus detail controls to protect edges.

The goal is to remove the chroma blobs and calm the luminance grain without turning the image into a plastic painting. You'll find these sliders in any raw processor — Lightroom's Detail panel, Capture One's Noise Reduction tool, Darktable's denoise module. The names are near-universal.

Steps
0/7

Open a noisy photo in your raw editor — anything shot above ISO 3200 works well. These steps assume Lightroom-style sliders; the logic is identical in other tools.

  1. Zoom to 100–200%

    Click the 1:1 or 2:1 zoom button. Noise is invisible at fit-to-screen; you must see pixels to judge.

    Zooming past 200% shows pixel structure that isn't real noise — stick to 200% max.

    You can clearly see the noise pattern (grain or colour speckles) in a shadow area.

  2. Evaluate noise type

    Look at a midtone area (not a pure black or white). Is it grainy (luminance) or blotchy with colours (chroma)? Both are common at high ISO.

    Don't rely on the histogram — noise is visible, not numeric.

    You have identified which type dominates.

  3. Adjust Luminance slider

    Drag the Luminance slider up slowly. Watch the grain disappear. Stop as soon as the grain is mostly gone — overshooting makes the image look waxy.

    Setting Luminance too high removes texture from skin, fabric and foliage, creating a plastic look.

    Grain is reduced but skin pores or fabric weave are still visible.

  4. Tweak Luminance Detail

    Raise Luminance Detail to protect edges (high-contrast lines like hair or architecture). Too low: edges blur. Too high: noise survives.

    A common mistake is leaving Detail at 0, which blurs everything equally.

    Edges in the zoomed view remain sharp while flat areas stay smooth.

  5. Adjust Color slider

    Drag the Color (or Chroma) slider up until the red/blue splotches in shadows disappear. This usually needs far less than Luminance.

    Color slider too high desaturates fine edges (e.g., a red flower against green leaves turns grey).

    Shadow colours look natural — no coloured blobs remaining.

  6. Fine-tune Color Detail

    If the Color slider caused edge desaturation, raise Color Detail to restore colour at high-contrast borders. Start at 50 and adjust.

    Color Detail above 80 often lets chroma noise bleed back in.

    The image has neutral colour noise and crisp colour edges.

  7. Before/after comparison

    Toggle the before/after view (usually a backslash key or split-screen button). Confirm the noise is gone and you haven't lost important detail.

    If after looks softer than before, back off Luminance or raise Detail.

    The after version is cleaner than before without being obviously blurred.

Checklist
0/6

Noise reduction field checklist

Keep this checklist open in a second monitor or print it until the workflow becomes routine.

  • Luminance noise is grayscale and reduces with the Luminance slider; chroma noise is coloured and reduces with the Color slider.
  • The Luminance Detail slider protects high-contrast edges from blur — set it higher for images with fine detail.
  • The Color Detail slider restores colour at edges that the Color slider desaturated; too high reintroduces chroma noise.
  • Always evaluate noise reduction at 100–200% zoom; smaller view hides problems.
  • Oversmoothing (waxy skin, lost texture) is a sign that Luminance is too high or Detail too low.
  • Chroma noise is usually fixed with a lower slider value than luminance noise — start Color at 25, Luminance at 40.

ISO 6400 portrait – noise reduction applied

Source: Portrait shot at ISO 6400, 1/100s, f/2.8, taken in dim indoor light.

Before: Heavy luminance grain in skin tones, plus blue chroma noise in the shadow under the chin.

Settings used (Lightroom Develop module, Detail panel):

  • Luminance: 42
  • Luminance Detail: 75
  • Color: 28
  • Color Detail: 55

Result (after 30 seconds of adjustment):

  • Skin texture retained — you can see pores and fine hair, not a mask.
  • Blue splotches under the chin gone; skin colour is uniform.
  • Fabric of the shirt (cotton weave) is still crisp.
  • At full screen no noise is visible; at 200% a faint grain remains, which is acceptable.

The same settings on a landscape with fine foliage would need Luminance Detail above 80 to keep leaves sharp.

Check yourself
1Put in orderChecked instantly

Arrange the noise reduction steps in the correct order as they are performed in a raw editor.

  • AAdjust Luminance Detail to protect edges
  • BEvaluate whether the noise is luminance, chroma or both
  • CCompare before and after to check for oversmoothing
  • DDrag the Luminance slider until grain is mostly gone
  • EAdjust the Color slider to remove chroma blobs
2Short answerMarked by AI

You are editing a photo of a chain-link fence shot at ISO 3200. The Luminance slider at 45 removes most grain, but the fence wires look soft. Explain what slider you would adjust next, why, and what happens if you set it too high or too low.

Graded on Identifies Luminance Detail as the next slider and explains its role in edge preservation · Explains consequences of too-high and too-low settings with reference to the fence image

Lesson 34

The exposure triangle: balancing aperture, shutter, and ISO

You will be able to trade off aperture, shutter speed, and ISO to achieve a correctly exposed image while preserving your creative intent. Covers equivalent exposures, the concept of stops, and the decision process when one setting must change. Prevents the trap of fixing one setting while ignoring the others.

30 min3 assessments

You already know that ISO controls sensitivity and noise. Now meet the other two partners: aperture (the size of the lens opening) and shutter speed (how long the sensor is exposed to light). These three form the exposure triangle — change one and at least one other must change to keep the same brightness.

But brightness is only half the story. Each setting also has a creative side effect:

  • Aperture controls depth of field — how much of the scene is in focus.
  • Shutter speed controls motion blur — whether moving subjects appear sharp or streaked.
  • ISO controls noise — the graininess of the image.

Your job is to pick the combination that gives the exposure you need and the creative look you want. There is no single “correct” exposure; there are many equivalent ones, and you choose based on your goal.

The table below shows how each setting affects exposure and the creative dimensions that matter most in manual mode.

Aperture

Effect on exposure (stops)
Wider opening = more light (e.g., f/2.8 vs f/5.6 is +1 stop)
Effect on depth of field
Wide = shallow DoF (blurry background); narrow = deep DoF (everything sharp)
Effect on motion blur
No direct effect
Effect on noise
No direct effect

Best for When you need to control depth of field — portraits (shallow) or landscapes (deep).

Shutter speed

Effect on exposure (stops)
Longer duration = more light (e.g., 1/60 vs 1/125 is +1 stop)
Effect on depth of field
No direct effect
Effect on motion blur
Fast = freezes motion; slow = blurs moving subjects
Effect on noise
No direct effect

Best for When you need to freeze or blur motion — sports, wildlife, waterfalls.

ISO

Effect on exposure (stops)
Higher sensitivity = more light (e.g., ISO 400 vs 200 is +1 stop)
Effect on depth of field
No direct effect
Effect on motion blur
No direct effect
Effect on noise
Higher ISO = more visible noise

Best for When you have maxed out aperture and shutter and still need more light, and can accept some noise.

Freezing motion indoors

You're photographing a dancer in a dimly lit studio. Your current settings give a correct exposure:

  • Aperture: f/4
  • Shutter speed: 1/60
  • ISO: 800

But 1/60 is too slow — the dancer is blurry. You need at least 1/250 to freeze the motion.

Step 1: Calculate the stop change. 1/60 → 1/125 = –1 stop, 1/125 → 1/250 = –1 stop. Total: –2 stops of light.

Step 2: Compensate. You must add 2 stops back using aperture, ISO, or both.

  • Option A: Open aperture. f/4 → f/2.8 = +1 stop, f/2.8 → f/2 = +1 stop. That gives +2 stops. But f/2 gives a very shallow depth of field — the dancer's face might be sharp but her hand could blur.
  • Option B: Raise ISO. ISO 800 → 1600 = +1 stop, 1600 → 3200 = +1 stop. That adds +2 stops, but ISO 3200 introduces noticeable noise.
  • Option C: Split the difference. Open aperture to f/2.8 (+1 stop) and raise ISO to 1600 (+1 stop). Total +2 stops. Depth of field is still shallow but more forgiving than f/2, and noise at ISO 1600 is moderate.

Decision: For this shot, you choose Option C. The dancer's motion is frozen, the background is softly blurred, and the noise is acceptable for the mood.

Resulting settings: f/2.8, 1/250, ISO 1600 — same exposure, different creative outcome.

Common misconception

“I should always use the lowest ISO possible to avoid noise.”

Lower ISO values produce cleaner, less grainy images, and many tutorials emphasize using the base ISO for maximum quality.

What is actually true

Sometimes you must raise ISO because you've already opened the aperture as wide as your lens allows and slowed the shutter as much as you can without introducing motion blur. In those cases, a slightly noisy photo is better than a blurry or underexposed one. The exposure triangle is about trade-offs, not absolutes.

  • Exposure is a balance of aperture, shutter speed, and ISO — change one and you must adjust at least one other to maintain brightness.
  • Each setting has a primary creative effect: aperture controls depth of field, shutter controls motion blur, ISO controls noise.
  • There is no single 'correct' exposure; many combinations work, and you choose based on your creative goal.
  • The exposure triangle helps you make informed trade-offs: decide which effect matters most and adjust accordingly.
  • Raising ISO is a valid choice when you've reached the limits of aperture and shutter and still need more light.
Check yourself

Check your understanding of the exposure triangle.

1Multiple choiceChecked instantly

Which setting primarily controls the depth of field in an image?

  • AShutter speed
  • BISO
  • CAperture
  • DFocal length
2Select all that applyChecked instantly

Which of the following changes will require you to adjust another setting to maintain the same exposure? Select all that apply.

  • ADecreasing aperture from f/5.6 to f/2.8
  • BIncreasing shutter speed from 1/125 to 1/500
  • CIncreasing ISO from 400 to 800
  • DChanging the white balance
  • EChanging the lens focal length
3Short answerMarked by AI

You are photographing a landscape on a bright sunny day. You want a large depth of field (everything in focus) and the sharpest possible image. Your current settings are f/8, 1/250, ISO 100. The scene is well exposed. However, you decide to stop down the aperture further to f/16 for even more depth of field. What changes would you make to maintain the same exposure, and what trade-offs would you accept? Explain your reasoning.

Graded on Identifies the required compensation (2 stops) · Chooses an appropriate compensation method and explains why · Explains the trade-offs of the chosen method

Lesson 35

Stops: the unit of exposure change

Defines a stop as doubling or halving the light, and shows how aperture, shutter, and ISO each change in whole or third stops.

10 min3 assessments

A stop is the universal unit of exposure change in photography. It represents a doubling or halving of the amount of light reaching the sensor.

  • +1 stop = double the light
  • -1 stop = half the light

Each of the three exposure settings — aperture, shutter speed, and ISO — changes in stops, but the numbers on the dial are different:

  • Aperture (f-stops): Each full stop changes the area by a factor of √2 (e.g., f/2.8 → f/4 lets in half the light).
  • Shutter speed: Each full stop doubles or halves the exposure time (e.g., 1/125s → 1/250s lets in half the light).
  • ISO: Each full stop doubles or halves the sensor sensitivity (e.g., ISO 200 → ISO 400 is +1 stop).

Because the stop is a consistent unit, you can trade changes between settings. For example, if you close the aperture by one stop (less light), you can open the shutter by one stop (more time) or increase ISO by one stop (more sensitivity) to keep the same overall exposure.

  • A stop is a relative unit: +1 stop doubles the light, -1 stop halves it.
  • Aperture, shutter speed, and ISO each change in stops, but the numerical increments differ.
  • A full stop in shutter speed means the time is multiplied or divided by 2.
  • A full stop in ISO means the sensitivity is multiplied or divided by 2.
  • A full stop in aperture changes the area by a factor of √2, so the f-number changes by √2 per stop.
  • Because stops are universal, you can compensate a change in one setting with an equal number of stops in another setting.
Go deeper

These articles provide background on exposure and exposure compensation, including the concept of stops.

You have a correct exposure at f/8, 1/125s, ISO 200. You want to use a faster shutter speed of 1/500s to freeze motion. How many stops of shutter speed change is that? By how many stops must you open the aperture to compensate? Show the steps.

  1. 1

    1/125s → 1/250s → 1/500s

    Each step halves the exposure time, which is a decrease of **1 stop** per step. Going from 1/125s to 1/500s requires two halvings.

1/4
Try it

Drag the slider to see how many stops of change correspond to different light multipliers. Notice that each +1 stop doubles the light, and each -1 stop halves it. What multiplier does +3 stops give? What about -3 stops?

0.0 stops

Light multiplier

—

This browser cannot run the calculation (Web Workers are unavailable).

Check yourself

Check your understanding of stops.

1Numeric answerChecked instantly

You change the shutter speed from 1/250s to 1/1000s. How many stops of reduction in exposure is that? (Enter a positive number.)

2Short answerMarked by AI

Explain in your own words what a 'stop' means in photography and why it is a useful unit for exposure adjustments.

Graded on Correct definition of a stop as a doubling/halving of light · Explanation of why stops are useful for exposure adjustments

3Numeric answerChecked instantly

You need to increase exposure by 3 stops. If you are currently at ISO 200, what ISO should you set to achieve that increase? (Assume you change only ISO.)

Lesson 36

Full stops

The major intervals on each setting that double or halve exposure.

5 min3 assessments

You already know that one stop doubles or halves the light reaching your sensor. But on your camera, aperture, shutter speed, and ISO are marked in numbers like f/5.6, 1/250, and 400. These aren't randomly placed — they come from a standard set of full stops: the values that make exactly a one-stop change.

Memorizing these values lets you adjust one setting while keeping the exposure constant, or change exposure by a known amount without guesswork. For example, if your shot at f/8, 1/125, ISO 200 is slightly dark, opening up two full stops means f/4 — and you know exactly how much more light you’ll get.

Reference

Full-stop values for aperture, shutter speed, and ISO

f/1.4

Shutter speed (seconds)
1/4000
ISO
100

f/2

Shutter speed (seconds)
1/2000
ISO
200

f/2.8

Shutter speed (seconds)
1/1000
ISO
400

f/4

Shutter speed (seconds)
1/500
ISO
800

f/5.6

Shutter speed (seconds)
1/250
ISO
1600

f/8

Shutter speed (seconds)
1/125
ISO
3200

f/11

Shutter speed (seconds)
1/60
ISO
6400

f/16

Shutter speed (seconds)
1/30
ISO
12800

f/22

Shutter speed (seconds)
1/15
ISO
25600

Moving down one row on any column adds exactly one stop of light (doubles exposure). Moving up halves it. Camera controls show intermediate third-stop values (like f/3.5 or 1/320); the table above is the skeleton they sit between.

Practice
0/6 known
1 / 6
Check yourself

Check that you can recall full-stop values and apply them.

1Fill the blanksChecked instantly
2Multiple choiceChecked instantly

Your current shutter speed is 1/500 s. You want exactly four times as much light (two stops more). Which shutter speed should you set?

  • A1/1000 s
  • B1/250 s
  • C1/125 s
  • D1/2000 s
3Select all that applyChecked instantly

Which of the following pairs are exactly one stop apart in terms of exposure? (Select all that apply.)

  • AISO 200 and ISO 400
  • Bf/5.6 and f/8
  • C1/500 s and 1/250 s
  • DISO 400 and ISO 800
  • Ef/4 and f/5.6
  • F1/125 s and 1/60 s

Lesson 37

Third stops

The finer increments that allow precise tuning of exposure.

5 min4 assessments

Your meter says the shot is 1/3 stop underexposed. A full stop would fix it — but opening from 1/250 s to 1/125 s doubles motion blur, and that can wreck the picture. One stop is too blunt an instrument.

You already learned in Stops that one stop doubles or halves the light. Cameras split each stop into three equal clicks: the third stops. One click multiplies light by 2^(1/3) ≈ 1.26; two clicks by 2^(2/3) ≈ 1.59; three clicks by 2^(3/3) = 2.0, the full stop you began with. The operating rule is three clicks = one stop.

That multiplier explains why the standard numbers look arbitrary: they multiply, they don't add. ISO runs 100 → 125 → 160 → 200, each step ×1.26. The same scale underlies shutter speeds (1/500 → 1/400 → 1/320 → 1/250) and apertures (f/5.6 → f/5.0 → f/4.5 → f/4).

The payoff is precision. A picture 2/3 stop too dark needs ISO raised 400 → 640 — two clicks — not all the way to 800, which drags in extra noise. Third stops are the smallest change the meter's -2/3, -1/3, 0, +1/3, +2/3 ticks call for.

  • Three clicks on a dial set to 1/3-stop increments equal exactly one full stop: 3 × 1/3 = 1.
  • Each 1/3 stop is a ×1.26 change in light; each 2/3 stop is ×1.59. The factors multiply, never add.
  • ISO third stops: 100, 125, 160, 200, 250, 320, 400, 500, 640, 800 — every third value doubles the light.
  • Shutter third stops run 1/500 → 1/400 → 1/320 → 1/250; denominators shrink as the exposure lengthens.
  • Aperture third stops run f/5.6 → f/5.0 → f/4.5 → f/4; f-numbers shrink as the opening widens.
  • In-camera meters and exposure compensation are marked in third stops: -2/3, -1/3, 0, +1/3, +2/3.
  • Match the correction to the error: a 2/3-stop error gets 2/3 stop of change, not a full stop that alters depth of field, motion blur, or noise.
Reference

Third-stop sequences: the numbers on your dial

Shutter speed

Sequence — each step right = +1/3 stop of light
1/1000, 1/800, 1/640, 1/500, 1/400, 1/320, 1/250, 1/200, 1/160, 1/125, 1/100, 1/80, 1/60, 1/50, 1/40, 1/30

Aperture

Sequence — each step right = +1/3 stop of light
f/2.8, f/3.2, f/3.5, f/4, f/4.5, f/5.0, f/5.6, f/6.3, f/7.1, f/8, f/9, f/10, f/11, f/13, f/14, f/16

ISO

Sequence — each step right = +1/3 stop of light
100, 125, 160, 200, 250, 320, 400, 500, 640, 800, 1000, 1250, 1600, 2000, 2500, 3200

Find your current value, then count clicks right to brighten or left to darken. Three steps right is one full stop. Shutter denominators shrink left-to-right because a slower shutter stays open longer; f-numbers shrink because a wider opening lets in more light.

Practice
0/8 known
1 / 8
Check yourself

Four quick checks on the third-stop numbers.

1Multiple choiceChecked instantly

Your photo came out 1/3 stop too dark. Which single change corrects the exposure?

  • AShutter 1/250 s → 1/200 s
  • BAperture f/5.6 → f/8
  • CISO 400 → 200
  • DShutter 1/250 s → 1/320 s
2Numeric answerChecked instantly

You need a shutter speed 2/3 stop slower than 1/500 s — a longer exposure, so more light. The dial is set to third-stop clicks. Give the denominator of the shutter speed you set: for 1/400 s, answer 400.

3Select all that applyChecked instantly

More than one is correct. Which statements about third stops are true?

  • AThree clicks of a dial set to 1/3-stop increments change exposure by one full stop.
  • BEach 1/3 stop multiplies the light by about 1.26.
  • CA change of 1/3 stop multiplies light by exactly one third.
  • DISO 100 → 200 is a change of 2/3 stop.
4Fill the blanksChecked instantly

Lesson 38

Equivalent exposures

Teaches how to calculate equivalent exposures by trading stops between aperture, shutter, and ISO while maintaining overall brightness.

15 min3 assessments
  • An equivalent exposure produces the same image brightness as the original, while allowing you to change aperture, shutter speed, or ISO for creative control.
  • One stop either doubles or halves the amount of light reaching the sensor; stops are the common unit for trading exposure.
  • To maintain equivalent brightness, any stop increase in one setting must be matched by a stop decrease in another setting, so the total stops sum to zero.
  • Standard aperture stops in full‑stop increments: f/1.4, f/2, f/2.8, f/4, f/5.6, f/8, f/11, f/16, f/22.
  • Standard shutter speed stops: 1/1000, 1/500, 1/250, 1/125, 1/60, 1/30, 1/15, etc. (halving or doubling time).
  • Standard ISO stops: 100, 200, 400, 800, 1600, 3200 (halving or doubling sensitivity).
  • When exact equivalence is impossible because of camera limits, prioritise the parameter that serves your creative intent (e.g., depth of field or motion blur).
Steps
0/6

You have a current exposure that is correct. Now you want to change one setting for a creative reason — shallower depth of field, faster shutter, lower ISO noise. Follow these steps to keep the brightness identical.

  1. Record your current settings

    Write down the three values: aperture, shutter speed, and ISO. For example: f/5.6, 1/125 s, ISO 200.

    It is easy to mis‑read a shutter speed (1/125 vs 1/30) or mistake an aperture sequence. Double‑check the numbers on your camera or light meter.

    You have three distinct numbers written down.

  2. Decide which setting to change and to what value

    State the creative goal. Example: ‘I want a shallower depth of field, so I will open the aperture from f/5.6 to f/2.8.’ Or ‘I need a faster shutter to freeze motion, so I will go from 1/125 to 1/500.’

    Changing more than one parameter at a time without calculating will usually break exposure. Start with exactly one target change.

    You have a specific new value for one setting.

  3. Calculate how many stops the change represents

    Count the full‑stop steps from the current value to the target. Example: f/5.6 → f/4 = 1 stop, f/4 → f/2.8 = 1 stop. Total: +2 stops (more light). For shutter: 1/125 → 1/250 = 1 stop, 1/250 → 1/500 = 1 stop. Total: –2 stops (less light). ISO: 200 → 400 = +1 stop; 200 → 100 = –1 stop.

    Half‑stop values often appear on cameras. If your camera uses third‑stops, group them into full stops for simple trading. For this example assume full‑stop increments.

    Your result is an integer (positive or negative) representing total stops of change.

  4. Choose a compensation parameter

    You need an opposite‑sign adjustment on a different setting that cancels out the stop change. If you opened the aperture by +2 stops, you must reduce light by –2 stops via a faster shutter or a lower ISO. Consider which parameter is less critical to your image. Example: keep the same ISO, and compensate with shutter speed.

    If you compensate with ISO, be aware that decreasing ISO reduces noise but may require a very slow shutter; increasing ISO adds noise. Pick the trade‑off that best fits your scene.

    You have selected one parameter to adjust, and you know the direction (faster/slower, higher/lower).

  5. Compute the new setting value

    Apply the required number of stops to the chosen parameter. Example: you need –2 stops on shutter speed. Starting from 1/125: 1/125 → 1/250 (–1 stop) → 1/500 (–2 stops). New shutter: 1/500. Final set: f/2.8, 1/500, ISO 200.

    Make sure the new value is within the range your lens and camera support. Some aperture values may not be available at certain focal lengths.

    The new setting is a real, usable number (e.g., f/2.8 exists; 1/5000 might not on some cameras).

  6. Verify the total stops sum to zero

    Add the stops of your target change and the stops of your compensation. The total must be zero. In the example: aperture +2, shutter –2 = 0. If it is not zero, re‑examine step 3 or step 5.

    Adding signed numbers incorrectly is common. Write them down: +2 and –2. Do not forget the sign.

    Your sum equals zero, confirming the exposures are equivalent.

Checklist
0/7

Equivalent‑Exposure Field Checklist

Use this checklist after you have made an adjustment, before you take the shot.

From landscape to freeze‑motion (shutter priority)

Starting exposure: f/8, 1/250 s, ISO 400

Goal: Stop a moving subject. You want a shutter speed of 1/1000 s.

Step 1 – Stops of target change: 1/250 → 1/500 (–1 stop) → 1/1000 (–1 stop) = –2 stops (less light).

Step 2 – Choose compensation: You decide to keep ISO at 400 (no extra noise) and open the aperture to let in +2 stops of light.

Step 3 – Compute new aperture: f/8 → f/5.6 (+1 stop) → f/4 (+1 stop). New aperture: f/4.

New equivalent exposure: f/4, 1/1000 s, ISO 400.

Alternative path: Keep aperture at f/8 and raise ISO: ISO 400 → 800 (+1) → 1600 (+2). Equivalent: f/8, 1/1000 s, ISO 1600 — but expect more noise.

Verification: Aperture +2 stops, shutter –2 stops. Sum = 0. Both paths give the same brightness.

Check yourself

Test your ability to produce equivalent exposures.

1Put in orderChecked instantly

Arrange the following steps in the correct order to find an equivalent exposure when you need to change one setting.

  • AVerify that the total stop change sums to zero.
  • BChoose a different parameter to compensate with an opposite stop change.
  • CRecord the current aperture, shutter speed, and ISO.
  • DDecide which setting to change and to what new value.
  • ECalculate the number of stops of the target change.
  • FCompute the new value for the compensation parameter.
2Short answerMarked by AI

You are shooting with these settings: f/4, 1/60 s, ISO 800. You want to reduce ISO to 200 to minimise noise, but you must keep the same exposure. The aperture must stay at f/4 because you like the depth of field. Calculate the required change and write your new shutter speed. Show your stop arithmetic.

Graded on Correctly calculates the ISO stop change · Applies the opposite stop change to shutter speed correctly · States the final equivalent exposure set

3Multiple choiceChecked instantly

Which of the following pairs are equivalent exposures (same image brightness)?

  • Af/8, 1/250, ISO 400 and f/5.6, 1/500, ISO 400
  • Bf/8, 1/250, ISO 400 and f/11, 1/125, ISO 800
  • Cf/8, 1/250, ISO 400 and f/5.6, 1/125, ISO 200
  • Df/8, 1/250, ISO 400 and f/8, 1/250, ISO 200

Lesson 39

Prioritizing settings for your goal

Helps decide which setting to adjust first based on desired depth of field, motion blur, or noise, using a priority framework.

10 min3 assessments
Common misconception

“If a photo is coming out too dark, I should raise the ISO first — that's the easiest way to brighten it.”

ISO directly controls the sensor's sensitivity, so a higher number immediately makes the image lighter without touching aperture or shutter speed. It feels like a single, fast fix.

What is actually true

ISO increases noise and reduces dynamic range, damaging image quality. The correct first move depends on your creative goal: control depth of field, freeze or blur motion, or maximise light intake. ISO should be your last resort, not your first instinct, and you only raise it after you've opened the aperture and slowed the shutter as far as your subject allows.

Your choice of which setting to adjust first depends on what you want the final photo to look like. The table below maps three common goals to the order you reach for aperture, shutter speed, and ISO.

Portrait — shallow depth of field

Primary concern
Blurred background, subject separation
First setting to adjust
Aperture (wide open, e.g. f/2.8)
Second setting to adjust
Shutter speed (to maintain correct exposure)
What you sacrifice
May get motion blur if subject or camera moves

Best for Any shot where separating the subject from the background is the top priority — portraits, macro, some still life.

Action / sports — freeze motion

Primary concern
Sharp, frozen moving subject
First setting to adjust
Shutter speed (fast, e.g. 1/500 s)
Second setting to adjust
Aperture (wider to compensate for less light)
What you sacrifice
Depth of field may be shallower than planned

Best for Photographing sports, running pets, children, vehicles — any fast motion that blur would ruin.

Low-light static — minimise noise

Primary concern
Clean image with minimal digital noise
First setting to adjust
Aperture (wide open)
Second setting to adjust
Shutter speed (slow, stabilise camera)
What you sacrifice
Requires a tripod or steady support; moving subjects will blur

Best for Indoor or night scenes where you can stabilise the camera and want the cleanest possible file — landscapes, still life, architecture.

When you raise the camera, stop thinking about 'correct exposure' and start thinking about what matters most in this shot.

  • If background blur (bokeh) makes the image — reach for aperture priority (A or Av). Set the widest aperture your lens allows. The camera will automatically choose a shutter speed to keep the exposure balanced. Watch out: in bright light, a very wide aperture may force a shutter speed faster than your camera's maximum, so you might need a neutral density filter or a smaller aperture after all.
  • If the subject is moving and you need it sharp — switch to shutter priority (S or Tv). Pick a fast enough shutter speed (1/250 s for slow walking, 1/500 s for running, 1/1000 s+ for sports). The camera sets the aperture. Be aware that in dim light, the camera may open the aperture to its maximum and still the shutter speed might be too slow — that's when you raise ISO, but only after aperture is wide open.
  • If you're in dim light with a static subject (on a tripod) — go full manual or aperture priority with a wide aperture, then slow the shutter as needed. Keep ISO at its base value (usually 100 or 200). The long exposure needs a tripod, but the image stays clean. Raise ISO only if you cannot get a correct exposure even with the aperture wide open and the shutter at your longest hand-holdable speed (or your tripod's limit for moving subjects).

In every scenario, ISO is the last dial you turn. Noise is irreversible. Aperture and shutter speed trade off creative qualities (depth of field, motion blur) that you can choose; ISO only degrades the image.

Freezing a running dog at the park

Scene: Sunny afternoon, open field. Your friend's dog is sprinting after a ball. You want a sharp image with no motion blur. Background separation is secondary.

Goal: Freeze motion.

Decision:

  1. 1.Select shutter priority mode (Tv).
  2. 2.Set shutter speed to 1/500 s (fast enough for a running dog).
  3. 3.The camera meters the scene and chooses aperture f/5.6, ISO 100 (base).
  4. 4.You take the shot — the dog is crisp, the grass behind it is slightly blurred (f/5.6 gives moderate depth of field), and the image is noise-free.

What if you had chosen aperture priority instead?

  • You might set f/2.8 to blur the background more.
  • The camera would then need a faster shutter to compensate — maybe 1/2000 s, which is fine — but also a higher ISO if the light drops. In this case, the sunny light keeps ISO at 100, so it would also freeze motion, but the background would be more blurred (not your goal here). Both modes can work for this scene, but shutter priority gives you direct control over motion, which is your priority.

Trade-off: By prioritising shutter speed, you let the camera decide depth of field. If the background ended up too sharp, you could narrow the aperture later, but you'd have to increase ISO to keep the shutter speed fast — a trade-off you accept because motion is the priority.

  • Identify the single most important visual quality before you touch any dial: depth of field, motion blur, or noise.
  • For shallow depth of field, adjust aperture first (use aperture priority mode A/Av).
  • To freeze or intentionally blur motion, set shutter speed first (use shutter priority S/Tv).
  • In low light with a static subject, open the aperture and slow the shutter before raising ISO.
  • ISO is the last resort — it adds noise and reduces dynamic range, so only increase it when aperture and shutter cannot give a correct exposure.
  • Your camera's priority modes automate the secondary settings, letting you focus on the one parameter that matters for your goal.
  • Practice by visualising the outcome before you touch the dial — imagine the depth of field and motion blur you want.
Check yourself

Now verify you can prioritise settings in real situations.

1Multiple choiceChecked instantly

You are photographing a soccer player running across a sunny field. Which setting should you adjust first to ensure the player is sharp?

  • AAperture — set to the widest opening
  • BShutter speed — set to at least 1/500 s
  • CISO — raise to 800 to brighten the image
  • DWhite balance — adjust to sunny preset
2Select all that applyChecked instantly

In which of the following situations would you typically reach for aperture priority first? (Select all that apply.)

  • APortrait where you want the background completely blurred
  • BLandscape where you want everything from foreground to horizon sharp
  • CFreezing the splash of a water droplet
  • DMacro shot of a flower where only the stamen is in focus
  • ENight skyline on a tripod
3Short answerMarked by AI

You are indoors with dim lighting, photographing a still life arrangement on a table. You have a tripod. Your goal is the cleanest image with the least amount of noise. Describe the order in which you would adjust aperture, shutter speed, and ISO, and explain why each choice supports your goal.

Graded on Identifies the correct order and actions (aperture → shutter speed → ISO last) · Explains the reasoning linking to noise and light gathering · Mentions use of tripod to allow long shutter

Lesson 40

Using exposure triangle in manual mode

Step-by-step on how to set exposure manually: set one variable, adjust another to match the meter, and confirm with the histogram.

15 min3 assessments

You know the three dials: aperture, shutter speed, ISO. In manual mode (M), you set all three yourself. The camera gives you one tool to guide you: the exposure meter. It's a scale, usually from -3 to +3, with a needle that moves as you point the camera. Your job is to adjust the dials until the needle sits at 0 — that's the exposure the camera thinks is correct. But 'correct' is just a starting point. After the shot, the histogram tells you if you actually captured the detail you wanted. This node walks you through the sequence, one dial at a time.

Steps
0/7

Follow these steps to set exposure manually. The order matters: you choose aperture and ISO first, then set shutter speed to match the meter, then check the histogram.

  1. Set the mode dial to M

    Turn the mode dial to the M position. On most cameras this is a marked position on the top dial. Some cameras require you to press a lock button before turning.

    If the dial doesn't turn, look for a small lock button near the dial and press it while turning.

    The viewfinder or top LCD shows an 'M'.

  2. Choose your aperture

    Rotate the aperture ring or command dial to set the f-number. For a portrait, start around f/2.8–f/4 to blur the background. For a landscape, f/8–f/11 for more depth of field.

    A very wide aperture (e.g., f/1.4) lets in a lot of light, so you'll need a faster shutter or lower ISO to avoid overexposure.

    The aperture value appears on the display.

  3. Set ISO to base or appropriate value

    Press the ISO button (or enter the ISO menu) and set it to 100 or 200 for bright conditions. In low light, raise ISO to 800, 1600, or higher, but be aware of noise.

    ISO 6400+ can introduce visible grain. Only use it when you cannot get a correct exposure with a slower shutter or wider aperture.

    The ISO value is displayed.

  4. Half-press the shutter and read the meter

    Point the camera at your subject and press the shutter button halfway. Look at the exposure meter in the viewfinder or on the rear screen. It shows a scale from -3 to +3 with a moving indicator.

    The meter reading depends on the metering mode (evaluative, center-weighted, spot). For general use, evaluative metering works best. If the needle jumps wildly, the scene may have extreme contrast.

    The needle moves as you change composition.

  5. Adjust shutter speed to center the meter

    Turn the shutter speed dial until the needle sits at 0 on the meter scale. If the needle is to the left (negative), your shot is underexposed — slow the shutter. If to the right (positive), overexposed — speed it up.

    If your shutter speed drops below 1/60s while handholding, you risk camera shake. Instead of going slower, increase ISO or open the aperture further.

    The meter needle is centered (0).

  6. Take a test shot and review the histogram

    Press the shutter fully to capture the image. Then press the playback button and display the histogram (often by pressing the Info/Disp button repeatedly). The histogram is a graph: left edge is pure black, right edge is pure white.

    A histogram that touches the left edge means you lost shadow detail (underexposed). Touching the right edge means blown highlights (overexposed).

    The histogram is a bell curve that does not spike at either edge.

  7. Adjust and reshoot if needed

    If the histogram is clipped on the left, increase exposure: open the aperture wider, slow the shutter, or raise ISO. If clipped on the right, do the opposite. Change only one variable at a time and take another test shot.

    Changing aperture also changes depth of field, and changing shutter speed changes motion blur. Trade off consciously.

    The new histogram is well within the edges.

Checklist
0/7

Manual Exposure Field Checklist

Keep this list visible while you practice. Tick each item before moving to the next shot.

  • Set the camera to M mode to take full control of exposure.
  • Choose aperture first for depth of field, then ISO for sensitivity, then adjust shutter speed to center the meter.
  • The exposure meter scale runs from -3 to +3; 0 is the camera's recommended exposure.
  • After the shot, read the histogram: avoid clipping at either edge to preserve detail.
  • If the histogram clips, change only one variable (aperture, shutter, or ISO) at a time and reshoot.
  • When handholding, keep shutter speed at 1/60s or faster to avoid camera shake; raise ISO if needed.
Go deeper

Read these articles for deeper understanding of how metering modes work and how exposure is measured.

Check yourself

Check your understanding of the manual exposure workflow.

1Put in orderChecked instantly

Arrange these steps in the correct order for setting exposure in manual mode.

  • ASet ISO to base or appropriate value
  • BTake a test shot and review the histogram
  • CSet the mode dial to M
  • DChoose aperture for desired depth of field
  • EAdjust shutter speed to center the meter
  • FAdjust settings and reshoot if needed
2Short answerMarked by AI

You take a photo in manual mode and the histogram shows a spike touching the right edge. What does this mean and what two adjustments could you make to fix it?

Graded on Identifies that the histogram indicates overexposure (blown highlights). · Suggests two appropriate adjustments.

3ProjectMarked by AI

Take three photos of the same subject in manual mode: one correctly exposed, one intentionally underexposed by 1 stop, and one overexposed by 1 stop. For each, note the aperture, shutter speed, and ISO you used. Write a brief explanation (2-4 sentences per photo) of how you achieved the exposure compensation, referencing the exposure meter and histogram.

Graded on Provides three photos with clear exposure differences (correct, -1 stop, +1 stop). · Records aperture, shutter speed, and ISO for each photo. · Explains how they used the exposure meter and histogram to achieve the compensation.

Lesson 41

Metering modes and when to use them

You will be able to choose the right metering mode for the scene and use exposure compensation to override the meter when needed. Covers how evaluative, spot, and center-weighted metering work, and the exposure compensation scale. Prevents the camera from being fooled by backlighting or high-contrast scenes.

25 min3 assessments

Your camera's light meter assumes every scene averages to middle gray (18% reflectance). That's a useful guess—until you point the camera at a backlit person, a snow-covered field, or a stage spotlight. In those situations the meter gets the exposure wrong, and you need to tell it how to measure.

Metering modes change which part of the frame the camera weighs when calculating exposure. The three you'll use most are evaluative (matrix), center-weighted, and spot. Each one suits a different kind of scene. The skill is looking at a scene and knowing which mode to reach for—and when to use exposure compensation to nudge the result brighter or darker.

The table below compares the three main metering modes across the dimensions that actually decide your choice.

Evaluative (Matrix)

Measurement area
Entire frame, weighted by focus point and zones
Best for contrast
Low to moderate contrast (landscapes, evenly-lit scenes)
Requires exposure lock?
Usually not needed
Weakness
Fails when a small subject is much brighter or darker than the background (backlight, spotlight)

Best for Everyday shooting where nothing is drastically brighter or darker than the rest

Center-weighted

Measurement area
Large central area (60–80%), gradual fall-off to edges
Best for contrast
Moderate contrast, subject in center
Requires exposure lock?
Useful to lock exposure and recompose
Weakness
Still influenced by bright/dark edges if subject is off-center

Best for Portraits or groups where the subject fills the center and background is somewhat different

Spot

Measurement area
Tiny circle (2–5% of frame) around the active focus point
Best for contrast
High contrast, small subject, precise exposure needed
Requires exposure lock?
Essential – meter a mid-tone, lock, recompose
Weakness
Slow to use for fast-moving subjects; you must know where to place the spot

Best for Backlit subjects, moon, stage performance, snow or black dog – any scene where the main subject is nothing like middle gray

Backlit portrait at a window

Scene: A person standing in front of a bright window. The window is much brighter than the face.

Evaluative metering – Camera sees lots of bright window, calculates exposure that is too dark for the face. The face becomes a silhouette.

Center-weighted metering – If the face is in the center, the camera gives it more weight, but the bright window still pulls the exposure down. Face is still too dark, window is blown out.

Spot metering – Place the active focus point (spot) on the person's cheek (a mid-tone in the skin, avoiding the brightest highlight). The camera sets exposure based ONLY on that small area. The face is correctly exposed, the window is overexposed (which may be acceptable or even desirable).

But even after spot metering, the face might be slightly underexposed if the skin is lighter than middle gray. Dial exposure compensation +0.7 EV to brighten it without switching to manual.

Result: Correctly exposed face, controlled background brightness.

Decide

You see three scenes. For each one, choose the metering mode you'd use first, and decide whether you'd add exposure compensation.

A snowy landscape with a dark tree in the foreground. The snow covers most of the frame.

Check yourself

Test your understanding of metering modes and exposure compensation.

1Multiple choiceChecked instantly

You're photographing a white cat on a bright beach. The cat is the main subject. Which metering approach will give you the best exposure?

  • AEvaluative metering with +1 EV compensation
  • BSpot meter the cat's fur, lock, and use -0.7 EV compensation
  • CCenter-weighted metering aimed at the sand
  • DEvaluative metering with no compensation
2Select all that applyChecked instantly

Which of the following scenes would likely be best handled by spot metering? (Select all that apply.)

  • AA snow-covered mountain with no distinct subject
  • BA musician on a dark stage with a single spotlight
  • CA group portrait in open shade under a tree
  • DA backlit flower where the petals are the key
  • EA landscape with even lighting across the frame
3Short answerMarked by AI

Describe a specific scene (not used in the lesson) where you would choose center-weighted metering over evaluative. Explain what about the scene makes center-weighted the better choice, and whether you would also use exposure compensation.

Graded on Scene description and choice justification · Exposure compensation reasoning

Lesson 42

Evaluative/Matrix metering

You will be able to rely on your camera's default metering mode for most scenes and recognize when it will be misled. Covers how the camera splits the frame into zones and averages them. Prevents fighting the meter when the scene is evenly lit.

15 min3 assessments

You already know the three metering modes from the previous node. Now let's focus on the one your camera probably defaults to: evaluative (Canon) or matrix (Nikon).

Evaluative metering splits the frame into dozens or even hundreds of zones—modern cameras use up to 1,000—and reads the brightness in each one. It compares the pattern of light and dark against a built-in database of common scenes (landscape, portrait, backlit, etc.) and calculates an exposure that tries to keep detail in both highlights and shadows. The camera also weights the reading toward the active autofocus point, so the area you're focusing on gets extra influence.

This mode works well for most evenly lit scenes, which is why it's the default. But it's not magic: when the lighting is unusual—a bright sky with a dark foreground, a spotlight on a performer—the averaging can produce a muddy or blown-out image. You'll learn to recognize those situations and either use exposure compensation or switch to spot metering.

The key insight: evaluative metering is a smart average. It assumes the scene has a typical range of tones. When your scene doesn't match that assumption, you need to override it.

Which metering mode should you reach for? The table below compares evaluative, center-weighted, and spot on the factors that actually decide the choice.

Evaluative (Matrix)

How it measures
Zones + pattern recognition + AF point weighting
Best for
Most scenes with even lighting
Common failure
High-contrast scenes (backlight, spotlight)
Compensation needed
Often -1 to -2 EV for bright backgrounds

Best for General walkaround photography

Center-weighted

How it measures
Averages entire frame but gives 60–80% weight to center
Best for
Scenes where subject is centered
Common failure
Off-center subjects or very bright edges
Compensation needed
Usually -1 EV for bright backgrounds

Best for Portraits with centered subject

Spot

How it measures
Measures a small circle (1–5% of frame)
Best for
Precise exposure on a specific tone
Common failure
Requires you to know what to meter
Compensation needed
None; you meter the exact tone you want

Best for Backlit subjects or high-contrast art

Evaluative metering on a backlit portrait

Imagine you're photographing a person standing in front of a bright window. The camera's evaluative meter sees the bright window and the darker person. It averages them and suggests an exposure that keeps the window detail but makes the person too dark.

  • Evaluative reading: f/4, 1/125s, ISO 200 → person is underexposed.
  • With exposure compensation +1.5 EV: f/4, 1/40s, ISO 200 → person is well exposed, window is blown out.
  • Switching to spot metering: meter on the person's face → f/4, 1/30s, ISO 200 → correct exposure for the person, window blown.

The evaluative mode tried to preserve both, but the dynamic range was too wide. You either accept the blown window (often fine for a portrait) or use fill flash. This example shows that evaluative is a starting point, not a final answer.

Common misconception

“Evaluative metering is always correct because the camera is smart.”

It works perfectly in most everyday scenes—landscapes, street photography, evenly lit rooms—so you start to trust it completely.

What is actually true

Evaluative metering assumes the scene has a typical tonal distribution. When your scene is dominated by a very bright or very dark area (snow, backlight, spotlight), the average will be off. You must check the histogram and use exposure compensation or switch modes.

Check yourself

Test your understanding of evaluative metering.

1Multiple choiceChecked instantly

In which type of scene is evaluative metering most likely to produce an underexposed image?

  • ASnowy landscape
  • BPortrait in open shade
  • CSunset with dark foreground
  • DIndoor party with mixed lighting
2Select all that applyChecked instantly

Which of the following are true about evaluative metering? (Select 2)

  • AIt uses multiple zones to measure brightness.
  • BIt ignores the active autofocus point.
  • CIt works well for backlit scenes without compensation.
  • DIt is the default metering mode on most cameras.
3Short answerMarked by AI

Describe a specific scene where you would override evaluative metering with exposure compensation. State the scene and what compensation value (in EV) you would start with, and explain why.

Graded on Identifies a valid high-contrast scene where evaluative metering fails · Provides a reasonable exposure compensation value and justification

Lesson 43

Spot metering

You will be able to meter from a tiny area of the frame for precise exposure control in high-contrast situations. Covers how to place the spot on a mid-tone and lock exposure. Prevents the meter from being influenced by bright backgrounds.

15 min3 assessments

You're shooting a portrait against a bright window. The camera's evaluative meter sees the vast bright area and underexposes your subject, turning them into a silhouette. The problem isn't the light—it's where the meter is looking.

Spot metering solves this by measuring only a tiny circle (1–5% of the frame) centered on your active autofocus point. You decide what the meter sees. For a backlit subject, you place that spot on the person's face. The camera ignores the window and sets exposure for the skin tone. Then you lock exposure, recompose, and shoot.

This is the best metering mode when you need precise control in high-contrast scenes: portraits near windows, wildlife in dappled light, a moon against a dark sky, or a white flower on dark leaves. Spot metering is the alternative to the default evaluative mode—learn it when the automatic choice fails you.

Three metering modes, one job: to give you a correct exposure. The difference is how much of the scene they read and how much control you get.

Evaluative

Area measured
Entire frame, weighted toward focus point
Control over exposure
Low – camera decides the balance
Best for
Evenly lit landscapes, casual snapshots
Risk of error
Common – bright backgrounds underexpose subject

Best for Scenes with uniform lighting where you want to trust the camera.

Center-weighted

Area measured
Central 60–80% of frame
Control over exposure
Medium – biases center, ignores edges
Best for
Portraits with average background, product shots
Risk of error
Moderate – still influenced by bright edges

Best for Scenes where the subject is centered and the background is similar in brightness.

Spot

Area measured
1–5% circle around autofocus point
Control over exposure
High – you choose exactly what to meter
Best for
Backlit subjects, high-contrast, critical precision
Risk of error
Low – if you meter the wrong tone, exposure is off

Best for High-contrast scenes where the subject's brightness differs significantly from the background.

Saving a backlit portrait

Scene: You're indoors, a person stands in front of a sunlit window at 2 PM. The window is three stops brighter than the person's face.

Camera settings: Aperture priority, f/2.8, ISO 100. Evaluative metering gives 1/2000s – the person is a silhouette.

Step 1: Switch to spot metering (check your camera manual: often a button or menu item).

Step 2: Move the active autofocus point over the person's cheek – not the forehead (which might be in shadow), not the hair. The cheek is a mid-tone skin area.

Step 3: Half-press the shutter button. The camera locks exposure at 1/250s, f/2.8, ISO 100. The window is now +3 stops overexposed, but the face is correctly exposed.

Step 4: While holding the half-press, recompose the shot so the person is off-center. Take the picture.

Result: The person's face is properly exposed; the window blows out to white, but that's acceptable because the subject is the person. The background is not the subject.

  • Spot metering reads 1–5% of the frame, centered on the autofocus point.
  • Use it when the subject is much brighter or darker than the background.
  • Lock exposure via half-press shutter or AE-Lock button, then recompose.
  • Meter on a mid-tone (e.g., green grass, a grey card, skin) for the most reliable exposure.
  • If you meter on a white subject, the camera will underexpose; you need +1–2 stops compensation.
  • Spot metering is an alternative to evaluative mode – switch to it when the automatic mode fails.
Decide

You are photographing a white flower against a dark green leafy background. The camera is in evaluative mode and the flower appears grey in the preview. You switch to spot metering. Choose the correct action at each step.

Where should you place the spot metering circle?

Check yourself

Check your understanding of spot metering.

1Multiple choiceChecked instantly

In which scenario is spot metering the best choice among the metering modes?

  • AAn evenly lit landscape with consistent light
  • BA backlit portrait where the subject's face is shaded
  • CA group photo in open shade
  • DA product shot on a white background
2Select all that applyChecked instantly

Which of the following are true about spot metering? (Select all that apply.)

  • AIt measures the entire frame and averages the light.
  • BIt measures a small area of 1–5% of the frame.
  • CIt is ideal for high-contrast scenes where the subject is not the average brightness.
  • DIt always gives the correct exposure without any adjustment.
  • EIt works best when you meter on a mid-tone surface.
3Short answerMarked by AI

You are photographing a white wedding dress against a dark forest background. The camera's evaluative meter makes the dress appear grey in the preview. Describe the steps you would take using spot metering to correctly expose the dress as white, and explain any compensation you might need.

Graded on Describes correct spot metering action (placement and lock) · Explains exposure compensation for bright subjects

Lesson 44

Center-weighted metering

You will be able to use the classic metering pattern that prioritizes the center of the frame. Covers how it differs from matrix and spot, and the scenes where it still excels. Prevents over-reliance on newer modes when the subject is centered.

15 min3 assessments

You know there are three main metering modes. Now get specific about the one that has saved more portraits than any algorithm: center-weighted metering.

It does not guess. It does not average the whole frame equally. It reads the entire scene but gives 60 to 80 percent of the exposure weight to a central circle – typically 8–12 mm in diameter on the focusing screen. The rest of the frame contributes the remainder. This makes it predictable: point the center at your subject, and the meter gives you that brightness, tempered slightly by the background.

Matrix/evaluative metering uses a database of thousands of scenes to guess what you are photographing. That is brilliant – until it is wrong. A bright sky behind a centered portrait fools matrix into underexposing the face. Center-weighted does not get fooled: the face dominates the weighted average.

Compared to spot metering, center-weighted is forgiving. A spot reads a tiny area (2–4% of the frame) and requires precise placement; move it off the subject and you get a wildly different reading. Center-weighted covers a larger area, so small composition changes do not swing the exposure.

These three axes are the ones that matter when you are standing in front of a scene deciding which metering mode to use.

Matrix / Evaluative

Metering area
Entire frame, zoned with pattern recognition
Response to bright background
Often underexposes a centered subject if background is very bright
Response to off-center subject
Can track off-center subjects through scene analysis
Predictability
Lower – uses proprietary algorithms, hard to anticipate
When to use
General scenes with even lighting; landscapes; casual snapshots

Best for Scenes where you want the camera to decide automatically and you have no specific subject priority

Center-weighted

Metering area
Large central circle (60-80% weight), rest of frame contributes
Response to bright background
Keeps centered subject properly exposed; background may blow out but face stays
Response to off-center subject
Fails – gives priority to whatever is in the center, ignoring subject if not centered
Predictability
High – you know the center will dominate the reading
When to use
Centered portraits, especially against bright windows or backlight; stage performers

Best for Any centered subject where you want consistent, predictable exposure without exposure compensation

Spot

Metering area
Tiny circle (2-4% of frame) at the active AF point
Response to bright background
Reads exactly the small area you aim; background is ignored
Response to off-center subject
Works if you keep the spot on the subject; fails instantly if you miss
Predictability
Very high – only reads what you point at
When to use
High-contrast scenes where you need precise exposure on a specific detail

Best for Situations where you can carefully place the spot and lock exposure (e.g., wildlife, backlit portrait with AE lock)

Portrait against a bright window

Scene: A friend stands 2 metres from a large window on a sunny afternoon. The window is your background; your friend's face is centered in the frame. You want the face correctly exposed; you do not care if the window is overexposed.

Camera settings fixed: Aperture priority, f/2.8, ISO 200.

Metering modeShutter speed resultFace exposureWindow exposure
Matrix1/60 sUnderexposed (face is 2 stops dark)Correctly exposed
Center-weighted1/125 sCorrectly exposedOverexposed (blown out)
Spot (on face)1/125 sCorrectly exposedOverexposed

Matrix tried to balance the entire frame, so it metered for the bright window and underexposed the face. Center-weighted gave 80% of the weight to the central area where the face is, so it exposed for the face. Spot also worked but required you to keep the spot exactly on the face – a slight recomposition would shift the reading.

Why center-weighted wins here: It is forgiving – you do not have to lock exposure or keep a tiny dot on the subject. Point the center at the face and shoot.

Common misconception

“Center-weighted metering is obsolete. Modern matrix/evaluative systems are better everywhere.”

Matrix modes use complex scene analysis and often produce correct exposures in difficult conditions. They are the default on most cameras, so people trust them.

What is actually true

Center-weighted is not obsolete; it is a specialist tool that excels where matrix fails. Matrix can misinterpret high-contrast scenes (backlight, bright sky behind subject) because it tries to preserve detail everywhere. Center-weighted deliberately sacrifices background detail for subject exposure. Many professional portrait and event photographers still use center-weighted as their default because its behavior is predictable – you know that whatever you put in the center will be the primary influence on exposure.

Decide

You are photographing a singer performing on a dark stage with a single spotlight. The singer is centered in the frame. The background is pitch black. You want the singer's face properly exposed and the background to go black naturally. You do not want to use exposure compensation.

Which metering mode do you choose first?

  • Center-weighted metering gives 60–80% of exposure weight to a central circle, making it predictable and consistent.
  • It excels with centered subjects against bright or contrasty backgrounds, where matrix modes often underexpose.
  • It is more forgiving than spot metering because small composition changes do not swing the exposure wildly.
  • It does not handle off-center subjects well; for those, use spot or matrix with exposure compensation.
  • Many portrait and event photographers choose center-weighted as their default because its behavior is easy to anticipate.
Check yourself

Check your understanding of when to reach for center-weighted metering.

1Multiple choiceChecked instantly

You are photographing a friend who is centered in the frame, standing in front of a bright, sunlit white wall. You want your friend's face correctly exposed and you do not care if the wall is overexposed. Which metering mode will give you that result most reliably without needing exposure compensation?

  • AMatrix/evaluative
  • BCenter-weighted
  • CSpot metering
  • DHighlight-weighted
2Select all that applyChecked instantly

In which of the following situations is center-weighted metering preferable to matrix/evaluative metering? Select all that apply.

  • AThe main subject is centered in the frame.
  • BYou want a predictable exposure that will not change if the background shifts slightly.
  • CThe background is significantly brighter than the subject.
  • DThe subject is moving quickly and often near the edge of the frame.
  • EYou need to meter a very small detail, like a distant bird's eye.
3Short answerMarked by AI

Describe a specific scene where using center-weighted metering would give a better exposure than matrix/evaluative metering. In your answer, explain (1) the scene, (2) what matrix would likely do wrong, and (3) why center-weighted avoids that problem.

Graded on Scene description with clear placement of subject relative to background · Explanation of matrix/evaluative failure · Why center-weighted avoids the problem

Lesson 45

Exposure compensation

You will be able to dial in exposure compensation to override the meter's recommendation without switching to full manual. Covers the +/- scale, when to use it, and how it interacts with metering modes. Prevents the camera from underexposing snow or overexposing dark subjects.

15 min2 assessments

Your camera's light meter is designed to make everything average out to middle gray. That works well for most scenes, but it fails when the scene is mostly white (snow, sand, a white dress) or mostly black (a dark forest, a black cat on a dark sofa). The meter sees all that white and thinks, "Too bright!" — so it underexposes the shot, turning snow gray. Conversely, it sees black and thinks, "Too dark!" — so it overexposes, turning shadows muddy.

Exposure compensation is the tool that fixes this without switching to full manual. It's a dial, usually marked with a ± symbol, that lets you tell the camera, "Add light" (positive compensation) or "Subtract light" (negative compensation). The camera stays in Program, Aperture Priority, or Shutter Priority mode, and it adjusts the other parameters to make the picture brighter or darker by the amount you set.

You already know how to pick a metering mode. Now you'll learn when to override its recommendation and by how much.

Two Classic Scenes That Fool the Meter

Scene 1: A snowy landscape at noon

  • Meter reading: f/8 at 1/800 s, ISO 100 (evaluative metering)
  • The camera tries to make the snow 18% gray. The snow is actually white, so the shot looks dark.
  • Apply +1.0 EV compensation: the camera adjusts to f/8 at 1/400 s (one stop slower). The snow looks white, not gray.

Scene 2: A black cat on a dark sofa

  • Meter reading: f/4 at 1/60 s, ISO 800 (spot metering on the cat)
  • The camera sees the dark fur and tries to brighten it to middle gray, overexposing the cat to a washed-out brown.
  • Apply -1.0 EV compensation: the camera adjusts to f/4 at 1/125 s (one stop faster). The cat remains black, and the sofa details are preserved.
Steps
0/5

Most cameras use a similar sequence to dial in exposure compensation. The exact button may be labeled ± or have a dedicated dial. This walkthrough assumes a Nikon D7500-style body, but the logic is the same across brands.

  1. Frame the scene and half-press the shutter

    Look through the viewfinder and compose your shot. Press the shutter button halfway to activate the meter. You'll see the exposure scale (usually a -3...0...+3 scale) at the bottom of the viewfinder. The current reading is shown by a tick mark or a bar. Note where it sits: if the left side is lit, the camera thinks the scene is too bright (underexposed); if the right side, it thinks it's too dark (overexposed).

    If the scale is not visible, you may need to press the shutter button again or check that the camera is in a semi-auto mode (P, A, S, or scene modes that allow EC). Not all modes support EC.

    The exposure scale is visible and the tick mark is stationary.

  2. Locate the exposure compensation button

    Look for a button marked with a ± symbol (plus/minus) on the top plate or near the shutter release. On many cameras it's the same button you use to adjust aperture. On Nikon D7500, it's a dedicated button just behind the shutter release. On Canon, it's often a button on the top with a ± icon.

    Do not confuse with the flash compensation button. Flash compensation adjusts flash power only, not overall exposure.

    You can see the ± symbol. If you press it now, the exposure scale should blink or change color to indicate it's active.

  3. Hold the button and rotate the main command dial

    While holding the ± button, rotate the main dial (usually near the shutter release) to the right for positive compensation (add light) or to the left for negative (subtract light). As you turn, watch the exposure scale move: the tick mark shifts to the right (positive) or left (negative). Each click is typically 1/3 EV. For a snowy scene, aim for +1.0 EV (three clicks if each is 1/3).

    If you turn the dial and nothing happens, you may be turning the wrong dial (e.g., the sub-command dial that controls aperture). Also, some cameras require you to release the button after turning; others require you to hold it. Check your camera manual.

    The exposure scale shows the desired compensation value (e.g., +1.0). The value is also shown in the viewfinder or on the top LCD.

  4. Take a test shot and review the histogram

    Press the shutter fully to take the picture. Immediately review the image on the LCD and check the histogram. The histogram should be well-distributed, not clipped at the left (underexposed) or right (overexposed). For a snowy scene, the histogram should have a peak on the right side (bright) but not touching the right edge.

    Don't rely solely on the rear LCD preview; it's often too bright or too dim. Use the histogram for accurate exposure judgment.

    The histogram is not clipped on either side. The image looks as you intended (snow is white, cat is black).

  5. Reset compensation to zero when you change scenes

    After you finish shooting the snow scene, dial the compensation back to 0.0. Otherwise, your next normal scene will be overexposed. To reset, hold the ± button and rotate the dial until the scale shows 0.0. Many cameras also have a dedicated button to reset exposure compensation.

    Forgetting to reset is the most common mistake. Develop a habit of checking the compensation value before every new scene.

    The exposure scale shows 0.0. The next test shot has a histogram centered in the middle, not shifted.

Checklist
0/6

Exposure Compensation Field Checklist

Tape this checklist to the back of your camera strap until it becomes second nature.

  • Exposure compensation overrides the meter in semi-auto modes (P, A, S) without switching to manual.
  • Positive compensation (+EV) adds light; use it for bright scenes like snow, sand, or white clothing.
  • Negative compensation (-EV) subtracts light; use it for dark scenes like black subjects or dark forests.
  • Each increment (1/3 EV, 1/2 EV, 1 EV) doubles or halves the light reaching the sensor.
  • The compensation value persists across shots until you reset it to 0.0.
  • Always check the histogram, not the LCD preview, to judge exposure accuracy.
  • Compensation affects the shutter speed or aperture depending on the mode (Aperture Priority changes shutter, Shutter Priority changes aperture).
Check yourself

Check your understanding of exposure compensation with these questions.

1Put in orderChecked instantly

Arrange the following steps in the correct order to dial in exposure compensation for a snowy scene. (Assume you are already in Aperture Priority mode.)

  • AHold the ± button and rotate the main dial to +1.0 EV.
  • BHalf-press the shutter to activate the meter and see the exposure scale.
  • CTake a test shot and review the histogram.
  • DReset compensation to 0.0 after finishing the snow scene.
2Short answerMarked by AI

Explain why a scene with a lot of white snow causes the camera's meter to underexpose the image, and describe how exposure compensation corrects this. (2-4 sentences)

Graded on Identifies the meter's assumption (18% gray or average brightness). · Describes the correct compensation direction and effect. · Uses terminology correctly (EV, compensation, meter).

Lesson 46

Manual mode in practice: a step-by-step shoot

You will walk through a complete manual exposure for a static scene, setting aperture, shutter, and ISO in the correct order. Covers the sequence: set ISO for conditions, choose aperture for depth, set shutter for exposure, check the meter, and refine. Prevents the paralysis of not knowing where to start.

35 min3 assessments

You've switched the dial to M. The meter is showing -2. The lens is at f/4. The shutter is 1/1000. You have no idea what to touch first. Manual mode doesn't mean you guess; it means you follow a sequence that locks in one variable at a time, starting with the one your camera can't change for you: ISO. This walkthrough steps you through a static scene so you build a repeatable habit — and stop freezing up in front of the viewfinder.

Steps
0/5

We'll shoot a fruit bowl near a window. The light is steady, the subject is still. Follow every step in order. If you skip ahead, you'll chase settings in circles.

  1. Assess ambient light and set ISO

    Look at the scene. Indoors near a window is moderate light. Turn the ISO dial to 400 — a good compromise between sensitivity and noise for this level of light.

    ISO reads 400 on the top display or in the viewfinder.

  2. Choose aperture for depth of field

    You want the whole bowl in focus. Set the aperture ring or command dial to f/8. This mid-range aperture gives generous depth of field while keeping the lens sharp.

    If you stop down to f/16 for even more depth, you'll need a much slower shutter. Be prepared to brace the camera or use a support.

    Aperture displays f/8 in the viewfinder.

  3. Set shutter speed using the meter

    Press the shutter button halfway to wake the meter. Look at the meter scale in the viewfinder or rear display. Rotate the shutter speed dial until the indicator rests at 0 (the centre mark). With ISO 400 and f/8, you'll likely land around 1/60 s.

    Meter bar shows exactly 0 — no overexposure or underexposure indicated.

  4. Take a test shot and review the histogram

    Press fully to capture the image. Immediately press the Info or Display button to bring up the histogram. A centred bell shape means good exposure. If the graph touches the left edge, you underexposed; if it touches the right edge, you overexposed.

    Do not trust the rear LCD brightness — it lies. The histogram is objective.

    Histogram shows no clipping on either side; the curve is roughly centred.

  5. Refine one variable at a time

    If underexposed, slow the shutter to 1/30 s (one stop slower) and re-meter. If overexposed, speed it up to 1/125 s. If you need more depth, change aperture to f/11 and re-adjust shutter so the meter returns to 0. Never change two settings at once — you won't know which one fixed the problem.

    After each change, verify the meter reads 0 and the histogram is centred.

Checklist
0/5

Manual mode field checklist

Keep this list visible when you practise. Tick each item before moving on.

Outdoor portrait — applying the sequence

Scene: A friend standing under a tree on an overcast day.

Step 1 – ISO: Overcast sky is moderate light, so set ISO 200.

Step 2 – Aperture: You want the background slightly blurred. Choose aperture f/5.6.

Step 3 – Shutter: Meter suggests 1/125 s. Turn the dial until the indicator hits 0. Your settings are now ISO 200, f/5.6, 1/125 s.

Step 4 – Test: Take a shot. The histogram is slightly left of centre — the face is underexposed because the camera metered the whole tree.

Step 5 – Refine: Slow the shutter to 1/60 s (one stop). Re-meter reads 0. Take another shot; the histogram is now centred. You're done.

  • Set ISO first for the light conditions — it's the only setting you cannot change without restarting the exposure triangle.
  • Choose aperture second to control depth of field (f/2.8 blurs the background, f/11 keeps everything sharp).
  • Set shutter speed last to align the meter to 0.
  • Always review the histogram after your first shot; the meter can be fooled by bright or dark subjects.
  • When tweaking exposure, change one variable at a time — if you move two dials, you won't know what worked.
Check yourself

Check your understanding of the manual mode sequence.

1Put in orderChecked instantly

Arrange the following steps in the correct order for setting manual exposure on a static scene.

  • ASet ISO for the light conditions
  • BChoose aperture for desired depth of field
  • CAdjust shutter speed until the meter reads 0
  • DTake a test shot and review the histogram
  • ERefine one variable at a time
  • FSwitch your camera to manual mode (M)
2Short answerMarked by AI

You are inside a room with dim overhead lights. Your current settings are: shutter 1/30 s, aperture f/2.8, ISO 3200. The shot is blurry and full of noise. In 2–4 sentences, explain exactly what changes you would make and in what order to get a sharp, low‑noise image. Provide concrete numbers where possible.

Graded on Identifies the root causes (blur from slow shutter, noise from high ISO) · Proposes a correct adjustment sequence with specific numbers

Project

Manual Exposure Project: Still Life

Set up a small still life at home — a bowl of fruit, a few books, or desk items. Use manual mode to capture three shots of the same scene with noticeably different depths of field (e.g., f/2.8, f/8, f/16) while keeping the overall exposure consistent. For each shot, record your ISO, aperture, shutter speed, and the shape of the histogram.

Deliverables:

  1. 1.Three JPEG images (EXIF intact) OR a text file listing the settings for each shot.
  2. 2.A short paragraph (3–5 sentences) explaining which aperture gave which depth‑of‑field effect and why you might use each one in a real shoot.

"Done" means the three shots differ visibly in depth of field but have similar overall brightness.

Deliverables

  • 01Three images with different apertures (EXIF preserved or settings recorded separately)
  • 02Settings record: ISO, aperture, shutter speed for each image
  • 03Reflection paragraph on depth of field differences
ProjectMarked by AI

Complete the 'Manual Exposure Project: Still Life' as described above. Submit the three images, the settings record, and the reflection paragraph.

Graded on Exposure consistency across the three shots · Depth of field variation is clearly visible · Settings record is complete and accurate

Lesson 47

Setting ISO for conditions

Learn how to choose the appropriate ISO based on ambient light, balancing noise and sensitivity for the scene.

12 min3 assessments

The first dial in the manual sequence is the one that punishes mistakes later: if ISO is wrong, your shutter speed is wrong before you have even chosen it. ISO sets how sensitive the sensor is to light. At its base value — usually 100 — the sensor collects light with the least electronic noise. Every time you double ISO (100 → 200 → 400), the sensor needs half as much light for the same exposure, and each doubling buys you one extra stop of shutter speed or one smaller aperture. The cost is noise: random brightness speckle and colour blotches that appear first in shadow areas and on flat surfaces like a sky or a wall.

So ISO has two opposite jobs: keep it as low as you can for clean detail, but raise it as soon as a low setting forces a shutter speed you cannot hold or a subject you cannot freeze. You already run the manual sequence ISO → aperture → shutter; this node is about picking that first number for the conditions in front of you.

  • Base ISO (usually 100) gives the least noise and is the right starting point in any light.
  • Each doubling of ISO — 100→200→400→800 — gains one stop of light sensitivity and lets you double the shutter speed.
  • Raising ISO amplifies the sensor signal, which also amplifies noise; it does not add light to the scene.
  • Raise ISO only when the meter's correct shutter speed is slower than you can hold — roughly 1/focal length in seconds.
  • If the shutter is already fast enough, leave ISO alone; a higher setting buys nothing but grain.
  • Auto ISO is a stopgap for changing light: it keeps your aperture and shutter where you set them while adjusting sensitivity for you.

Sunny street vs dim cafe

Sunny street: ISO 100, aperture f/8, the meter gives 1/500 s. The handheld threshold for a 35 mm lens is about 1/35 s, so 1/500 s is plenty — base ISO stays.

Dim cafe two hours later: same 35 mm lens, aperture f/2.8, ISO 100. The meter asks for 1/4 s, far below the 1/35 s you can hold. Every doubling of ISO halves the required shutter time:

  • ISO 100 → 1/4 s
  • ISO 200 → 1/8 s
  • ISO 400 → 1/16 s
  • ISO 800 → 1/32 s
  • ISO 1600 → 1/64 s

At ISO 1600 the shutter speed passes 1/35 s, so you get a sharp handheld shot. The price: shadows at 1600 will show visible speckle, but a blurred photo at ISO 100 is unusable; a noisy photo at ISO 1600 is usable. If the cafe has a table you can rest the camera on, drop back to ISO 400 and 1/16 s instead — the support removes the need for a fast shutter, so ISO can stay lower.

Steps
0/7

This is the ISO-first sequence for a handheld shot. Do it in this order.

  1. Set ISO to its base value

    Put the camera in M and set ISO to 100 (or the camera's lowest native value).

    If you leave ISO from a previous dark shoot, your bright scene will overexpose before you touch anything.

    The ISO readout shows your base value.

  2. Frame and choose aperture for depth

    Compose, then set the aperture that gives the depth of field you want — wide open for a blurred background, smaller for more in focus.

    Changing aperture later changes the shutter speed the meter wants, so lock your depth choice first.

    Aperture is where you want it and you haven't touched shutter yet.

  3. Set shutter to centre the meter

    Turn the shutter dial until the exposure indicator sits at 0. Note the shutter speed you land on.

    If the meter won't centre because you're at the limits of the shutter range, the scene is too bright or too dark for this ISO + aperture pair.

    Meter reads 0 and you can name the shutter speed.

  4. Compare shutter speed with your handheld threshold

    Your threshold is about 1/focal length in seconds — for a 50 mm lens, 1/50 s. If your shutter is faster than this, keep base ISO and stop: you're done.

    Don't skip the comparison; a 1/30 s shot on a 100 mm lens looks sharp in the viewfinder and blurs on the desk.

    You know whether 1/x is above or below 1/focal length.

  5. Double ISO until the shutter clears the threshold

    Raise ISO one stop at a time, re-centring the meter each time by turning the shutter dial faster, until the shutter speed is at or above 1/focal length.

    Jumping straight to ISO 6400 adds noise you don't need; the minimum ISO that works is the right ISO.

    Shutter speed is now at or above the threshold and the meter is centred.

  6. Check the exposure, not just the brightness

    Look at the histogram or playback and confirm the shot is correctly exposed at the new ISO.

    Raising ISO looks like it brightens the image, but the camera is just amplifying — an underexposed frame at ISO 3200 is still underexposed, now with extra noise.

    The histogram reaches both edges without clipping.

  7. Inspect shadows for noise before leaving the scene

    Zoom into playback at 100% on a dark area or a smooth surface and look for speckle and colour blotches.

    Noise hides at thumbnail size; you only notice it on a monitor later, by which time you can't re-shoot.

    Shadows look clean enough for your use — if not, lower ISO and steady the camera or open the aperture.

Checklist
0/7

ISO setting field checklist

The order matters: ISO before aperture, aperture before shutter. If the light changes mid-shoot, start again at step 1.

Check yourself

Three quick checks before you shoot.

1Put in orderChecked instantly

Arrange these steps of setting ISO in manual mode in the order you perform them.

  • ASet exposure mode to M and ISO to the base value of 100
  • BChoose the aperture for your intended depth of field
  • CRead the meter and set the shutter speed for a centred exposure
  • DIf the shutter speed is below your handheld threshold, double ISO until it reaches it
  • EInspect shadows at playback zoom for noise before moving on
2Numeric answerChecked instantly

With a 50 mm lens you need at least 1/50 s to shoot handheld. At ISO 100 and f/2.8, the meter gives 1/4 s for a correct exposure. Each doubling of ISO halves the required shutter time. What is the lowest ISO that lets you use a shutter speed of at least 1/50 s? Answer with the ISO number only.

3Short answerMarked by AI

At dusk you are photographing a street performer who keeps moving. At ISO 100 and f/4, the meter gives 1/15 s, but freezing the motion requires 1/250 s. You can raise ISO, open the aperture to f/1.8, or do both. Which do you adjust first, to what setting, and what trade-off are you accepting? Answer in 2–4 sentences.

Graded on Names the motion constraint and adjusts shutter first · Proposes concrete settings and names the trade-off accepted

Lesson 48

Choosing aperture for depth of field

Understand how aperture controls depth of field and learn to select an aperture that achieves the desired sharpness or blur.

15 min3 assessments

You've learned the order: set ISO, choose aperture, set shutter. Now it's time to master the second step. Aperture doesn't just control how much light enters the lens—it controls how much of your scene is in focus. This zone of acceptable sharpness is called depth of field. A wide aperture (small f-number like f/2.8) gives a shallow depth of field: only the subject is sharp, and the background melts into blur. A narrow aperture (large f-number like f/16) gives a deep depth of field: everything from near to far appears sharp. The choice is creative: do you want to isolate your subject or show the whole scene? But there's a catch: a narrow aperture lets in less light, so you'll need a slower shutter or higher ISO to compensate. That trade-off is why you choose aperture deliberately, not randomly.

How aperture choice affects depth of field and light

Analogy

Think of aperture like the pupil of your eye. In bright sunlight, your pupil constricts (small aperture), and you can see clearly from near to far—that's deep depth of field. In dim light, your pupil dilates (large aperture), and you focus only on what you're looking at; everything else blurs—that's shallow depth of field. You're already using this concept every day.

Where the analogy breaks down

This analogy breaks down because the eye's depth of field is also affected by the lens's focal length and the distance to the subject, and the eye adjusts automatically, whereas in photography you choose the aperture deliberately. Also, the eye's aperture changes continuously, not in discrete f-stops.

  • Aperture controls depth of field: the zone of acceptable sharpness in front of and behind the focus point.
  • A small f-number (e.g., f/2.8) means a wide aperture and shallow depth of field—good for portraits and isolating subjects.
  • A large f-number (e.g., f/16) means a narrow aperture and deep depth of field—good for landscapes and group shots.
  • Aperture also controls exposure: narrow apertures let in less light, requiring slower shutter speeds or higher ISO to maintain brightness.
  • Depth of field is also influenced by focal length and distance to subject, but aperture is the most direct control you have in the field.

Choosing aperture for a portrait vs. a landscape

Portrait: You want a sharp subject and a blurred background. Set your lens to f/2.8. With a 50mm lens focused on a subject 2 meters away, the depth of field is approximately 0.2 meters (20 cm). Only the subject's face and shoulders are in focus; the background becomes a soft wash of color.

Landscape: You want everything from a foreground rock to distant mountains sharp. Set your lens to f/16. Focus at the hyperfocal distance (about 1.5 meters for a 24mm lens at f/16). The depth of field extends from roughly 0.75 meters to infinity. Every detail is crisp.

Go deeper

For a deeper mathematical treatment of depth of field and the factors that influence it, consult these articles.

Check yourself

Test your understanding of aperture and depth of field.

1Multiple choiceChecked instantly

Which aperture setting will produce the shallowest depth of field?

  • Af/2.8
  • Bf/5.6
  • Cf/11
  • Df/16
2Short answerMarked by AI

Explain why a photographer might choose f/16 for a landscape but f/2.8 for a portrait. Reference the concept of depth of field.

Graded on Correctly identifies depth of field difference · Connects choice to creative intent

3Short answerMarked by AI

You are photographing a flower in a garden. You want the flower sharp but the background leaves blurred. You are using a 50mm lens. Which aperture would you choose and why? If the background is still too sharp, what could you do?

Graded on Selects appropriate aperture · Provides a valid adjustment · Explains reasoning

Lesson 49

Setting shutter speed for exposure

Learn how to set shutter speed to achieve correct exposure given the chosen ISO and aperture, while avoiding motion blur.

12 min3 assessments

You walk through a complete manual exposure in the previous node, setting ISO for the light, aperture for depth, then shutter speed to match the meter. Now the question is: how do you pick the right shutter speed value when the meter gives you one, and avoid blur at the same time?

The meter tells you the shutter speed that delivers correct exposure for your chosen ISO and aperture. But that number might be 1/15 s with a 200 mm lens — fine for a tripod, but hand‑held camera shake will blur every detail. Or the number might be 1/60 s while your subject is running — motion blur will soften the image.

Shutter speed has two effects:

  • Exposure — longer = more light.
  • Blur control — faster = less camera shake and less subject motion blur.

When the metered speed is too slow for your shooting situation, you cannot just dial a faster speed — that would underexpose the image. You have to go back: raise ISO or open the aperture, then let the meter give you a new, faster shutter speed. That loop — set ISO + aperture, read shutter, check if it’s fast enough, adjust if not, reset shutter — is the core procedure this node teaches.

Steps
0/6

Follow these steps while you’re looking through the viewfinder. The sequence assumes you have already set ISO and aperture.

  1. Frame and half‑press the shutter

    Point the camera at your scene and press the shutter button halfway. This activates the built‑in light meter. In the viewfinder or on the rear screen, you’ll see a scale with a tick mark — the exposure meter.

    If the meter doesn’t appear, the camera may be in a semi‑automatic mode (Av, Tv) — switch to M (Manual).

    A moving indicator appears on the meter scale.

  2. Read the meter and adjust shutter speed

    Rotate the shutter‑speed dial (or the main command dial on mirrorless bodies) until the indicator sits at the centre of the scale — the zero mark. That means your shutter speed, together with the preset ISO and aperture, gives a correct exposure according to the camera’s meter.

    In very dark or very bright scenes the meter may blink — it cannot find any shutter speed at that ISO and aperture. You must change ISO or aperture first.

    The meter indicates zero. The displayed shutter speed is no longer blinking.

  3. Check the reciprocal rule (handshake prevention)

    Look at the focal length of your lens (e.g., 50 mm, 200 mm). Your shutter speed number must be at least 1 / focal length in seconds. For a 50 mm lens, that’s 1/50 s; for 200 mm, it’s 1/200 s. If your current speed is slower, camera shake will blur the shot.

    The reciprocal rule applies to full‑frame and 35 mm equivalent. If you use a crop‑sensor camera, multiply the focal length by the crop factor (e.g., 1.5× for APS‑C) before applying the rule.

    Your shutter speed is numerically ≥ the denominator of 1/focal length.

  4. Check subject motion

    If your subject is moving, you need an even faster speed. Guidelines:

    • Slow walking: 1/125 s
    • Running / children: 1/250 s
    • Fast sports / birds: 1/500 s or faster

    If your metered speed is below these numbers, proceed to the next step.

    A subject that is still but your hands shake still requires the reciprocal rule — subject motion is separate.

  5. Adjust ISO or aperture if the shutter is too slow

    If the shutter speed fails either check (step 3 or step 4), you cannot simply dial a faster speed. Increase ISO (more light sensitivity) or open the aperture (smaller f‑number). Each full stop you change (e.g., ISO 800→1600 or f/5.6→f/4) doubles the shutter speed. After the change, repeat from step 1: half‑press and reset the shutter dial until the meter reads zero again.

    Do not change aperture if you need a specific depth of field — raise ISO instead. Do not raise ISO beyond your acceptable noise level.

    After adjusting, the meter still reads zero and the shutter speed now passes both checks.

  6. Take a test shot and review

    Press the shutter fully. Review the image on screen. Check the histogram for clipping (blown highlights or blocked shadows). Zoom in on critical details (eyes, text) to confirm they are sharp — no visible blur from camera shake or motion.

    The rear screen looks brighter than the actual photo. Use the histogram, not the screen brightness, to judge exposure.

    Histogram bars do not pile against the left or right edge. Zoomed‑in details show crisp edges.

Checklist
0/6

Before every manual‑mode shot, tick these:

Check items 1–4 before pressing the shutter; check items 5–6 after the first test shot.

Shutter speed loop in practice: a 200 mm portrait

Setup: You’re shooting a seated portrait in shade. ISO already set to 400 for clean quality. Aperture f/8 for sharpness. Lens is 200 mm.

Step 1: Half‑press. The meter says 1/30 s is correct.

Step 2: Check reciprocal rule – 1/200 s needed for 200 mm, but you have only 1/30 s. Camera shake is guaranteed.

Step 3: You cannot simply spin the dial to 1/200 s — that would underexpose by nearly 3 stops. You must change ISO or aperture.

  • Option A: Raise ISO from 400 to 3200 (3 stops). With ISO 3200 and f/8, the meter now says 1/250 s — passes both the reciprocal rule and general subject motion. Image will be noisier but sharp.
  • Option B: Open aperture from f/8 to f/4 (2 stops). With f/4 and ISO 400, the meter says 1/125 s — still below 1/200 s. Not enough alone, so combine: f/4 and ISO 800 gives 1/250 s.

Decision: You choose Option A (ISO 3200, f/8, 1/250 s) to keep maximum depth of field and avoid changing lenses. Take a test shot — histogram clean, face sharp at 100% zoom.

  • Shutter speed is set last in the manual‑mode sequence: after fixing ISO and aperture, dial shutter until the meter reads zero.
  • The reciprocal rule (shutter ≥ 1/focal length) prevents camera shake for hand‑held shots.
  • For moving subjects, use at least 1/250 s; faster for sports or fast action.
  • If the metered shutter speed is too slow, you must increase ISO or open the aperture — never set a faster shutter without compensating, because that underexposes the image.
  • After changing ISO or aperture, always re‑set the shutter speed with the meter loop (half‑press → adjust → confirm zero).
  • Take a test shot and review the histogram and sharpness; visible blur or clipping shows you need to re‑enter the loop.
Go deeper

Read these for a deeper look at shutter speed mechanics, leaf vs. focal‑plane shutters, and the history of fast‑action photography.

Check yourself

Now test your understanding of the shutter‑speed setting procedure.

1Put in orderChecked instantly

Arrange these actions in the correct sequence for setting shutter speed in manual mode, after ISO and aperture are already chosen.

  • AHalf-press the shutter to activate the light meter.
  • BRotate the shutter-speed dial until the meter indicator reaches zero.
  • CCheck that the shutter speed is at least 1 / focal length (reciprocal rule).
  • DIf the subject is moving, verify that the shutter speed is fast enough (e.g., ≥ 1/250 s).
  • ETake a test shot and check the histogram and sharpness.
2Short answerMarked by AI

Explain the reciprocal rule for handholding a camera, and describe what you should do if the light meter indicates a shutter speed slower than the rule allows.

Graded on Identifies the reciprocal rule correctly · Describes appropriate corrective action when rule is violated

3ProjectMarked by AI

You are shooting a street performer in dim evening light. Your current settings: ISO 800, aperture f/4, lens 50 mm. The light meter indicates 1/15 s gives correct exposure. The performer is juggling (fast motion). You want to keep the same depth of field (aperture f/4). You are willing to increase ISO up to 6400. Identify the issues with 1/15 s, determine the fastest shutter speed you need (consider both handholding and motion), and describe what settings you will change and to what values to get a sharp photo. Show your calculations and state your final settings (ISO, aperture, shutter speed) and explain the trade‑offs.

Graded on Identifies both camera shake and motion blur issues · Calculates the number of stops and feasible ISO adjustment · Provides final settings and explains trade‑off

Lesson 50

Metering and refining exposure

Practice reading the in-camera light meter and making small adjustments to shutter, aperture, or ISO to fine-tune exposure.

15 min4 assessments

A light meter in your camera reads the light that reaches the sensor and tells you whether your current shutter, aperture, and ISO will produce a photo that's too dark, too bright, or about right. In manual mode, the meter doesn't change your settings — it just shows where you are. Your job is to read it and nudge one setting at a time until the needle sits at zero.

Most cameras show the meter as a horizontal scale in the viewfinder or on the rear screen, running from negative values on the left (underexposed, too dark) to positive values on the right (overexposed, too bright). The scale is marked in stops: each whole number means a doubling or halving of light.

You already know the order for setting up a shot from the previous node: ISO first, then aperture for depth of field, then shutter speed. What this node adds is the loop that follows: check the meter, adjust, check again. Each adjustment you make moves the meter by a known number of stops, so you can predict what will happen before you even take the photo.

One stop of shutter speed: double or halve the time — 1/125 to 1/250 lets in half the light. One stop of aperture: move one full f-number, e.g. f/5.6 to f/8. One stop of ISO: double or halve the sensitivity — 400 to 800. The meter is lazy in a good way: it only cares about the total light reaching the sensor, so any combination that lands the needle on zero gives a similar brightness. What differs is depth of field, motion blur, and noise.

The practical refinement loop is short:

  1. 1.Read the meter.
  2. 2.Decide how far off you are, in stops.
  3. 3.Pick the setting you can change without ruining what you care about in the shot.
  4. 4.Change it by that many stops.
  5. 5.Re-check the meter — it should now read zero.

The moment most beginners get stuck is step 3. When the meter reads –1, you don't just "make it darker or brighter" — you choose which of the three settings to give up. That choice is the whole craft, and the rest of this node practices it.

Steps
0/5

You're shooting a portrait in open shade at f/4, 1/250 s, ISO 400, and the meter reads –1.7. You want the background blurred and the subject sharp, and you're handholding the camera. Refine the exposure in five steps.

  1. Read the meter and count the stops

    Look at the meter scale in the viewfinder: the indicator sits at –1.7, meaning the exposure is 1.7 stops underexposed, i.e. darker than middle grey. The number −1.7 tells you exactly how much correction is needed: you must let in 1.7 stops more light.

    Don't guess by feel. A reading of –1.7 is nearly two stops; a reading of –0.3 is barely anything. The number is your target.

    You can say out loud: "I need to add 1.7 stops of light."

  2. Decide what must not change

    The aperture is f/4 because you want the background blurred — keep it. The shutter is 1/250 s because you're handholding and need to avoid camera shake — keep it. The only setting you can afford to give up is ISO.

    If you open the aperture to f/2.8, you gain only 1 stop and lose the depth of field you composed for. If you slow the shutter to 1/125 s, you risk blur from hand shake.

    You have named which of the three settings is the one that can move. Here it's ISO.

  3. Change the chosen setting by the number of stops

    Set ISO from 400 to 800 (+1 stop) and then to 1600 (+1 more stop). That's +2 stops from the starting ISO, which overshoots the target slightly but is the nearest standard setting. On a camera with third-stop ISO steps you could set 1400 for +1.7.

    Don't change two settings at once. If you raise ISO and also open the aperture, you overshoot into overexposure and no longer know which change did what.

    Re-read the meter: the needle is now at +0.3 or 0.

  4. Re-check the meter

    The meter now reads +0.3, indicating a third of a stop overexposed. That's within acceptable range, but since you set ISO 1600 which is +2 stops from 400, you went 0.3 past your target.

    The meter is a suggestion, not a law — but on a first pass, aim to land within ±0.3 stops of zero.

    Needle sits between –0.3 and +0.3.

  5. Take the shot and review

    Press the shutter, then review the image on the rear screen with the histogram or blinkies. For this portrait, the skin tones should look neither muddy (underexposed) nor blown (overexposed) on the highlights.

    The rear screen lies in bright sunlight. Trust the histogram or the blinkies, not the screen brightness.

    The histogram has no highlight clipping on the right edge, and the image looks bright as you intended.

Checklist
0/7

Fine-tuning exposure in the field

Keep this open while shooting. The order matters: read, decide, move, re-read.

Reading the meter and correcting: three real scenes

Scene 1: Bright beach, want frozen waves. Meter reads +2 (too bright). Aperture f/8, shutter 1/1000, ISO 200 — you want sharp water, so shutter stays. Move aperture from f/8 to f/16 (−2 stops) or if you need depth, drop ISO to 50 (−2 stops). Result: meter at 0, waves still frozen.

Scene 2: Candlelit dinner, want the flame warm and the face visible. Meter reads –1 (too dark). Shutter 1/60, aperture f/2.8, ISO 800 — you're handholding, so shutter stays. Open aperture from f/2.8 to f/2.0 (+1 stop). Result: meter at 0, same shutter speed, shallower depth of field (creamy background).

Scene 3: Street at night, want the whole building sharp. Meter reads –2.3 (too dark). Aperture f/11, shutter 1/30, ISO 100 — you want everything sharp, so aperture stays. Can't slow shutter much more without a tripod, so raise ISO from 100 to 400 (+2 stops), maybe 500 (+2.3 stops). Result: meter at 0, building sharp, some noise in the shadows — acceptable.

  • The light meter reports exposure in stops relative to zero: negative is underexposed, positive is overexposed.
  • One stop doubles or halves the light reaching the sensor, whichever setting you move.
  • The refinement loop is read, count, choose, move, re-read — in that order, one setting per move.
  • Choose which setting to move by protecting what matters: aperture for depth of field, shutter for motion, ISO as last resort for noise.
  • A correct move of N stops moves the meter by exactly N stops toward zero.
  • The histogram and blinkies are the honest review tools; the rear screen brightness lies in sunlight.
Check yourself

Check that you can read a meter and choose the right move.

1Put in orderChecked instantly

Put the steps of refining exposure in the order they are performed. You must capture the meter reading before you decide anything.

  • ARead the meter and count the stops
  • BDecide which setting must not change
  • CChange one setting by the required stops
  • DRe-read the meter to confirm zero
2Multiple choiceChecked instantly

You are photographing a runner at 1/500 s, f/5.6, ISO 200, and the meter reads –1. You want the background strongly blurred. What is the best single adjustment?

  • ASlow the shutter to 1/250 s to let in one more stop of light.
  • BOpen the aperture to f/4 to let in one more stop of light.
  • CRaise ISO to 400 to let in one more stop of light.
  • DSet the meter to zero without changing any settings.
3Short answerMarked by AI

Your meter reads +0.7 and you want to preserve both a narrow depth of field (wide aperture) and a fast shutter speed to freeze motion. Which setting do you change, by how much, and what trade-off do you accept?

Graded on Names the setting that can move while protecting aperture and shutter · Names the trade-off of the chosen move · Clarity of the adjustment in stops

Project

Refine three exposures in the field

Take your camera and find three scenes: one too dark, one too bright, and one where the meter reads around zero but the image looks wrong (for example, snow appearing grey). For each scene, shoot the initial frame, read the meter, state the stop difference, choose which setting to change based on what the scene needs (depth, motion, or low noise), make the change, and shoot a corrected frame. Deliver the before/after pair for each scene with the settings noted.

Deliverables

  • 01Three before/after image pairs with EXIF or noted settings (ISO, aperture, shutter)
  • 02For each pair, a written line: meter reading, stop correction, which setting you changed, and why
  • 03One sentence on what the histogram showed in each after shot
ProjectMarked by AI

Submit the three before/after pairs and the written notes described in the project brief. The work is judged on whether you actually read and corrected the meter, not on the artistic quality of the photos.

Graded on Pairs show a real before/after with settings recorded · Stop difference stated and matched by the change · Choice of which setting to change is justified by the scene · Histogram note present for each after shot

Lesson 51

White balance and color temperature

You will be able to set the correct white balance to avoid unnatural color casts in your images. Covers the Kelvin scale, presets (daylight, cloudy, tungsten), and how to read the scene. Prevents the orange cast of indoor shots or the blue cast of shade.

20 min4 assessments

You've set aperture, shutter and ISO correctly, yet your indoor shots come out orange and your portraits in the shade look blue. The culprit is the light source itself: every light has a color temperature, and your camera needs to know it to render white objects as white.

Color temperature is measured in Kelvin (K). Lower numbers (1000–3000 K) produce warm, yellow-orange light; higher numbers (6000–8000 K) produce cool, blue light. Noon daylight sits around 5500 K. When the camera guesses wrong, it leaves a color cast.

Your camera offers presets like Daylight, Cloudy, Tungsten, and Shade, each tuned to a specific Kelvin range. You can also set a precise Kelvin value manually. Auto White Balance works in many situations but fails under mixed lighting or strongly colored sources – that’s when you take control.

Reference

Common Light Sources and Their Color Temperatures

Candle flame

Color temperature (K)
1500

Sunrise / sunset

Color temperature (K)
2000

Household incandescent (tungsten)

Color temperature (K)
2800

Studio tungsten lamps

Color temperature (K)
3200

Fluorescent tubes (cool white)

Color temperature (K)
4000

Noon daylight / flash

Color temperature (K)
5500

Overcast sky

Color temperature (K)
6500

Open shade (clear sky)

Color temperature (K)
8000

Use this table to set a custom Kelvin value when presets don't match your scene.

Practice
0/8 known
1 / 8

Fixing a yellow portrait under tungsten light

You're shooting a friend at a desk lit only by a tungsten desk lamp. With Auto WB, the white wall behind them appears creamy and their skin looks orange.

Before: Camera set to Auto WB – color cast: warm yellow/orange.

  1. 1.Recognize the light source: tungsten (household bulb). Check the reference table – tungsten is ~2800 K.
  2. 2.Change WB to the Tungsten preset (sometimes labeled Incandescent). Your camera adjusts to ~3200 K, neutralizing the orange.
  3. 3.Review the result: the wall looks white, skin tones are natural.

If the preset is slightly off, you can fine-tune by setting a custom Kelvin value (e.g., 2800 K if the lamp is dimmer).

Check yourself

Check your understanding of white balance and color temperature.

1Multiple choiceChecked instantly

You are photographing a friend in the shade of a building on a sunny afternoon. The image looks too blue. Which white balance preset should you use to neutralize the blue cast?

  • ADaylight
  • BCloudy
  • CShade
  • DTungsten
2Select all that applyChecked instantly

Which of the following statements about white balance are true? Select all that apply.

  • AIt adjusts the overall exposure of the image.
  • BIt compensates for the color temperature of the light source.
  • CSetting the wrong white balance can cause a color cast.
  • DAuto white balance always produces accurate colors.
  • EKelvin is the unit used to measure color temperature.
3Fill the blanksChecked instantly
4Select all that applyChecked instantly

Which of the following light sources have a color temperature below 4000 K? Select all that apply.

  • ACandle flame
  • BNoon daylight
  • CHousehold incandescent bulb
  • DOvercast sky
  • ESunrise

Lesson 52

Custom white balance

You will be able to set a custom white balance using a gray card or a white surface for precise color accuracy. Covers the camera's custom WB procedure and when it is worth the extra step. Prevents mixed lighting from ruining skin tones.

15 min3 assessments

You already know how white balance presets like Daylight or Tungsten shift the colors in your image. But presets are guesses — they assume the whole scene is lit by a single type of light. What happens when you shoot indoors with a window on one side and a desk lamp on the other? The camera’s preset picks one temperature, leaving the other side blue or orange, and skin tones look unnatural.

Custom white balance fixes this. Instead of guessing, you show the camera exactly what "white" looks like in your scene using a neutral reference — typically a gray card or a white sheet of paper. The camera measures the color of that reference and calculates the correction needed to make it neutral. That same correction is then applied to every shot until you change it.

Use custom white balance when:

  • The light is a mix of different color temperatures (e.g., window + tungsten).
  • You need consistent color across a series of shots (e.g., a product shoot).
  • Your subject’s skin tones must be accurate (portraits, weddings).

For quick snaps under a single light source, a preset is fine. But when precision matters, custom white balance is worth the few extra seconds.

Steps
0/4

You’ll need a gray card or a white sheet of paper and your camera set to manual mode. Place the reference in the same light as your subject.

  1. Set white balance mode to Custom

    On most cameras, press the WB button and rotate the dial until you see the Custom WB icon (a gray rectangle with two triangles, often labeled "PRE" or "CWB"). On menu-based cameras, navigate to White Balance → Custom.

    If you don't see the Custom WB option, check your camera’s manual; some entry-level models require you to shoot a reference image first.

    The Custom WB icon is displayed on the top LCD or in the viewfinder.

  2. Frame the gray card under the scene’s light

    Hold the gray card so it fully fills the center of the frame — at least 80% of the frame area. The card must be in the same light as your subject, at the same angle. If you’re using a white piece of paper, make sure it’s matte and not glossy.

    If the card is too small in the frame, the camera will measure the surrounding colors and give a wrong reading. Don’t let your hand or camera cast a shadow on the card.

    The viewfinder shows the gray card filling the live view area, no other objects visible.

  3. Take the reference measurement

    Press the shutter button halfway to focus (or just press fully if your camera allows). The camera will record the color of the gray card and calculate the white balance. On most cameras, you’ll see a confirmation like "OK" or "Data saved."

    If you release the shutter too quickly, the measurement may fail. Hold until the camera confirms.

    The confirmation message appears, or the Custom WB icon stops blinking.

  4. Apply the custom white balance

    Select the just-measured Custom WB as the active white balance mode. On many cameras, you go back to the WB menu and choose the saved custom setting (often slot 1 or PRE1). Some cameras automatically set it after measurement.

    If you don’t explicitly select the measured preset, the camera may revert to Auto WB or the previous preset.

    Take a test shot of a white wall or the gray card; it should appear neutral gray on the LCD, not blue or orange.

Checklist
0/8

Custom White Balance Field Checklist

Re-measure whenever the lighting changes—even moving the light source two feet can shift the temperature.

Portrait Under Mixed Window and Tungsten Light

Scenario: You’re photographing a friend sitting at a desk. On the left, a large window lets in daylight (≈5500K). On the right, a desk lamp with a tungsten bulb (≈3200K). Your subject’s face is hit by both lights; without correction, the side lit by the lamp appears orange, and the window side appears blue. Skin looks patchy.

With Custom WB:

  1. 1.Place a gray card on the desk where your friend’s face will be, angled to catch both lights.
  2. 2.Frame the card filling the viewfinder.
  3. 3.Press shutter to measure – camera calculates a correction that neutralizes the mix.
  4. 4.Remove the card, recompose on your friend, and shoot.

Result: The skin tones are consistent across the face – neither orange nor blue. The background has a warm tint from the tungsten lamp, which looks natural because we expect indoor lights to be warm, but the skin is correct.

Without Custom WB:

  • If you used the Daylight preset, the tungsten side goes orange and skin looks jaundiced.
  • If you used the Tungsten preset, the window side goes blue and skin looks cold.
  • Auto WB might try to average but will still produce a tint, especially if one light is dominant.

This is why custom white balance is the go-to for mixed-light portraits when color accuracy matters.

  • Custom white balance requires a neutral reference (gray card or matte white surface) placed under the scene's actual light.
  • The measurement fills the center of the frame; a small reference area produces an inaccurate correction.
  • The camera saves a correction that makes the reference neutral; the same correction applies to all subsequent shots until changed.
  • Custom WB is superior to presets in mixed lighting because it compensates for the exact combination of color temperatures present.
  • Re-measure any time the lighting changes – even a slight shift in lamp position or a cloud covering the sun alters the temperature.
  • When applied correctly, custom WB eliminates color casts and produces accurate skin tones and product colors.
Go deeper

The Wikipedia article on color balance provides additional background on the theory of neutral references and how color corrections are applied in digital imaging.

Check yourself

Test your understanding of the custom white balance procedure and when to use it.

1Put in orderChecked instantly

Arrange the steps for setting a custom white balance in the correct order. (The steps are: take the measurement, place the gray card, set camera to Custom WB mode, apply the saved custom WB, frame the card filling the viewfinder.)

  • ASet camera to Custom WB mode
  • BPlace the gray card in the scene’s light
  • CFrame the card filling the viewfinder
  • DTake the measurement (press shutter)
  • EApply the saved custom white balance
2Short answerMarked by AI

You are photographing a restaurant interior with warm candlelight on the tables and cool daylight from windows. You have a gray card. Evaluate whether you should use a Daylight preset, a Tungsten preset, or set a custom white balance. Explain which option you choose and why, and identify what color cast would appear if you used the wrong preset.

Graded on Choice justification · Explanation of color casts

3Short answerMarked by AI

A photographer uses a white piece of paper (slightly off-white aged paper) as a reference for custom white balance. The resulting images still have a warm yellow cast. Explain why this happened and what should have been done differently.

Graded on Identification of problem · Correct action

Lesson 53

White balance presets

Understand the common white balance presets (daylight, cloudy, tungsten, etc.) and when to use each to neutralize color casts.

15 min3 assessments

You already know the Kelvin scale from the previous node. Auto white balance usually gets close, but it can be fooled by scenes with a dominant color—like a sunset that keeps shifting the reading, or a room lit by both window light and a desk lamp. White balance presets are fixed stops on that Kelvin scale. Instead of guessing, you pick the preset that matches your main light source. Each preset tells the camera: “The light here is about this temperature—subtract that much blue or orange to make white look white.” The result is a neutral starting point, not a creative effect.

The five most useful presets and when to reach for each one.

Daylight

Color temperature (K)
5500
Typical light source
Midday sun, flash
What it corrects
Neutral—no correction
Best for
Direct sunlight portraits, outdoor events at noon

Best for Shooting in clear sunlight with no shade or cloud covering

Cloudy

Color temperature (K)
6500
Typical light source
Overcast sky, open shade
What it corrects
Adds a touch of warmth (yellow)
Best for
Portraits in open shade or on a cloudy day—makes skin less blue

Best for Overcast days or any scene where the sky is the main light and skin tones look too cool

Tungsten

Color temperature (K)
3200
Typical light source
Incandescent / halogen bulbs
What it corrects
Adds blue to neutralize orange
Best for
Indoor rooms lit by table lamps or ceiling bulbs—fixes the yellow cast

Best for Shooting under common household warm bulbs without a gray card

Fluorescent

Color temperature (K)
4000
Typical light source
Office or shop fluorescent tubes
What it corrects
Adds magenta to neutralize green
Best for
Any space with ceiling fluorescents—corrects the sickly green tint

Best for Offices, supermarkets, schools where fluorescent tubes dominate

Shade

Color temperature (K)
7500
Typical light source
Blue sky as the only light, subject in shadow
What it corrects
Adds significant warmth (deep yellow)
Best for
Subjects in deep shadow on a sunny day—prevents the blue tint from the sky

Best for Backlit subjects or people standing under a tree in bright sun

Fixing a candle-lit dinner scene

You photograph a table lit only by a few candles (color temperature ~1800 K).

  1. 1.Auto WB guesses 4000 K → the image is heavily orange/yellow because the camera didn't add enough blue.
  2. 2.Tungsten preset (3200 K) is still too warm because candlelight is even warmer than a bulb.
  3. 3.Custom Kelvin would be best, but if you only have presets, the closest is Tungsten—it won't be perfect, but it will be much less orange than Auto.

The key: use the preset whose temperature is closest to your light source, even if it's not a perfect match.

Common misconception

“Presets are creative filters—if I want a warm mood, I’ll use the “Cloudy” preset.”

Switching from Daylight to Cloudy does make the image look warmer, and that looks nice for a golden-hour feel.

What is actually true

That warm look is actually a color cast—you’re introducing a blue shortage. A true creative filter should be applied after the image is shot. Presets are correctors, not embellishers. Using the wrong preset on purpose introduces a cast that is hard to undo cleanly later.

  • White balance presets map to fixed Kelvin temperatures—they tell the camera what color the light is.
  • Daylight (5500 K) is the neutral reference; any other preset adds a color correction.
  • Cloudy and Shade presets warm up the image (add yellow); Tungsten and Fluorescent cool it down (add blue or magenta).
  • Use the preset that matches your main light source. If sources are mixed, pick the most important subject's light or use a gray card.
  • Presets correct casts—they are not creative filters. Apply mood after capture.
Check yourself

Check your understanding of when to use each preset.

1Multiple choiceChecked instantly

You are shooting a portrait in the shade of a large oak tree on a bright sunny day. Which white balance preset will best prevent your subject's skin from looking too blue?

  • ADaylight
  • BCloudy
  • CTungsten
  • DShade
2Select all that applyChecked instantly

Which of the following scenes would be best handled by the Cloudy preset? (Select all that apply.)

  • AA child playing in a playground under thick overcast clouds
  • BA subject standing in the shadow of a building on a clear day
  • CA desert landscape at noon with no clouds
  • DA bride under a gazebo lit only by blue sky
3Short answerMarked by AI

You are using the Tungsten preset to shoot in a room lit by overhead fluorescent tubes. Describe what color cast will appear in the final image and explain why.

Graded on Identifies the dominant cast (green/magenta) from the mismatch · Explains the correction direction (too much blue / too little warmth)

Lesson 54

Color temperature and the Kelvin scale

Learn the concept of color temperature measured in Kelvin and how different light sources correspond to different values.

15 min4 assessments

Color temperature is a way of describing the color of light numerically, using the Kelvin (K) scale. It comes from physics: when you heat a black object, it glows red at lower temperatures, then orange, yellow, white, and finally blue as it gets hotter. The scale is reversed from what you might expect — lower Kelvin numbers produce warm (yellow/orange) light, and higher numbers produce cool (blue) light.

Here are reference values for common light sources:

  • Candle flame: ~1800 K
  • Household tungsten bulb: ~3200 K
  • Sunrise/sunset: ~3500 K
  • Daylight (noon): ~5500 K
  • Electronic flash: ~5500 K
  • Overcast sky: ~6500 K
  • Shade on a sunny day: ~7000 K
  • Clear blue sky: ~10000 K

Your camera adjusts white balance by shifting the image toward the opposite color on the spectrum — if the light is warm (low K), it adds blue to compensate; if the light is cool (high K), it adds yellow. Knowing the Kelvin value of your scene lets you set an exact white balance instead of relying on presets.

Increasing color temperature from warm (candle) to cool (blue sky). Each step represents a higher Kelvin value.

Analogy

Think of a stove burner. When you first turn it on, it glows red – that's a relatively low temperature. If you kept turning it up past safe limits, it would eventually glow blue – a much higher temperature. The Kelvin scale works the same way: a candle flame (reddish) is around 1800 K, while a blue sky is around 10000 K.

Where the analogy breaks down

A stove burner's color is also affected by the metal's composition and the energy output, not just temperature. In photography, we're describing the perceived color of light sources (like sunlight or fluorescent bulbs), not actual heated objects. Also, the Kelvin scale for light sources is a correlated color temperature, which doesn't require the source to be a blackbody.

Common misconception

“Lower Kelvin numbers mean colder (bluer) light, because I associate low numbers with cold temperatures.”

In everyday language, 'cool' colors are blue and 'warm' colors are red. Numbers usually increase with heat, so it feels logical that low numbers = cool colors.

What is actually true

On the Kelvin scale, lower numbers (e.g., 1800 K) produce warm, orange light, and higher numbers (e.g., 10000 K) produce cool, blue light. This comes from the physics of blackbody radiation: a cooler object glows red, a hotter object glows blue. The color temperature scale preserves that inverse relationship.

  • Color temperature measures the hue of light in Kelvin (K).
  • Lower Kelvin values (2000–3500 K) produce warm yellow/orange light.
  • Higher Kelvin values (6000–10000 K) produce cool blue light.
  • Midday daylight is around 5500 K, which is considered neutral white.
  • Cameras use the Kelvin setting to shift colors and remove unwanted color casts.
  • Common presets (Tungsten, Daylight, Shade) correspond to specific Kelvin ranges.
Go deeper

Read these for the physics behind color temperature and its application to light sources.

Check yourself

Check your understanding of color temperature and the Kelvin scale.

1Multiple choiceChecked instantly

Which of the following color temperatures would produce the warmest (most orange) light?

  • A5500 K
  • B3200 K
  • C7000 K
  • D10000 K
2Short answerMarked by AI

You are shooting indoors under warm tungsten lights, but your camera's white balance is set to Daylight (5500 K). The resulting photos have a strong orange color cast. Explain why this happens in terms of color temperature.

Graded on Identifies the mismatch in Kelvin values · Explains the camera's correction and why it fails

3Short answerMarked by AI

You see a blue color cast in your photo taken under an overcast sky (color temperature ~6500 K). Your camera's white balance is set to Daylight (5500 K). Should you increase or decrease the Kelvin setting on your camera to remove the blue cast? Explain why.

Graded on Correct action and numeric reasoning · Connects setting change to removal of blue cast

4EssayMarked by AI

Imagine you are photographing a portrait in a room lit by a single tungsten lamp on one side and daylight coming through a window on the other. The mixed lighting gives two different color temperatures. Describe one approach to handling the white balance in this situation. Justify why you would choose that approach over other possibilities, considering the color temperature values involved and the typical appearance of skin tones.

Graded on Describes a specific white balance strategy · Justifies choice by comparing alternatives · Considers impact on skin tones and overall image

Lesson 55

Evaluating the light source for white balance

Develop the skill to assess the dominant light source in a scene and choose the appropriate white balance setting.

15 min3 assessments
Decide

You're reviewing portraits from a birthday party in a café. One photo has a strong orange cast on the birthday girl's face, while the background near the window looks correct. The café has mixed lighting: warm tungsten ceiling lamps and cool overcast daylight from large windows. You shot in Raw with Auto White Balance (AWB). The orange face is the symptom.

Work through the choices to identify the cause and the fix.

The orange cast is on the face, not on the whole image. What does that tell you about the dominant light source on the subject?

Decision tree: from color cast symptom to white balance correction.

Common misconception

“Auto White Balance always corrects color casts perfectly, so I don't need to worry about the light source.”

In many predictable outdoor scenes, AWB does a decent job, so beginners assume it's infallible. Camera marketing often shows 'intelligent' auto modes.

What is actually true

AWB fails in mixed lighting (e.g., tungsten + daylight) and with strongly colored subjects (e.g., a blue wall). It averages the scene, so if the dominant light is warm, AWB adds blue globally, making cool areas even cooler. You must evaluate the actual light source to set the correct WB manually or adjust in Raw.

Evaluating a kitchen scene

The scene: Your kitchen has overhead LED panels (5000 K, cool white) and a warm pendant lamp (2700 K) over the island. A bowl of fruit sits on the island under the lamp.

Symptom: Photo taken with AWB shows warm orange fruit and a barely noticeably cool countertop.

Evaluation:

  1. 1.Identify the dominant light on the subject: the fruit is under the pendant lamp (tungsten-like, 2700 K).
  2. 2.The background (counters) is lit by the LED panels (daylight-like, 5000 K).
  3. 3.Since the fruit is your subject, set WB to Tungsten (approx 3200 K) – this neutralizes the fruit's orange cast.
  4. 4.Result: fruit looks natural; countertops become slightly blue – acceptable trade-off because the fruit is the focus.

Alternative: Shoot Raw and later use a local adjustment brush on the fruit's area to set WB to 2700 K, and another adjustment for the countertops to 5000 K.

  • The color cast in a photo is a symptom of the dominant light source not matching the white balance setting.
  • Tungsten light (indoor bulbs) produces a warm orange cast; correct WB is 2500–4000 K (Tungsten preset).
  • Daylight (sun) produces neutral to slightly warm light; correct WB is 5000–6500 K (Daylight preset).
  • Fluorescent light often gives a green or blue cast; correct WB is 4000–5000 K (Fluorescent preset).
  • Shade or overcast light is cool (bluish); correct WB is 6500–8000 K (Shade/Cloudy preset).
  • When the scene has mixed lighting sources, choose WB for the subject and accept or correct the background later.
  • Always evaluate the light hitting your subject, not the average of the whole scene.
Check yourself

Check your understanding of evaluating light sources.

1Select all that applyChecked instantly

Which of the following are common symptoms of a white balance mismatch? (Select all that apply.)

  • AThe entire image has a strong blue or orange tint.
  • BShadows are pure black.
  • CSkin tones look unnatural (e.g., too orange or too blue).
  • DThe image appears too dark overall.
2Put in orderChecked instantly

Arrange these steps in the correct order for evaluating the light source for white balance when you see a color cast.

  • AIdentify the dominant light source on the subject.
  • BObserve the color cast in the photo (e.g., orange, blue, green).
  • CApply the corresponding white balance preset or Kelvin value.
  • DEstimate the Kelvin range of the dominant light.
  • ECheck if the cast is uniform or localized to one area.
3Short answerMarked by AI

You are photographing a friend sitting next to a window on a cloudy day. The room's ceiling light is an incandescent bulb (warm). Your friend's face has a blue cast. What is the most likely dominant light source on the face? What white balance setting would you start with? Explain your reasoning in 2–4 sentences.

Graded on Identifies the dominant light source correctly (window/daylight, not ceiling light). · Recommends an appropriate WB preset or Kelvin value based on the analysis. · Explains the reasoning linking cast to light source to setting.

Lesson 56

Focus and depth of field mastery

You will be able to place the plane of focus exactly where you want it and control how much of the scene is acceptably sharp. Covers autofocus point selection, depth of field preview, and the relationship between aperture, focal length, and distance. Prevents the frustration of a sharp background and a blurry subject.

30 min3 assessments

You can already set the exposure, but a correctly exposed photo is useless if the wrong thing is sharp. The plane of focus is the exact distance from the camera where the lens is focused – everything at that distance is perfectly sharp. The depth of field (DOF) is the zone of acceptable sharpness that extends in front of and behind that plane. By controlling DOF, you decide whether the background melts into a blur or stays crisp. This node shows you how to place the plane of focus with your camera's autofocus points and how the three main factors – aperture, distance, and focal length – shape the DOF.

The depth of field spans from the near limit to the far limit around the plane of focus.

A red rose in sharp focus against a blurred green background. The depth of field is shallow, isolating the flower.
CC BY-SA 4.0· Taibhseoir source
  • The plane of focus is the distance at which the lens is focused; only objects at that plane are perfectly sharp.
  • Depth of field (DOF) is the zone of acceptable sharpness around the plane of focus.
  • A wider aperture (smaller f-number, e.g., f/2.8) gives a shallower DOF, blurring the background.
  • A narrower aperture (larger f-number, e.g., f/16) gives a deeper DOF, keeping more of the scene sharp.
  • Moving closer to the subject reduces DOF; moving farther away increases it.
  • A longer focal length (e.g., 200mm) makes DOF shallower; a shorter focal length (e.g., 24mm) makes it deeper.
  • Use the camera's autofocus point selection to place the plane of focus precisely on your subject, not on the background.
Reference

How Aperture, Distance, and Focal Length Affect Depth of Field

Aperture (f-number)

Increase the factor...
Deepens DOF (e.g., f/16)
Decrease the factor...
Shallows DOF (e.g., f/2.8)

Distance to subject

Increase the factor...
Deepens DOF (farther away)
Decrease the factor...
Shallows DOF (closer in)

Focal length

Increase the factor...
Shallows DOF (telephoto, e.g., 200mm)
Decrease the factor...
Deepens DOF (wide-angle, e.g., 24mm)

These three factors work together. Changing one often requires adjusting another to maintain the same exposure.

Check yourself
1Multiple choiceChecked instantly

Which combination of aperture, focal length, and distance will produce the shallowest depth of field?

  • Af/2.8, 50mm, 2m distance
  • Bf/16, 50mm, 2m distance
  • Cf/2.8, 200mm, 2m distance
  • Df/2.8, 50mm, 10m distance
2Fill the blanksChecked instantly
3Short answerMarked by AI

You are photographing a flower at f/2.8, 100mm, 1m away. You want the entire flower sharp but the background blurred. The flower is 10 cm deep. Explain one adjustment you could make to achieve this, and what the trade-off would be.

Graded on Identifies a valid adjustment (aperture, distance, or focal length change) that would increase DOF to cover the flower's depth. · Describes the trade-off (e.g., less light, composition change, perspective change) and its practical consequence.

Lesson 57

Single-point AF

You will be able to use single-point autofocus to place the focus precisely on your subject. Covers how to move the focus point and when to rely on this mode. Prevents the camera from focusing on the wrong element in a busy scene.

15 min2 assessments

Your camera's autofocus is smart, but it's not psychic. In a busy scene — a bird in branches, a face behind a crowd — the camera often locks onto the wrong thing: the branch, the crowd, the background. That's because the default 'auto-area' AF mode lets the camera decide which of its dozens of focus points to use.

Single-point AF puts you in control. You pick one focus point, and the camera only uses that point. The rest of the scene is ignored for focusing. This is the go-to mode when your subject is still and you need razor-sharp placement — a portrait's eye, a product detail, a sign against a messy wall.

Most cameras let you move the active point with the directional pad or joystick. You compose the shot, nudge the point onto your subject, half-press the shutter, and recompose if needed (while keeping the shutter half-pressed or using back-button focus). The result: the plane of focus lands exactly where you intended, not where the camera guessed.

Different autofocus area modes trade off precision against speed. Here's how they compare on the axes that matter:

Single-point AF

Focus precision
Excellent — you choose exactly where to focus
Speed of selection
Slow — you must move the point manually
Tracking moving subjects
Poor — not designed for moving subjects; point must be re-positioned

Best for Static subjects where focus placement is critical: portraits, macro, product shots

Zone AF

Focus precision
Good — camera picks from a small group of points you choose
Speed of selection
Moderate — you select a zone, camera picks within it
Tracking moving subjects
Fair — can track within the zone if the subject stays there

Best for Subjects that move predictably within a region: a runner on a track, a child playing

Auto-area AF

Focus precision
Variable — camera often chooses the wrong point in busy scenes
Speed of selection
Fast — no manual selection needed
Tracking moving subjects
Good — uses all points to track the subject

Best for Unpredictable subjects where speed matters more than precision: sports, wildlife in flight

Portrait against a cluttered background

Scene: A person stands in front of a fence with gaps. The camera is in auto-area AF mode.

Problem: The camera picks a focus point on the fence, making the person's face soft.

Solution: Switch to single-point AF. Move the active point onto the person's nearest eye. Half-press the shutter — the eye is now in focus. Recompose slightly if needed. The fence remains out of focus because the depth of field is shallow (you are using a wide aperture, say f/2.8).

Result: The eye is tack-sharp, the background is blurred, and the viewer's attention is drawn to the face. The exact same shot with auto-area AF would have misfocused on the fence.

Common misconception

“More autofocus points always mean better focus.”

Cameras with 50+ points are marketed as superior, and more points do cover more of the frame.

What is actually true

More points increase the chance that the camera will pick the wrong one if you don't control which is active. In a busy scene, single-point AF (using just one of those points) gives you more reliable focus than letting the camera choose from all 50. The number of points matters less than how you use them.

  • Single-point AF restricts focus to one point you select, giving you exact placement.
  • Use it for static subjects where focus precision is critical.
  • You move the active point with the camera's directional controls (pad or joystick).
  • Half-press or back-button focus to lock, then recompose while holding focus.
  • Single-point AF is not suited for fast-moving subjects where the point must be constantly repositioned.
  • Switch to zone or auto-area AF only when the subject moves unpredictably.
Go deeper

The Wikipedia article on DSLR cameras explains how autofocus systems work, including the role of individual focus points. Read it for deeper context on autofocus point placement.

Check yourself
1Short answerMarked by AI

You are photographing a musician on a stage with bright lights. The background has moving lights and multiple people. The musician is standing still and singing. You are using a zone AF mode (9-point zone) to cover the face area, but the camera keeps focusing on the moving lights in the background. Evaluate why zone AF is failing in this scenario. Then decide which AF mode you would switch to and explain your reasoning, including how you would position the active focus point. Finally, state one situation where zone AF would be a better choice than your chosen mode.

Graded on Diagnoses why zone AF fails · Chooses single-point AF with reasoning · States a situation where zone AF is better

2Short answerMarked by AI

You are taking a close-up photo of a flower with many similar flowers in the background. The flower you want in focus is the one in the center. Your camera is set to auto-area AF. Describe step-by-step how you would use single-point AF to ensure the flower is sharp, including how you would move the focus point and lock focus. Assume your camera has a directional pad.

Graded on Switches to single-point AF · Moves focus point onto target flower · Locks focus and recomposes correctly

Lesson 58

Continuous AF

You will be able to track a moving subject with continuous autofocus for sharp action shots. Covers how the camera predicts focus and when to switch to this mode. Prevents the missed focus of using single-shot AF on a moving target.

15 min4 assessments

Single-shot autofocus (AF-S/One-Shot) locks focus when you half-press the shutter. If your subject moves — a runner, a child on a swing, a bird taking off — that locked focus is now wrong. Continuous AF (AF-C or AI Servo) solves this by reading focus continuously and adjusting the lens to keep the subject sharp, even as the distance changes. It also predicts where the subject will be at the moment the shutter actually fires, compensating for the delay between pressing the button and the exposure.

You already know how to select an AF point from the previous node. Now you need to choose the right AF mode for the moment: single-shot for still subjects, continuous for anything that moves.

Three ways to achieve focus: which one fits your scene?

Single-shot AF (AF-S / One-Shot)

Focus update
Locks once
Subject type
Static or very slow
Half-press behavior
Focus locks and stays
Predictive tracking
No
Power drain
Low

Best for Portraits, landscapes, still life, macro when subject is still

Continuous AF (AF-C / AI Servo)

Focus update
Adjusts constantly
Subject type
Erratic or fast-moving
Half-press behavior
Focus follows the subject
Predictive tracking
Yes – camera predicts position at shutter release
Power drain
Higher (motor works continuously)

Best for Sports, wildlife, children playing, any action

Manual Focus

Focus update
You turn the ring
Subject type
Any – but requires skill
Half-press behavior
Does nothing to AF
Predictive tracking
No (you do the tracking yourself)
Power drain
None (no AF motor use)

Best for Macro, low contrast scenes, video with focus peaking, extreme close-ups

Tracking a runner on the track

Scenario – You're at a 400 m race. A runner is coming straight toward you. You want a sharp full-body shot.

With Single-shot AF (wrong choice):

  1. 1.Half-press the shutter when the runner is 30 m away. Focus locks on that distance.
  2. 2.The runner moves to 25 m. You don't release the shutter button – focus stays at 30 m.
  3. 3.You fully press the shutter. The image is blurry because the focus point was wrong.

With Continuous AF (right choice):

  1. 1.Set the camera to AI Servo (Canon) or AF-C (Nikon/Sony). Select a wide AF area mode (zone or dynamic) so the camera can find the subject easily.
  2. 2.Half-press the shutter. The camera starts tracking the runner. As the runner moves, the lens adjusts focus continuously.
  3. 3.The camera predicts where the runner will be when the shutter fires (typically 50–100 ms later).
  4. 4.Fully press – the image is sharp from 30 m all the way to 15 m.

Settings used:

  • Shutter speed: 1/1000 s (freezes motion)
  • Aperture: f/5.6 (enough depth of field to cover slight prediction errors)
  • ISO: 400 (to keep shutter speed fast)
  • Drive mode: Continuous high (captures a burst)

Result: A crisp sequence of the runner closing in, not a single blurry frame.

Steps
0/4

How to enable Continuous AF on a typical interchangeable-lens camera (Canon, Nikon, Sony).

  1. Find the AF mode control

    On Canon DSLRs, press the AF‑MODE button near the lens mount. On Nikon, use the AF‑MODE button or the i‑menu. On mirrorless bodies (Sony, Fujifilm), press the Fn button or go through the quick menu.

    If your lens has a physical switch labelled AF/MF, make sure it's set to AF – otherwise the mode buttons will do nothing.

    You see a screen or viewfinder overlay showing AF mode options.

  2. Select continuous mode

    Choose AI Servo (Canon) or AF‑C (Nikon, Sony, Fujifilm). On some cameras this is called Continuous AF. Press OK or half‑press the shutter to confirm.

    Don't confuse AF‑C with AF‑S (single) or AF‑A (auto, which sometimes behaves like single).

    The viewfinder or screen now shows 'AI Servo' or 'AF‑C'.

  3. Choose an AF area mode that tracks

    Select Zone AF, Dynamic Area, or Wide Tracking (names vary). Avoid single‑point AF unless you are an expert panning – it's too small to hold a moving subject.

    If you use a tiny single AF point and the subject moves off it, tracking stops.

    Your AF point display now shows a group or a large rectangle, not a single dot.

  4. Practice with a moving target

    Half‑press the shutter and pan to follow a walking person. Notice the focus point moving and the image staying sharp. Try a fast pan – the camera may lag. If it does, increase shutter speed first, then consider upgrading lens or body.

    Continuous AF drains battery faster. Carry a spare if shooting long events.

    Review a shot on the LCD – it should be as sharp as when you first acquired focus.

  • Continuous AF (AF‑C / AI Servo) adjusts focus as the subject moves – never locks to a single distance.
  • The camera uses predictive algorithms to estimate where the subject will be at the exact moment the shutter fires.
  • Use Continuous AF for any subject that changes distance quickly: sports, wildlife, moving children, vehicles.
  • Single‑shot AF locks focus on half‑press and is the right choice for static scenes – portraits, landscapes, still life.
  • For continuous AF to work well, pair it with a tracking‑friendly AF area mode (zone, dynamic, wide) – not single point.
  • Continuous AF uses more battery than single‑shot because the motor is active as long as the shutter is half‑pressed.
Check yourself

Check your understanding of when and how to use Continuous AF.

1Multiple choiceChecked instantly

Which autofocus mode continuously adjusts focus as the subject moves?

  • ASingle-shot AF
  • BContinuous AF
  • CManual Focus
  • DOne-Shot AF
2Select all that applyChecked instantly

Select all scenarios where Continuous AF is strongly preferred over Single-shot AF.

  • APhotographing a sleeping cat
  • BShooting a basketball game
  • CTaking a group portrait of still subjects
  • DPhotographing birds in flight
  • EMacro shot of a still flower
3Short answerMarked by AI

You are shooting a soccer match with Single-shot AF. You half-press the shutter when a player is in focus, but the player runs toward you before the shutter fires. The resulting image is blurry. Explain why this happened and what you should change.

Graded on Identifies root cause and correct action · Uses correct terminology · Provides practical advice

4Select all that applyChecked instantly

Which of the following are true about Continuous AF's predictive focus?

  • AIt calculates the subject's speed and direction to adjust focus.
  • BIt works best with static subjects.
  • CIt can keep focus even if the subject moves erratically.
  • DIt requires the user to manually refocus after every shot.

Lesson 59

Manual focus

You will be able to focus manually using the lens ring or focus peaking for scenes where autofocus struggles. Covers when manual focus is necessary (macro, low light, through glass) and how to confirm focus. Prevents the hunting and missed shots of AF in challenging conditions.

15 min3 assessments

Autofocus is fast and accurate in good light with contrasty subjects. But it fails when the scene is too dark, the subject is too small, or there is glass between you and your target. The lens hunts back and forth, the shutter won't fire, and you miss the moment. Manual focus hands control back to you: you turn the ring, see the image snap into sharpness, and shoot. The skill is not just turning a ring — it is knowing when to reach for it and how to confirm you hit focus.

Autofocus and manual focus each have their territory. The table below shows which one wins in the situations that matter.

Autofocus

Speed in good light
Fastest – instant lock
Accuracy in low light
Hunts or fails below certain EV
Accuracy with macro subjects
Often misses due to shallow DOF
Accuracy through glass/water
Locks on glass reflection, not subject
Reliance on contrast
Requires contrast edges to work

Best for Bright, contrasty scenes with moving subjects (sports, birds, kids).

Manual focus

Speed in good light
Slower – you turn the ring
Accuracy in low light
Works as long as you can see the subject
Accuracy with macro subjects
Precise – you place the plane of focus
Accuracy through glass/water
Ignores glass – you focus past it
Reliance on contrast
Works on any surface, even a blank wall

Best for Low light, macro, through-window, or any scene where AF cannot lock.

Macro flower at dawn

Situation: A dew-covered rose, 30 cm away. Autofocus hunts because the petals lack contrast and the shallow depth of field (f/2.8) makes the focus window tiny.

What you do:

  1. 1.Flip the lens switch to MF (or M on the camera body).
  2. 2.Turn on focus peaking (usually a menu setting – highlights in-focus edges in red or yellow).
  3. 3.Rotate the focus ring until the stamens glow with peaking highlights.
  4. 4.Magnify the view (press the zoom button) to check the fine hairs on the stem are sharp.
  5. 5.Hold steady and shoot.

Result: The flower is tack-sharp, the background softly blurred. The whole process took 3 seconds – faster than waiting for AF to hunt and fail.

Common misconception

“Manual focus is always slower than autofocus.”

In good light with a contrasty subject, AF locks in a fraction of a second. Turning a ring takes longer.

What is actually true

In low light, macro, or through glass, AF can hunt for several seconds or fail entirely. Manual focus lets you go straight to the right distance, often faster than the camera can decide. The speed advantage depends on the scene.

Decide

You are photographing three subjects in one afternoon. For each, decide whether to use autofocus or manual focus and explain your reasoning. Then read the outcome.

A low-light concert: the stage is lit by a single red spotlight. The AF indicator blinks and never locks.

  • Manual focus is essential when autofocus cannot lock: low light, macro, through glass, or low-contrast subjects.
  • Focus peaking highlights in-focus edges in colour – use it to confirm sharpness without magnifying.
  • Magnification (zoom button) gives a pixel-level check for critical focus, especially in macro.
  • Manual focus is often faster than AF in difficult conditions because you skip the hunting cycle.
  • Switch back to autofocus in good light with moving subjects – it is faster and equally accurate.
Check yourself

Check your understanding of when and how to use manual focus.

1Multiple choiceChecked instantly

In which of the following situations is manual focus usually the better choice?

  • AA fast-moving football player in daylight
  • BA macro photograph of a dewdrop on a leaf
  • CA portrait with a plain background in bright sun
  • DA landscape taken with a wide-angle lens at f/11
2Select all that applyChecked instantly

Select all the situations where manual focus is recommended over autofocus. (More than one are correct.)

  • ALow-light concert with a single spotlight
  • BBird in flight against a clear sky
  • CClose-up of an insect on a flower
  • DShooting through a glass window at a zoo
  • EStreet photography in bright afternoon sun
3Short answerMarked by AI

You are photographing a dew-covered spiderweb at dawn. The autofocus hunts and you miss the shot. Describe how you would set up and confirm focus manually, and explain why manual focus is faster in this scenario.

Graded on Describes the setup steps (switch to MF, use peaking/magnification) · Explains why manual focus is faster than AF in this scenario · Connects the explanation to the specific scene (dawn, dew, spiderweb)

Lesson 60

Depth of field preview

Learn how to use the depth of field preview button to see the actual sharpness range before taking the shot.

15 min3 assessments

The depth of field preview button is the small button near the lens mount on most DSLR and mirrorless cameras. When you compose a shot, the camera keeps the aperture wide open (its maximum aperture, like f/2.8) to let in as much light as possible for a bright viewfinder image. But that means you are always looking at the scene with the shallowest possible depth of field — not what the final photo will look like.

Pressing the depth of field preview button stops the aperture down to your selected f-stop (say f/11). The viewfinder or live view gets darker, but now you see the actual range of sharpness: which leaves, faces, or bricks are in focus and which are blurred. You can then decide whether to adjust your aperture or recompose before you press the shutter.

On mirrorless cameras with electronic viewfinders, the camera may already simulate the final depth of field in the viewfinder. Check your camera manual to confirm — the preview button still works, but it may be redundant.

Steps
0/5

You have a scene with a subject at 2 meters and a background at 10 meters. You want the subject sharp and the background softly blurred. You have set aperture to f/2.8, but you are not sure if the background will be too sharp. Use the depth of field preview to check.

  1. Frame the shot

    Compose your photo normally through the viewfinder or live view. Set your aperture to f/2.8 (or whatever wide aperture you want to test).

    If you are in full auto mode, the camera may override your aperture. Switch to Aperture Priority (Av/A) or Manual (M) mode first.

    The aperture value in the viewfinder shows f/2.8 (or your chosen value).

  2. Find the preview button

    Look on the front of the camera body, near the lens mount, usually on the same side as the lens release button. It is a small button, often marked with a dot or the letters 'DOF' or 'DEP'. On some Canon cameras, it is on the bottom right of the lens mount. On Nikon, it is on the left side near the lens. On Sony mirrorless, it may be a custom button you need to assign in the menu.

    The button can be small and hard to press while holding the camera. Use your index finger or middle finger of your left hand (the hand supporting the lens).

    You can feel a small button under your finger when you probe the area around the lens mount.

  3. Press and hold the button

    Press and hold the depth of field preview button. Keep it held down as you look through the viewfinder or at the live view screen.

    The viewfinder will get significantly darker, especially at narrow apertures like f/16. This is normal. Do not release the button yet.

    The viewfinder darkens, and you may see the aperture blades in the lens close down if you look at the front of the lens (with the camera off).

  4. Assess the sharpness

    While holding the button, look at the background. Compare the sharpness of the background to what you saw before pressing the button. At f/2.8, the background should be noticeably softer. If it is still too sharp, you may need a wider aperture (smaller f-number). If the background is too blurry and you want more context, you may need a narrower aperture (larger f-number).

    Your eye may need a moment to adjust to the dimmer viewfinder. Move your eye slightly to scan the frame.

    You can clearly see that the background is more blurred than the foreground subject.

  5. Release and adjust

    Release the button. The viewfinder returns to full brightness. If you are satisfied with the depth of field, take the shot. If not, adjust your aperture and repeat steps 3 and 4.

    Do not forget to reset your aperture after checking — it is easy to leave it at f/16 and wonder why your next shot is dark.

    The viewfinder brightens again, and the aperture value is whatever you last set it to.

Checklist
0/7

Depth of Field Preview Check

Keep this checklist visible while you practice. Tick each item as you do it — do not rely on memory.

  • The depth of field preview button stops the lens down to your selected aperture, showing the actual sharpness range in the viewfinder.
  • The viewfinder darkens when you press the button because less light reaches it — this is normal and expected.
  • The button is typically a small unmarked button on the front of the camera near the lens mount.
  • You must be in Aperture Priority (Av/A) or Manual (M) mode for the preview to reflect your chosen aperture.
  • Mirrorless cameras with electronic viewfinders may simulate depth of field automatically, making the button redundant — check your manual.
  • Use the preview to decide whether to adjust aperture before taking the shot, not after.
Go deeper

Read the 'Depth of field' article on Wikipedia for the optical theory behind what you are seeing. The section on 'Factors affecting depth of field' explains why aperture, focal length, and distance all matter.

Check yourself

Test your understanding of using the depth of field preview button.

1Put in orderChecked instantly

Arrange these steps in the correct order for using the depth of field preview button to check depth of field before taking a photo.

  • ASet the camera to Aperture Priority or Manual mode
  • BCompose the shot and set the desired aperture
  • CPress and hold the depth of field preview button
  • DAssess the sharpness of the background through the viewfinder
  • ERelease the button and adjust aperture if needed
2Short answerMarked by AI

You are photographing a flower at f/2.8 and the depth of field preview shows the background is too sharp for your liking. What should you do, and why? (Answer in 2–4 sentences.)

Graded on Identifies the correct adjustment (wider aperture / smaller f-number) · Explains why the adjustment works · Practical correctness of the workflow

3Multiple choiceChecked instantly

When you press the depth of field preview button, the viewfinder gets darker. What does this indicate?

  • AThe camera battery is low and the screen is dimming to save power.
  • BThe aperture blades have closed down to your selected f-stop, reducing light to the viewfinder.
  • CThe camera is switching to a different metering mode that underexposes the viewfinder.
  • DThe lens is malfunctioning and needs to be cleaned.

Lesson 61

Depth of field: aperture, distance, focal length

Understand how aperture, subject distance, and focal length interact to control depth of field.

15 min3 assessments

To control depth of field deliberately, you need to know which lever to pull — and the three levers are aperture, subject distance, and focal length. You have already used depth of field preview and placed focus exactly; now see why the same aperture gives different results when you change lenses or step closer.

Aperture works by narrowing or widening the cone of light entering the lens. A wide aperture (small f-number like f/1.4) admits light from a wider range of angles, so points in front of and behind the focus plane spread into larger circles of confusion sooner — shallower depth of field. Stop down to f/16 and the cone narrows, those circles stay small over a greater distance.

Subject distance changes how much magnification is needed. The closer you are, the larger the image of each point is projected onto the sensor, so the same circle-of-confusion tolerance is reached after a tiny shift in focus — depth shrinks. Double the distance and depth roughly quadruples.

Focal length magnifies the scene directly, and depth of field shrinks with the square of focal length. A 200mm lens at f/4 gives far less depth than a 50mm at f/4 when both are focused at the same distance. That is why portrait photographers reach for an 85mm or 135mm, not a 24mm.

Three independent controls of depth of field

Analogy

Think of a garden hose with a spray nozzle. When you tighten the nozzle to a narrow stream (like a small aperture), the water stays concentrated over a long distance — everything in the stream stays wet. Open the nozzle to a wide spray (like a large aperture), and the water spreads out quickly; only a short section near the nozzle is heavily focused, and beyond that the spray thins.

Just as a narrow stream gives you a longer wet patch, a small aperture gives deeper focus. And moving the nozzle closer to a leaf makes the stream cover a smaller area — similar to how shorter subject distance reduces depth.

Where the analogy breaks down

A hose stream does not change its ‘depth of field’ when you use a longer hose; focal length has no analogy here. Also, water droplets do not have a circle-of-confusion tolerance – the analogy cannot explain why doubling focal length quadruples depth loss.

Common misconception

“To get a blurry background, I just need to use the widest aperture on my lens.”

Wide aperture does create a shallower depth of field — that part is true. Beginners see the immediate effect of switching from f/8 to f/2.8.

What is actually true

Wide aperture alone often fails. If you are far from your subject (e.g., 5 meters) or using a wide-angle lens (24mm), even f/1.4 may keep the background nearly as sharp as the subject. You must also get closer or use a longer focal length; the three controls work together.

  • Each control (aperture, distance, focal length) independently changes depth of field; you can trade one for another.
  • Wider aperture (smaller f-number) always reduces depth; narrower aperture increases it.
  • Halving the subject distance reduces depth by roughly a factor of four.
  • Doubling focal length reduces depth by roughly a factor of four at the same distance and aperture.
  • Depth of field preview (from the previous node) lets you see the effect before pressing the shutter.
  • Diffraction from very small apertures (f/16 and beyond) can soften the image even when depth is large.

Same aperture, very different depth

You are photographing a flower 50 cm away. Your lens can zoom from 24 mm to 70 mm. You set aperture to f/4.

Focal lengthApproximate depth of field at 50 cm, f/4 (full-frame)
24 mm~35 cm – the stem and leaves behind are still sharp
50 mm~5 cm – the flower is sharp, background blurs
70 mm~2.5 cm – only the front petals are in focus

The same f/4, but the depth difference is huge because focal length magnifies the flower and shrinks the zone of acceptable sharpness. If you need the entire blossom sharp, zoom out or stop down to f/11; if you want only the center sharp, zoom in.

Check yourself

Check your understanding of the three controls.

1Multiple choiceChecked instantly

You are using a 50mm lens at f/2.8 and standing 2 meters from your subject. Which single change would give you the shallowest depth of field?

  • ASwitch to a 24mm lens at f/2.8 from the same distance
  • BMove to 4 meters away and keep the 50mm at f/2.8
  • CKeep the 50mm lens but change to f/1.4
  • DKeep the 50mm at f/2.8 but stop down to f/8
2Short answerMarked by AI

You are photographing a bird at a feeder using a 70mm lens at f/4, distance 3 meters. The background is too sharp — you want it more out of focus. You have a 70–200mm zoom lens. Describe what you would change (and what you would keep the same) to achieve a shallower depth of field, and explain why.

Graded on Identifies which control to change · Explanation of why the change works

3Short answerMarked by AI

You took two portraits of a friend with a 50mm lens at f/2.8. In the first shot you stood 1 meter away; in the second you stood 3 meters away and cropped to match the framing. The background in the second shot appears much sharper. Explain why, referencing the relationship between distance and depth of field.

Graded on Identifies that distance is the cause · Explains the quantitative relationship · Connects to why background becomes sharper

Lesson 62

Autofocus point selection

Learn how to move the active autofocus point to compose off-center subjects while maintaining focus.

15 min3 assessments

Focusing on an off-center flower

You're photographing a flower at the left third of the frame. You want the flower sharp and the background blurred (shallow depth of field).

Wrong approach: Focus with the center AF point, then recompose. At a wide aperture (f/1.8) and close distance, recomposing shifts the plane of focus behind the flower, making it soft.

Correct approach:

  1. 1.Set AF mode to Single-point AF (not Auto or Zone).
  2. 2.Press the AF point selection button (often marked with a small rectangle or a joystick icon).
  3. 3.Use the directional pad or joystick to move the active AF point left until it covers the flower.
  4. 4.Half-press the shutter button. The camera confirms focus (beep or green circle).
  5. 5.Fully press to take the photo.

Result: The flower is sharp, the background is blurred, and the composition is exactly as you framed it.

  • Moving the active AF point preserves your composition and avoids focus shift.
  • Single-point AF mode gives you precise control over which part of the scene is in focus.
  • Most cameras use a directional pad, joystick, or touchscreen to move the AF point.
  • The active AF point is visible in the viewfinder or on the LCD as a highlighted square.
  • Focus-and-recompose introduces focus error at wide apertures and close distances.
  • Always check that the AF mode is set to Single-point before attempting to move the point.
  • Touchscreen cameras let you tap directly on the subject to set the AF point instantly.
Steps
0/4

You've framed a great shot, but your subject is off-center. If you use the center AF point and recompose, you risk focus shift. Here's how to move the active AF point to focus exactly where you want.

  1. Set the AF mode to Single-point

    Locate the AF mode button or menu on your camera (often labeled AF, or a dedicated button with a rectangle icon). Choose Single-point AF (sometimes called One-Shot AF or AF-S). This tells the camera to use only one AF point that you control.

    On Canon: press the AF button on the back, then use the main dial to select Single-point. On Nikon: press the AF-mode button near the lens mount, then rotate the rear dial to AF-S and the front dial to Single-point. On Sony: press the Fn button, navigate to AF area, and choose Flexible Spot (S/M/L).

    If you accidentally leave the camera in Auto-area AF or Zone AF, the camera will override your point selection and focus on whatever it thinks is important.

    The viewfinder or LCD shows a single small square (or a set of squares with one highlighted). No clusters or multiple boxes.

  2. Activate AF point selection

    Press the button that enables moving the AF point. This is often a dedicated button with an icon of a rectangle with dots, or it may be a joystick that you can press. On many cameras, pressing the directional pad (D-pad) center button also activates selection.

    If your camera has a touchscreen, you can skip this step and simply tap the subject on the LCD.

    Some cameras require you to hold the AF point selection button while moving the point. If you release it, the selection locks.

    The active AF point starts blinking or is highlighted differently. You can now move it with the D-pad or joystick.

  3. Move the AF point to your subject

    Use the directional pad, joystick, or touchscreen to slide the active AF point over the subject you want in focus. Move it slowly; most cameras have a limited number of points, so you may need to place the subject under a nearby point if it doesn't align exactly.

    For touchscreen: tap directly on the subject on the LCD. The camera will set the AF point there immediately.

    If you move the point too fast, you might overshoot. Some cameras have a 'wrap-around' behavior where moving past the edge jumps to the opposite side.

    The highlighted square sits squarely over the subject in your composition.

  4. Lock focus and shoot

    Half-press the shutter button. The camera will focus using the selected AF point. You should see a focus confirmation (beep, green dot, or indicator in the viewfinder). If the subject is too low-contrast or dark, the camera may struggle; try focusing on a nearby edge.

    Once confirmed, fully press the shutter to take the photo.

    If the camera refuses to focus (focus hunts), the subject may be outside the AF point's detection range. Move the point to a higher-contrast area or switch to manual focus.

    The subject appears sharp in the viewfinder or on the LCD. The focus indicator is steady.

Checklist
0/6

Before you press the shutter, verify these settings and actions

Keep this checklist visible on your phone or in your camera bag until the steps become automatic.

Go deeper

For a detailed history and technical explanation of autofocus systems, including different point selection methods.

Check yourself

Check your understanding of autofocus point selection.

1Multiple choiceChecked instantly

You want to photograph a bird perched on a branch at the right edge of the frame. Which AF mode should you use to ensure the bird is sharp without recomposing?

  • AAuto-area AF (camera chooses points)
  • BSingle-point AF (you choose the point)
  • CZone AF (a group of points)
  • DContinuous AF (tracking mode)
2Put in orderChecked instantly

Arrange the steps to move the active AF point on a typical camera into the correct order.

  • APress the AF point selection button
  • BUse the directional pad or joystick to move the point to the subject
  • CSet the AF mode to Single-point
  • DHalf-press the shutter to lock focus
3Short answerMarked by AI

Explain why moving the AF point is preferable to the 'focus-and-recompose' technique when shooting at a wide aperture (e.g., f/1.8) and close distance. What error does focus-and-recompose introduce?

Graded on Identifies the focus shift caused by distance change during recompose · Recommends moving AF point as the solution

Lesson 63

Composition: building a compelling image

You will be able to arrange elements in the frame using proven compositional guidelines to create stronger photographs. Covers the rule of thirds, leading lines, framing, and the importance of simplicity. Prevents the habit of centering every subject and ignoring the edges.

25 min3 assessments

You can already place the plane of focus exactly where you want and control how much of the scene is sharp. Now the question is: what do you show in that sharp area? Without deliberate composition, your camera's default — the subject dead center — is the easiest choice, but it's also the most forgettable. A centered subject fills the frame with equal weight on all sides, which gives the viewer no reason to explore the rest of the image. Composition is the deliberate arrangement of visual elements to guide the viewer's eye, create a sense of balance, and tell a story. The same subject, moved to a different part of the frame, can transform a snapshot into a photograph that holds attention.

How composition guides the viewer's eye through the frame.

Analogy

Think of your composition like a shop window display. The window dresser places the most attractive item at eye level (the rule of thirds intersection), uses shelves or props (leading lines) to guide your gaze toward it, and keeps the background uncluttered so you focus on the merchandise. If the display were a chaotic jumble, you'd walk past. Your photograph works the same way: every element should either support the subject or be removed.

Where the analogy breaks down

This analogy breaks down because a photograph is a two-dimensional rectangle, and the viewer's eye can enter from any edge — not just from the front like a window display. Also, a window display is static and three-dimensional, while a photograph flattens depth and may rely on motion or timing.

  • The rule of thirds places key elements at the intersection of imaginary lines dividing the frame into thirds horizontally and vertically.
  • Leading lines direct the viewer's eye toward the main subject, creating depth and movement.
  • Framing with natural elements — branches, archways, windows — adds context and draws attention inward.
  • Simplicity removes distractions and forces focus on the subject by eliminating clutter.
  • Good composition creates a sense of balance and visual flow, making the image feel intentional.
Common misconception

“I should put the subject in the center because that's the most important part of the photo.”

The center is the most prominent position in the frame, and symmetry is naturally pleasing to the human eye.

What is actually true

Centering often results in a static, uninteresting image because the viewer's eye stops at the center and doesn't explore the rest of the frame. Placing the subject off-center (using the rule of thirds) creates dynamic tension and encourages the viewer to see the whole scene.

A landscape photograph with a path leading from the bottom left to the horizon, with a tree at the top right intersection.
CC BY-SA 2.0· Bob Harvey source
Check yourself

Check your understanding of composition principles.

1Multiple choiceChecked instantly

Which of the following best describes the purpose of leading lines in a photograph?

  • ATo create symmetry within the frame.
  • BTo guide the viewer's eye toward the subject.
  • CTo fill the frame with as much detail as possible.
  • DTo ensure the subject is placed in the center.
2Short answerMarked by AI

You are photographing a winding river through a valley. Describe how you would use the rule of thirds and leading lines to compose the shot. Mention where you would place the river and the horizon.

Graded on Uses rule of thirds for horizon · Uses leading line for the river · Overall composition clarity

3EssayMarked by AI

Compare the effectiveness of centering the subject versus using the rule of thirds for a portrait photograph. In your answer, provide one scenario where centering would be more appropriate and one where the rule of thirds would be better. Explain why each choice works compositionally.

Graded on Identifies strengths of centering · Identifies strengths of rule of thirds · Comparison and justification

Lesson 64

Rule of thirds

Learn to place key elements along the grid lines or at their intersections for a more balanced and dynamic composition.

15 min3 assessments

You frame a portrait: your subject dead centre, face filling the middle of the frame. The photo is technically correct, but it feels flat, static. That is the problem the rule of thirds solves. Instead of putting the subject in the middle, you place key elements – a face, a horizon, a tree – along imaginary lines that split the frame into nine equal rectangles. The intersections of those lines become strong visual anchors. The result: a picture that feels balanced, active and natural, because your eye moves around the frame rather than staying stuck in the middle.

From flat to dynamic

You are photographing a lone tree in a field. Horizon across the middle, tree exactly centre. The photo is symmetrical but boring – the eye lands on the tree and stays there. Now recompose:

  • Drop the horizon to the lower third line (the bottom horizontal line of the grid).
  • Place the tree on the right third intersection (where the right vertical line meets the upper horizontal line).

The sky now takes the upper two-thirds, giving a sense of openness. The tree is off-centre, leaving room for the viewer to wonder what is on the left. The photo becomes a story: the tree is not the whole story, just one actor in a bigger scene.

Steps
0/6

Apply the rule of thirds every time you compose a shot. These six steps work on any camera – mirrorless, DSLR or phone – as long as you can see a grid overlay.

Complete the steps in order. Skipping step 2 means you place the subject in a random spot, not an intersection.

  1. Activate the grid overlay

    Find the overlay setting in your camera's menu or live-view display. On most cameras it's buried in 'Display options' or a grid icon. On a phone, open the camera app's settings and toggle 'Grid' on.

    If you cannot find it now, keep a note of the setting and check it before your next shoot.

    Some cameras offer several grid styles – pick the 3×3 grid, not the 4×4 or the diagonals.

    You see nine equal rectangles (two vertical lines, two horizontal lines) on your screen or viewfinder.

  2. Identify your primary subject

    Look through the frame and decide which single element is most important: a person’s eye, a flower, a distant mountain, a car. This is the one thing that must land on a grid intersection.

    Do not pick multiple subjects for this step – only one element gets the intersection. The rest fall on lines or in thirds.

    You can point to exactly one main subject in the scene.

  3. Place the subject on an intersection

    Move the camera until the subject lies on one of the four points where the grid lines cross. If the subject is a person, put an eye (or their face) on an intersection. For a landscape feature, align its most prominent part.

    Your camera's autofocus point can help: set it to a single point and put that point where you want the intersection.

    Do not push the subject to the very edge of the frame – leave some breathing room (about a sixth of the frame width) beyond the subject.

    The subject overlaps one of the four grid intersection dots.

  4. Align the horizon or strong horizontal lines

    If your scene includes a horizon, a road, a roof line or a shoreline, place it exactly on one of the two horizontal grid lines. Choose the upper third line if the foreground is more interesting, or the lower third line if the sky is the focus.

    Also check that vertical elements (trees, poles, buildings) sit on the vertical lines.

    A horizon exactly centred is what you are trying to avoid – even if you are tempted by symmetry, place it on a third line first.

    The strongest horizontal line is on either the upper or lower horizontal grid line.

  5. Adjust for direction and movement

    If the subject has a clear direction – a person looking left, a car moving right – leave more empty space in front of them than behind them. That space is called 'lead room' or 'nose room'.

    Place the subject on the intersection opposite the direction they are facing. For example, if a person looks right, put them on the left third intersection.

    Putting the subject on the same side they are looking towards makes the frame feel cramped and unbalanced.

    The subject is on the intersection that leaves the most space in the direction they face or move.

  6. Review the whole frame

    Take your eye off the subject and scan the other eight rectangles. Do they contain something distracting (a bright spot, a face, a clutter)? If so, recompose slightly or wait for a better moment.

    The rule of thirds is a guide, not a law – if the scene calls for symmetry, break it. But break it deliberately, not because you forgot.

    A strong subject on an intersection can be ruined by a bright or busy element in another third. Check the full frame before pressing the shutter.

    No unintended focal points pull attention away from the subject.

Checklist
0/6

Live-shoot checklist for the rule of thirds

Use this checklist as a mental loop before every shot until the habit sticks. After a few shoots, you will check most points automatically.

  • The rule of thirds divides the frame into a 3×3 grid of nine equal rectangles.
  • The four points where the grid lines intersect are the strongest positions for a primary subject.
  • Place the horizon on the upper or lower third line, never the centre of the frame.
  • Leave more empty space in the direction the subject is looking or moving ('lead room').
  • Review the entire frame for distractions after placing the subject on an intersection.
  • The rule is a compositional guideline, not a hard law – break it deliberately when symmetry or tension calls for it.
Go deeper

Read the Wikipedia article for the historical origin of the rule and examples from painting and photography.

Check yourself

Check your understanding of the rule of thirds.

1Put in orderChecked instantly

Arrange the following steps in the correct order for applying the rule of thirds when composing a photo.

  • AActivate the grid overlay on your camera or phone.
  • BIdentify the primary subject in the scene.
  • CPlace the subject on one of the four grid intersections.
  • DAlign the horizon with the upper or lower third line.
  • EAdjust for lead room based on subject direction.
  • FReview the entire frame for distracting elements.
2Short answerMarked by AI

Describe how you would apply the rule of thirds to a portrait of a person looking to the right. What specific placement would you use and why?

Graded on Identifies correct subject placement (left intersection) · Explains the reason (lead room, natural gaze) · References grid overlay or intersection usage · Clarity and specificity

3ProjectMarked by AI

Take a photograph (or describe in detail a real or imagined scene) that uses the rule of thirds. Include:

  1. 1.A brief description of the scene and your primary subject.
  2. 2.Where exactly the subject is placed on the grid (which intersection and why).
  3. 3.Which horizontal line you used for the horizon (if applicable) and why.
  4. 4.How you handled lead room if the subject has direction.
  5. 5.A sentence or two on why this composition is stronger than a centred version.

Graded on Clear description of subject and scene · Correct placement on grid intersection with reasoning · Horizon placement and lead room (where applicable) · Comparison to centred composition

Lesson 65

Leading lines

Understand how to use natural lines in the scene to guide the viewer's eye toward the main subject.

15 min3 assessments

A flat, boring photo often lacks a clear path for the eye. Without a visual guide, the viewer's gaze wanders and leaves the frame. Leading lines solve this: they are natural or man-made lines—roads, fences, shorelines, shadows—that point toward your subject. Once you spot them, you position yourself so the line starts near a corner or edge of the frame and leads inward. The result is an image with depth and direction, where the subject feels inevitable.

A Path Through the Park

Scene: A winding gravel path through a park, with a large oak tree at the far end. The path is about 1.5 meters wide, flanked by grass.

Without leading lines: You stand facing the tree, the path runs straight away from you. The tree is small in the frame, the path is just a stripe. The photo feels flat.

With leading lines: You move to the left side of the path and crouch low. Now the path enters from the bottom-left corner and curves toward the tree. The edges of the path create two converging lines. The tree sits at the point where the lines meet, about two-thirds into the frame.

Result: The viewer's eye follows the path from the corner, along the curve, and lands on the tree. The image has depth—the path gets narrower as it recedes—and a clear subject. The rule of thirds is also satisfied: the tree is on the right third intersection.

  • A leading line is any continuous element in the frame that points toward the subject.
  • Lines work best when they start near a corner or edge of the frame, not in the center.
  • Diagonal lines create more dynamic tension than horizontal or vertical ones.
  • Multiple lines (e.g., both edges of a road) converging toward the subject strengthen the effect.
  • The line must lead to something—an empty vanishing point confuses the viewer.
  • Depth of field matters: a deep focus (small aperture) keeps the line sharp from front to back.
Steps
0/5

You are at a location with potential leading lines—a pier, a row of trees, a staircase. Follow these steps to capture the strongest composition.

  1. Scan for lines

    Look for any continuous shape: roads, fences, shadows, rows of lampposts, shorelines, railway tracks, bridges, even a line of people. Ask yourself: does this line point toward something interesting?

    Don't confuse a line that points away from the scene (e.g., a road that exits the frame) with one that leads inward.

    You can trace the line from the edge of the frame to a potential subject with your finger.

  2. Choose your vantage point

    Move left, right, higher, or lower until the line enters from a corner or edge and points toward your subject. Crouch to make a low wall lead upward; climb a step to make a row of pillars converge.

    Standing at eye level often makes lines horizontal or flat. Get low or high to create diagonals.

    The line now runs diagonally across at least half the frame, not parallel to the edges.

  3. Set your exposure for the line and subject

    Use aperture priority (A/Av) or manual mode. Choose a small aperture (f/8–f/11) to keep both the line and subject sharp. Set ISO as low as possible (100–200) for clean detail. Adjust shutter speed to get a correct exposure.

    If the line is in shadow and the subject in sun, you may need exposure compensation or a graduated ND filter to avoid blowing out highlights.

    The histogram shows no clipped highlights or shadows; the line and subject are both within the exposure range.

  4. Focus on the subject

    Use single-point autofocus and place the focus point on your main subject (where the line ends). Half-press the shutter to lock focus, then recompose if needed.

    If the line is much closer than the subject, autofocus may grab the line. Manually override or use back-button focus.

    The subject is sharp when you zoom in on the LCD.

  5. Frame and shoot

    Check the edges of the frame for distractions. Ensure the line starts cleanly at the edge (not cut off awkwardly). Take several shots: one with the line as a strong diagonal, one with the line as a curve, and one with the line as a vertical leading upward.

    A line that exits the frame at a corner can look like a mistake. Make sure it enters at a clear edge point.

    The line is continuous from edge to subject, and the subject is not in the exact center unless the composition demands it.

Checklist
0/7

Leading Lines Field Checklist

Tape this checklist to the back of your camera strap until it becomes automatic.

Check yourself

Test your understanding of leading lines.

1Put in orderChecked instantly

You are composing a photo of a lighthouse at the end of a stone pier. Arrange these steps in the correct order to use leading lines effectively.

  • ASet aperture to f/11 for deep focus.
  • BMove to the side of the pier so it enters from the bottom-left corner.
  • CFocus on the lighthouse using single-point AF.
  • DScan the scene and identify the pier as a leading line.
  • ECheck the histogram and adjust exposure if needed.
  • FTake the shot, ensuring the line is continuous to the lighthouse.
2Short answerMarked by AI

You are photographing a staircase in an old building. The stairs lead up to a stained-glass window. Describe in 2–4 sentences how you would use leading lines to compose this shot, including your camera settings.

Graded on Identifies the lines (handrails/steps) and their direction toward the subject · Describes camera settings appropriate for leading lines (small aperture, low ISO, focus on subject) · Explains the compositional placement (lines entering from corners/edges)

Project

Capture a Leading Lines Photo

Go outside (or use a photo you already have) and find a scene with at least one strong leading line. Compose the shot using the walkthrough steps. Submit the photo along with a short text explaining:

  • What the leading line is and where it enters the frame.
  • Your camera settings (aperture, ISO, shutter speed).
  • How you ensured the line points to the subject.

Constraints: Use manual or aperture-priority mode. The line must be a real physical element (not digital editing). The subject must be clearly identifiable.

Done looks like: A photo where the viewer's eye naturally follows the line to the subject without getting lost.

Deliverables

  • 01One digital photo (JPEG, at least 1920px on the long side).
  • 02A text file or note with the explanation described above.
ProjectMarked by AI

Submit your leading lines photo and explanation as described in the project brief.

Graded on The photo contains a clear leading line that enters from an edge or corner · The line leads to a clear subject · Explanation justifies camera settings and composition choices

Lesson 66

Framing with natural elements

Learn to use foreground elements like branches or doorways to frame the subject and add depth.

15 min3 assessments

A photograph is a flat rectangle. Your job is to make it feel deep. One way is to use the world itself as a picture frame—a branch arching over the path, a doorway, a gap in the leaves. A natural frame sits between you and the subject, enclosing it and creating the illusion of looking through something. It tells the eye: start here; go there.

Done well, a frame adds layers. The nearest plane (the frame) is dark or out of focus; the subject sits in the middle; the background falls away. The result is a photograph that feels three-dimensional.

You have already learned about leading lines and the rule of thirds. Framing is a special case of both: the frame leads the eye as a closed shape, and it often sits on a third. Now you need a repeatable process to find, compose and capture one.

Steps
0/6

Framing is a search-and-compose cycle. These six steps will get you from an empty scene to a framed shot. Work through them in order; skipping a step risks a weak composition.

  1. Find a natural boundary

    Walk around your subject. Look for elements that create a closed shape around it: an overhanging branch, an arch, a window, a gap between trunks, a rock cleft. The frame should be in the foreground—closer to you than the subject.

    If the scene lacks a clear frame, move your feet. A few steps sideways may turn a straight path into a framed corridor.

    A frame that is too busy (tangled branches, bright sky behind dark leaves) will distract, not focus.

    You can see at least one continuous boundary that encloses the subject area without cutting into it.

  2. Adjust your position so the frame surrounds the subject

    Crouch, step left, tilt the camera. You want the frame to appear at the edges of your viewfinder—top, bottom, sides—without pushing the subject to a corner. Usually the frame fills one or two edges, not all four, unless you want a vignette effect.

    Centre the subject within the opening, then consider the rule of thirds: if the frame is heavy on one side, place the subject on the opposite third.

    If the frame is too close to you, it may appear huge and swallow the subject. Back up or use a longer focal length.

    The subject is clearly visible inside the framed area, and the frame does not touch the subject’s face or key details.

  3. Set aperture for depth of field

    You usually want both the frame and the subject in decent focus. Select Aperture Priority (Av or A) and choose f/8 to f/11. A wider aperture (f/2.8) would blur the frame so much it becomes unrecognisable; a narrower aperture (f/16) may soften both due to diffraction.

    If the frame is very close (within 1 m) and the subject is 5 m away, even f/11 may not keep both sharp. In that case, decide which plane matters more—the subject—and accept a slightly soft frame.

    At f/16 or f/22 on an APS‑C sensor, diffraction reduces overall sharpness. Stop at f/11 unless you have a full‑frame body.

    The camera shows an aperture of f/8 or f/11 in the viewfinder or LCD.

  4. Focus on the subject

    Place the active focus point on the subject’s eye (for a person or animal) or the most important detail (for a landscape). Press the shutter half‑way. The frame, being closer, will be slightly out of focus—that’s fine; it adds depth. If the autofocus keeps grabbing the frame, switch to single‑point AF and move the point manually.

    If you focus on the frame, the subject (which you care about) will be soft. Always override AF when needed.

    When you half‑press, the subject is sharp in the viewfinder; the frame looks a bit softer.

  5. Check edges and tangents

    Look around the entire frame in the viewfinder. Make sure no branch or edge cuts directly through the subject’s head, body or key item. A tangent—where the frame just touches the subject—creates a visual tension that usually looks accidental.

    Also check that the frame itself isn’t cut off by the picture edge. If a branch exits the top left corner, that’s often fine; if it exits the centre of the frame, it may look like an error.

    Tangents are the most common flaw in student framing shots. A branch that touches the top of someone’s head feels like a mistake.

    The subject is fully within the opening with no intersecting lines at critical points.

  6. Take three variations and review

    Fire a couple of frames. Then shoot one with a slightly wider aperture (one stop wider) to see if a softer frame works better. Do one version without the frame for comparison. Review all on the LCD, zooming in to check sharpness on the subject.

    Don’t delete the ‘bad’ ones immediately—sometimes the softer frame version looks more atmospheric when viewed on a large screen.

    On the LCD, the subject is sharp and the frame is recognisable. You have a clear preference for one shot.

Checklist
0/7

Field Checklist – Natural Framing

Print or screenshot this list before you go out. Tick each item before moving to the next shot.

The Forest Arch

Scene: A friend stands in a forest clearing. The background is bright green leaves. You want to add depth.

Finding the frame: You notice an oak branch that curves low, forming an arch about 2 m high. It is 1.5 m in front of the subject.

Position: You crouch so the branch appears in the top‑left and top‑right corners of the frame, creating a natural arch that frames the friend’s head and shoulders.

Settings: ISO 200, f/9 (aperture priority), 1/125 s. Focus point on the friend’s near eye. The branch is close enough that at f/9 it appears slightly soft but still recognisably a branch.

Check: No branch cuts across the friend’s face. The dark bark contrasts with the lighter background, so the eye jumps to the subject.

Result: The framed version has a clear foreground (the arch), middle ground (the friend) and background (sunlit leaves). The unframed version (shot without the branch) looks flat.

  • Natural framing uses an element in the foreground to enclose the subject, guiding the viewer’s eye inward.
  • An effective frame is usually darker than the subject to avoid competing for attention.
  • Aperture settings of f/8 to f/11 keep both the frame and the subject acceptably sharp in most scenes.
  • Focus must be locked on the subject; the frame’s slight softness enhances depth.
  • Avoid tangents: the frame should not intersect the subject’s face, head, or key details.
  • A wide‑angle lens makes the frame appear larger relative to the subject, exaggerating depth.
  • Reviewing an unframed version side‑by‑side helps you judge whether the frame actually improves the composition.
Check yourself

Test your understanding of the framing process.

1Put in orderChecked instantly

Arrange the following steps in the correct order for composing a frame-with-natural-elements shot:

a) Set aperture to f/8–f/11. b) Find a natural boundary in the foreground. c) Adjust position so the frame surrounds the subject. d) Focus on the subject. e) Check for tangents between frame and subject. f) Review multiple variations on the LCD.

  • Aa) Set aperture to f/8–f/11.
  • Bb) Find a natural boundary in the foreground.
  • Cc) Adjust position so the frame surrounds the subject.
  • Dd) Focus on the subject.
  • Ee) Check for tangents between frame and subject.
  • Ff) Review multiple variations on the LCD.
2Short answerMarked by AI

Describe a scenario where using a natural frame would likely weaken the composition rather than strengthen it. What specific problem would arise, and what would you do instead? Limit your answer to 3–5 sentences.

Graded on Identifies a clear problem scenario (e.g., bright frame, distracting pattern, wrong depth). · Proposes a concrete, actionable alternative or fix. · Clarity and conciseness.

Project

Find and Shoot a Natural Frame

Your task: go outside (or into your house) and create ONE photograph that uses a natural element as a frame for a clear subject. The frame can be a tree branch, a window, an arch, a gap in a fence, or any other element that encloses the subject.

Constraints:

  • The frame must be in the foreground (closer to you than the subject).
  • Use an aperture of f/8 or narrower (higher f‑number).
  • Focus on the subject, not the frame.
  • Avoid tangents: the frame should not cut through the subject's face or key detail.
  • Submit ONE photo file and a 100–200 word explanation covering: what the frame is, your camera settings (aperture, focal length, ISO), why you positioned the frame as you did, and one thing you learned from the process.

Deliverables

  • 01One photograph file (JPEG or PNG, max 5 MB).
  • 02A 100–200 word explanation in plain text.
ProjectMarked by AI

Complete the project described above: take a photo using natural framing, explain your choices.

Graded on Photo shows a clear foreground element that encloses the subject (the frame). · Aperture and focus are appropriate (aperture f/8 or smaller, focus on subject). · Explanation shows understanding of compositional choices (why that frame, position, settings).

Lesson 67

Simplicity and minimalism

Understand the power of simplicity in composition, removing distractions to focus attention on the subject.

15 min3 assessments

You already know how to place your subject using the rule of thirds or leading lines. But a well-placed subject still gets lost if the frame is full of clutter. Simplicity is the act of removing everything that does not support the story you are telling. When you simplify, you reduce the number of elements competing for attention. The viewer’s eye lands on the subject and stays there. This is not about making the frame empty—it is about making every element count. A simple composition often uses negative space, plain backgrounds, and a single strong focal point. The result is clarity: the message of the photograph becomes immediate and unmistakable.

The simplification process reduces visual noise step by step.

Analogy

A clear desk lets you focus on one task; a messy desk scatters your attention. Similarly, a simple photograph directs the viewer's eye to the subject without competition. The negative space around the subject acts like the empty part of the desk—it frames the work.

Where the analogy breaks down

When the subject is the clutter itself—like a crowded market scene where the chaos tells the story—simplicity would strip away the meaning. In such cases, the complexity is the message.

Common misconception

“Simplicity means the photo is boring or empty.”

Many simple photographs have large areas of empty space, which can feel uneventful if you are used to busy images.

What is actually true

Simplicity means intentional reduction, not emptiness. A simple photo can be dynamic if the subject is strong and the negative space supports it—like a single bird against a vast sky.

A Single Leaf on Concrete

Imagine a single autumn leaf resting on a grey concrete path. The leaf is the only warm color; the concrete is uniform and textureless. Your eye goes straight to the leaf. The story is about isolation and the passage of time. If there were other leaves, cracks in the concrete, or a person walking by, the message would blur. This is simplicity at work: every element that remains serves the story.

  • Simplicity removes elements that do not contribute to the image's story.
  • A simple composition directs the viewer's attention immediately to the subject.
  • Negative space is not wasted space—it frames and emphasizes the subject.
  • Simplicity does not mean minimalism; it means intentional exclusion.
  • The same scene can be shot simply or complexly depending on the intended message.
Check yourself

Check your understanding of simplicity in composition.

1Multiple choiceChecked instantly

What is the primary purpose of simplifying a composition?

  • ATo make the photo look empty and modern
  • BTo focus the viewer's attention on the subject by removing distractions
  • CTo ensure the background is completely black
  • DTo follow the rule of thirds exactly
2Short answerMarked by AI

Describe a real or imagined scene that would benefit from simplification. Identify at least two elements you would remove and explain why their removal strengthens the composition.

Graded on Identification of distracting elements · Explanation of how removal strengthens composition · Clarity of description

3Short answerMarked by AI

Look at this description: 'A portrait of a person standing in a park with a busy background of trees, benches, and other people. The subject is off-center.' What specific distractions would you eliminate to simplify this portrait? Justify your choices.

Graded on Identification of specific distractions · Justification for each removal · Feasibility of the proposed changes

Lesson 68

Reviewing and critiquing your photos

You will be able to analyze your own images using the histogram, highlight warnings, and a critical eye to identify exposure and focus problems. Covers reading the histogram, spotting blown highlights, and the basic steps of self-critique. Prevents the habit of deleting images without understanding what went wrong.

25 min3 assessments
Decide

You're on a sunny afternoon shoot. You point your camera at a white egret standing on dark muddy water. You take the shot in manual mode using the meter's indicated exposure. On the LCD, the egret looks washed out — no feather detail — and the water appears pure black, even though you could see ripples. You suspect something is wrong with the exposure. You have access to the histogram overlay and the highlight warning feature. What do you do?

You see the photo on the LCD. The bird's feathers are featureless white, the background is ink black. What is your first diagnostic step?

Decision tree for diagnosing photo problems from a symptom.

Analyzing a Photo of a White Egret at Sunset

Photo: A white egret stands on dark water at golden hour. The egret appears pure white with zero texture, the water is black with no reflections, and there is no detail in either. The sky is a bit gray.

Histogram: A tall, narrow spike at the extreme right edge (red channel maxed) and another spike at the extreme left edge (all channels low). The middle of the histogram is nearly empty — no midtones.

Highlight warning: The entire egret area blinks on the LCD.

Analysis: The evaluative metering tried to make the overall scene average to middle gray. Because the egret is so bright and the water so dark, the camera's exposure was a compromise that clipped both extremes. The histogram tells us that the bright areas are blown (no recoverable detail) and the dark areas are crushed (no recoverable detail). The highlight warning confirms which specific regions are blown.

What this means: The scene has too much dynamic range for the camera's sensor in a single exposure. Without exposure compensation or bracketing, important detail is lost in both highlights and shadows. The histogram is the first tool to catch this — never rely on the LCD alone.

Common misconception

“If the photo looks fine on the camera's LCD, it's properly exposed.”

The LCD is bright, contrasty, and often has auto-brightness that makes underexposed images look correct, especially in bright outdoor light.

What is actually true

The LCD is not calibrated and can be very misleading. Only the histogram and highlight warnings give objective evidence. Many photos that look great on the LCD turn out to have blown highlights or crushed shadows when viewed on a computer monitor. For example, a portrait shot against a bright sky may look well-exposed on the LCD, but the histogram will show the sky spike at the right edge, indicating loss of cloud detail.

Checklist
0/6

Post-Shot Diagnostic Checklist

Use this checklist immediately after your first test shot or after changing exposure settings.

Check yourself

Now apply what you've learned to diagnose photo problems.

1Put in orderChecked instantly

Arrange the steps of a proper self-critique after taking a photo. (1 = first step, 5 = last step)

  • AReview the histogram for clipping
  • BCheck highlight warnings for blown areas
  • CZoom in to assess focus sharpness
  • DCompare exposure to your creative intent
  • EDecide whether to reshoot or adjust settings
2Short answerMarked by AI

You take a photo of a subject that is partly in bright sunlight and partly in deep shade. The LCD looks okay, but the histogram shows a spike at the right edge and a spike at the left edge, with a dip in the middle. What does this histogram tell you, and what is the likely problem?

Graded on Identifies the symptom (clipping at both ends) · Explains the likely cause (high dynamic range scene) · Recognizes that the LCD was misleading

3Select all that applyChecked instantly

Which of the following are symptoms of overexposure (blown highlights)? (Select all that apply)

  • AThe histogram shows a spike touching the right edge, with pixels piled up at 255
  • BHighlight warnings show blinking areas on the photo
  • CThe photo appears consistently darker than the scene
  • DFine texture in bright areas (like clouds or a white shirt) appears as pure white without detail

Lesson 69

Reading the histogram

Learn to interpret the luminance histogram to assess exposure and identify underexposure or overexposure.

15 min3 assessments

You can already review your photos on the camera’s LCD screen. But the screen is small and your eyes adjust to its brightness, so what looks fine might actually be losing detail in pure black or pure white. The luminance histogram solves that: it is a graph showing how many pixels in your photo have each brightness level, from pure black (0) on the left to pure white (255) on the right.

Every time you look at a photo, the histogram answers three questions instantly:

  1. 1.Are any highlights blown? — Look for a spike pressed against the far right edge.
  2. 2.Are any shadows crushed? — Look for a spike pressed against the far left edge.
  3. 3.How is the overall exposure distributed? — A wide, bell-shaped curve that does not touch either edge usually means the photo captures the full tonal range without losing detail.

The histogram does not tell you whether your photo is good; it tells you whether your sensor captured the detail you need. If you want texture in a white dress, the histogram must not have a pile of pixels at 255. If you want to recover detail from black rocks, the histogram must not have a pile at 0.

Decision tree for diagnosing exposure problems from a histogram

Decide

You are reviewing a photo of a group portrait taken under harsh midday sun. On the camera’s LCD you see blown-out sky and very dark faces. You switch to the luminance histogram.

The histogram shows a tall spike on the far right edge and most of its mass to the right of center. What does the right edge spike tell you?

Common misconception

“"The histogram should always look like a bell curve centered in the middle."”

A centered histogram often corresponds to a well-exposed scene in typical daylight, and many tutorials show this as the "ideal" shape.

What is actually true

The ideal shape depends on the scene itself. A snowy landscape has a natural peak on the right; a night scene peaks on the left. The goal is not a centered bell curve but to avoid clipping at either edge — the histogram can be anywhere horizontally as long as no pixels are forced to pure black or pure white unless the scene demands it.

Reading two real histograms

Photo A: Underexposed

Histogram: tall spike at x=0 (left edge), then a low curve rising to a small hump at x=80, then flat from x=150 to x=255.

The photo is of a forest in shade. The left-edge spike means shadows are pure black with no texture. The hump at x=80 shows the tree trunks, but no detail above that — the bright sky in the background is entirely absent.

Diagnosis: The exposure is too low; the sensor didn't capture the bright part of the scene. The left-edge spike confirms lost shadow detail.

Photo B: Correct exposure for that forest

Histogram: No spike at either edge. It starts rising at x=20, peaks at x=120, and trails off to zero at x=235.

The photo now shows dark bark with grain, green leaves in the midtones, and the sky through the trees as a bright but not blown area.

Diagnosis: The exposure is set to capture the full brightness range of the scene. The histogram barely touches 10 and tops at 230, leaving headroom on both sides.

Check yourself

Check your understanding of the histogram.

1Short answerMarked by AI

Describe what a histogram that shows a tall spike at the far left (0 brightness) and a low curve ending far before the right edge means for the photo’s exposure and the detail you can recover in editing.

Graded on Identifies left-edge spike as shadow clipping and describes what it means for detail · Connects histogram shape to exposure level (underexposed) and mentions the bright side is missing · Mentions implications for editing (e.g., cannot recover clipped shadows, noise when brightening)

2Put in orderChecked instantly

Arrange the following steps in the correct order for diagnosing and correcting an exposure using the histogram. Place each step by its correct sequence number (1 to 5).

  • ACheck the histogram on the camera after taking a test shot.
  • BIdentify whether there is a spike at the far left (shadow clipping) or far right (highlight clipping).
  • CDecide which area (shadows or highlights) is most important to preserve.
  • DAdjust exposure compensation (or aperture/shutter/ISO) to shift the histogram away from the clipped edge.
  • ETake another shot and re-check the histogram to verify clipping is resolved.
3Select all that applyChecked instantly

Which of the following statements about the luminance histogram are correct? Select all that apply.

  • AThe left side of the histogram represents shadows.
  • BThe right side represents highlights.
  • CA histogram that is perfectly centered always means correct exposure.
  • DA spike on the far right always means underexposure.
  • EThe histogram can help identify both overexposure and underexposure.
Go deeper

Read the Wikipedia article on histograms for an extensive explanation of how the graph represents pixel brightness and the mathematical background behind the tonal distribution.

Lesson 70

Check for blown highlights and crushed shadows

Learn to use highlight warnings and shadow indicators to detect loss of detail in bright and dark areas.

15 min3 assessments
Decide

You're reviewing photos from a bright outdoor shoot. One image of a white wedding dress against a sunlit wall looks washed out. The camera's highlight warning is blinking on the dress area. The histogram shows a spike touching the right edge. What do you do?

The highlight warning is blinking on the dress. What does this indicate?

Decision tree for diagnosing blown highlights and crushed shadows using camera warnings and histogram.

Blown Highlights in a White Building Shot

Situation: You photograph a white building on a sunny day. The camera's highlight warning flashes on the building's walls. The histogram shows a tall spike pressed against the right edge; the sky is correctly exposed.

Problem: The building's highlights are blown. The white paint loses all texture and appears as a featureless white blob.

Fix: Reduce exposure by 1/3 stop (faster shutter speed or smaller aperture). The histogram spike moves left away from the edge. The highlight warning stops. Now the building retains subtle shadows and texture in the paint.

Result: Before: pure white walls, no detail. After: visible brick texture and slight shading.

Checklist
0/5

Quick Review Checklist for Blown Highlights and Crushed Shadows

Use this checklist every time you review a batch of photos. It takes 10 seconds per image.

  • Blown highlights appear as pure white with no detail; the histogram has a spike at the right edge.
  • Crushed shadows appear as pure black with no detail; the histogram has a spike at the left edge.
  • The highlight warning (blinking) indicates loss of detail in bright areas; the shadow warning does the same for dark areas.
  • In JPEG, clipped highlights and shadows are permanently lost; in RAW, you may recover up to 1–2 stops of detail.
  • To fix blown highlights in-camera, reduce exposure (faster shutter, smaller aperture, or lower ISO).
  • To fix crushed shadows in-camera, increase exposure or add light to the scene (e.g., flash, reflector).
  • The histogram is a reliable tool; always check it alongside the warnings for a complete picture.
Common misconception

“If the highlight warning blinks, the photo is ruined and cannot be fixed.”

The warning means detail is lost, and you can't get back what the sensor didn't record.

What is actually true

If you shoot in RAW, you can often recover 1–2 stops of highlight detail by reducing exposure in post-processing. The warning still means some detail is lost, but not all. For JPEG, the loss is permanent. So the photo may be salvageable, depending on the format and how much is blown.

Check yourself

Test your ability to detect and respond to blown highlights and crushed shadows.

1Short answerMarked by AI

You have a photo of a person with a white shirt against a dark background. The histogram shows a spike at the right edge for the shirt area, and the shadow area is crushed. Describe what you see and what you would do to fix it in-camera.

Graded on Identifies both blown highlights and crushed shadows from the description · Proposes a specific in-camera fix that addresses both problems · Explains why the fix works using histogram concepts

2Select all that applyChecked instantly

Which of the following are signs of blown highlights? (Select all that apply.)

  • AHistogram spike at the right edge
  • BHistogram spike at the left edge
  • CHighlight warning blinking on the image
  • DShadow warning blinking on the image
  • EPure white areas with no detail when zoomed in
  • FPure black areas with no detail when zoomed in
3Put in orderChecked instantly

Put the steps to check for blown highlights and crushed shadows in the correct order.

  • AEnable highlight and shadow warnings on the camera
  • BReview the histogram for spikes at the edges
  • CLook for areas of pure white or pure black in the image
  • DAdjust exposure if warnings or histogram indicate clipping
  • ERecheck the warnings and histogram after adjustment

Lesson 71

Using the camera's playback tools

Learn how to use zoom, info displays, and other playback tools to evaluate focus, composition, and exposure on the go.

15 min3 assessments

You've taken a shot in manual mode. The exposure looks good on the rear screen, but the screen is small and bright—it lies to you. The only way to know if the eye is sharp, if the composition holds up, or if you clipped a highlight is to use the camera's playback tools. Every camera has the same four: zoom to check focus, info overlays to see shutter speed, aperture, ISO and the histogram, highlight warnings (the 'blinkies') that flash over overexposed areas, and rating/protect to mark keepers so you don't accidentally delete them. This lesson walks you through using them in the field, in the order that catches problems before you leave the spot.

  • Zoom in to at least 100% (1:1) to check sharpness on the main subject, not the whole frame.
  • Cycle through info overlays to confirm shutter speed is fast enough for the focal length and that the histogram is well-placed.
  • Enable highlight warnings (blinkies) to immediately see blown highlights; adjust exposure and reshoot.
  • Use the rating (star) function to flag keepers and the protect function to prevent accidental deletion.
  • Check focus on the eyes in portraits and on the sharpest edge in landscapes, not on smooth areas.
  • Compare the playback histogram to the scene's actual tonal range—a spike against the right wall means you lost detail.
Steps
0/7

After every shot, run this sequence before you move on. It takes 10 seconds and saves you from discovering a soft image at home.

  1. Press the Playback button

    Press the triangle ▶ button (usually top-left on the back of the camera). The last image you took appears on the screen.

    If you see a blank screen, you may be in a different mode—press Playback again or switch the mode dial to any shooting mode.

    The image fills the screen. You can see the whole frame.

  2. Enable highlight warnings

    Press the Info/Disp button repeatedly until you see the histogram view with flashing areas (blinkies). On some cameras, this is a separate setting in the playback menu. The blinkies flash black and white over any pixels that are blown (pure white).

    If blinkies don't appear, check the camera's playback display settings—some models require you to enable 'Highlight alert' in the menu first.

    Overexposed areas blink. If nothing blinks, your exposure is within the sensor's range.

  3. Assess the blinkies and histogram

    Look at where the blinkies are. If they cover important detail (a face, a cloud, a highlight), your exposure is too bright. Check the histogram: a spike touching the right edge confirms clipping. Decide if you need to reshoot with a faster shutter, smaller aperture, or lower ISO.

    Don't panic about small blinkies in specular highlights (e.g., a reflection on water)—those are acceptable. Worry about large patches of blinkies on your subject.

    You know whether to reshoot or move on.

  4. Zoom in to check focus

    Press the Zoom In button (magnifying glass with a +, or a dedicated AF/MF button). Press once to zoom to roughly 50%, again to 100% (1:1). Use the multi-controller or arrow keys to pan to the main subject. On a portrait, pan to the eye. On a landscape, pan to the sharpest edge (a branch, a rock).

    Zooming past 100% (e.g., 200%) makes pixel-level noise look like blur. Stay at 1:1. Also, don't zoom out and judge sharpness from the full frame—the screen is too small.

    The subject appears crisp. If it looks soft, the focus was off or shutter speed was too slow. Reshoot.

  5. Review composition and exposure with info overlay

    Press Info/Disp again to cycle to the shooting data overlay (often a second or third press). This shows shutter speed, aperture, ISO, focal length, and sometimes a thumbnail with a focus point indicator. Confirm that the focus point is on your subject (it will be highlighted or shown as a red square on some cameras). Check that shutter speed is at least 1/(focal length) to avoid camera shake (e.g., 1/100s for a 100mm lens).

    If the focus point is not on your subject, the camera may have focused on the background. Re-shoot and ensure your AF point is on the subject.

    Shutter speed is safe, aperture is what you intended, ISO is within acceptable noise range, and focus point is on the subject.

  6. Rate or protect the keeper

    If the image passes all checks, press the Rating/Star button (often a dedicated button or a menu option). Assign 1–5 stars. Alternatively, use the Protect button (a key icon) to lock the file from deletion. This is especially useful when you're shooting a series and want to mark the best frame immediately.

    Don't rate every image—only the ones you'd consider editing. Over-rating dilutes the system.

    The star or lock icon appears on the image.

  7. Move to the next shot

    Press the right arrow or scroll wheel to advance to the next image. Repeat steps 2–6 for each frame you care about. After a burst, check only the first and last frame of the sequence to save time.

    If you skip this step and start shooting again, you'll lose the chance to catch a problem while the scene is still set up.

    You are on the next image and ready to evaluate it.

Checklist
0/8

Playback review checklist

Keep this checklist visible while shooting. Tick each item mentally after every important shot.

Field example: Checking a portrait

Situation: You're shooting a portrait in open shade at 1/200s, f/2.8, ISO 200 with a 85mm lens.

Step 1: Press Playback. The image looks good on screen.

Step 2: Press Info/Disp until blinkies appear. No blinkies—good, exposure is safe.

Step 3: Press Zoom In twice to reach 1:1. Use the controller to pan to the model's left eye. The eye is sharp, eyelashes are distinct. No motion blur.

Step 4: Press Info/Disp to see shooting data. Shutter speed 1/200s is well above 1/85s (safe). Focus point is on the eye. ISO 200 is clean.

Step 5: Press the Rating button once to give it 3 stars. The star icon appears.

Result: You know this image is a keeper. You move on to the next pose with confidence.

Check yourself

Test your ability to use playback tools in the field.

1Put in orderChecked instantly

Arrange the following steps in the correct order for reviewing an image immediately after shooting it. Start with the first action after pressing the Playback button.

  • AEnable highlight warnings (blinkies)
  • BZoom in to 1:1 on the main subject
  • CRate or protect the image if it passes checks
  • DCheck the histogram and blinkies for exposure
  • EReview shooting data (shutter speed, aperture, ISO, focus point)
  • FAdvance to the next image
2Short answerMarked by AI

You're shooting a landscape at 1/30s with a 200mm lens. After pressing Playback, you zoom in to 1:1 and the distant trees look slightly soft. The blinkies show no overexposure. The histogram is centered. What is the most likely cause of the softness, and what specific playback tool step would you use to confirm it? (Answer in 2-4 sentences.)

Graded on Identifies the likely cause (camera shake) and references the 1/focal length rule · Names the specific playback tool step to confirm (shooting data overlay) · Provides a coherent and complete answer within the length constraint

3ProjectMarked by AI

Take five photos in manual mode of any subject (e.g., a still life, a friend, a street scene). For each photo, use the playback tools as described in this lesson. Then write a short report (100-150 words) that includes: (1) the settings you used for each shot, (2) what the playback tools revealed (blinkies, sharpness, histogram shape), and (3) whether you reshoot or kept the image and why.

Graded on Includes settings for each of the five photos · Describes what playback tools revealed for each photo · States whether each image was kept or reshoot, with reasoning

Lesson 72

A framework for self-critique

Develop a systematic approach to reviewing your own photos, focusing on exposure, focus, composition, and intent.

15 min3 assessments

You can already read a histogram and spot blown highlights. But a single fix—exposure, say—might not rescue a photo if the composition is weak or the subject is blurry. You need a repeatable sequence that covers everything a good critique considers, in an order that makes each step build on the one before.

This framework gives you five checks to run on every photo you review: exposure → focus → composition → intent → one action to improve. Running them out of order—fixing intent before you know whether the photo is sharp—wastes time and misses root causes.

  • Self-critique follows a fixed order: exposure, then focus, then composition, then intent, then a single actionable improvement.
  • Checking exposure first prevents mistaking a blown-out sky for a composition problem.
  • A sharp photo with poor composition is salvageable; a blurry photo with perfect framing is not.
  • Intent evaluates whether the original goal (e.g., convey motion, show detail) was achieved.
  • The last step isolates exactly one change that would have the biggest impact, avoiding the trap of listing everything wrong.
Steps
0/5

Each time you review a picture, run these steps in order. Stop at the first step where something is off—fix that before moving on.

  1. Check Exposure

    Look at the histogram. Is the graph clipped at either edge? Are highlights blown or shadows crushed? Also check the highlight warning overlay if your camera has one. If you see clipping, decide: is it intentional (e.g., a specular highlight) or a mistake?

    Don't skip this step even if the photo 'looks okay' on the LCD. The histogram never lies; your eyes adapt.

    The histogram has no clipping on the side that matters for your subject, or you have explicitly decided to accept the clipping.

  2. Check Focus & Sharpness

    Zoom to 100% on the main subject. Is the eye (or key detail) tack sharp? If the subject is moving, check for motion blur; if you used a tripod, check for camera shake from mirror slap or wind. Also look at the depth of field—are the parts you wanted in focus actually sharp?

    Screen sharpening on the camera's back display can make a blurry image look sharp. Always zoom to 100%.

    The main subject is sharp at 100% view, and depth of field covers the intended area.

  3. Check Composition

    Assess framing, the rule of thirds (or your chosen rule), leading lines, balance, and negative space. Crop mentally: would a tighter crop improve the message? Are there distracting elements at the edges? Ask: does the composition direct the viewer's eye to the subject?

    Don't polish composition if the shot is blurry—go back to step 2 first.

    The composition feels intentional and supports the subject without major distractions.

  4. Check Intent

    Recall why you took this photo. Were you trying to tell a story, capture a mood, show texture, freeze action? Does the final image communicate that intent? If not, identify what is missing—perhaps the emotion is flat because the light was harsh, or the action is unclear because the shutter speed was too slow.

    Don't invent intent after the fact. If you can't remember why you took it, mark it as 'no clear intent' and decide whether that makes the photo weak.

    You can articulate the original intention and state whether the photo succeeds or fails at it.

  5. Choose One Improvement for Next Time

    Of the issues found in steps 1–4, pick the single change that would most improve the next similar shot. Examples: 'Use a faster shutter speed to freeze motion' or 'Move left to remove the lamppost from the background' or 'Bracket exposure for the sky.' Write it down or note it.

    Do not list five things. The goal is to remember ONE actionable change that will actually stick.

    You have one specific, actionable change written in your notes.

Checklist
0/5

Self-Critique Field Checklist

Print or screenshot this checklist. Keep it open in Lightroom or your camera bag.

Critique of a Hypothetical Portrait

Photo: Outdoor portrait, subject against a brick wall, midday sun, face partially shadowed by a tree.

  1. 1.Exposure: Histogram shows a spike on the right—the white wall is blown out. The subject's face is correctly exposed, so the blown wall is a real problem, but not on the subject. Decision: Accept the blown background if the portrait is about the person, but note it as a failing.
  2. 2.Focus & Sharpness: At 100%, the subject's eye is sharp. No motion blur. Depth of field is fine because the background wall is far enough away that it's slightly soft, which helps separation. All good.
  3. 3.Composition: The subject is centered, rule of thirds not used. The tree branch enters the frame from the top right—distracting. The brick wall texture is busy. Crop suggestion: remove the branch and maybe move the subject off-center.
  4. 4.Intent: The intent was a casual, relaxed portrait. The harsh overhead light creates strong shadows under the eyes—not relaxed. The intent fails because of lighting.
  5. 5.One improvement for next time: Shoot in open shade or use a diffuser to soften the light, eliminating the harsh shadows on the face.
Check yourself

Now apply the framework.

1Put in orderChecked instantly

Arrange the five steps of the self-critique framework in the correct order. Each step name appears exactly once.

  • ACheck exposure
  • BCheck focus & sharpness
  • CCheck composition
  • DCheck intent
  • EChoose one improvement for next time
2Short answerMarked by AI

A friend shows you a photo of a football player mid-kick at dusk. The player's face is sharp, but the ball is blurry. The composition puts the player on the left third and the ball at the right third. The histogram has a small shadow clip in the lower-left corner (the grass). The friend says: 'I wanted to show the power of the kick.' Using the framework, write a 2-4 sentence critique, addressing each step in order. Mention what is working and what the one improvement should be.

Graded on Addresses exposure step · Addresses focus and identifies the blur correctly · Addresses composition and intent · Proposes one specific, actionable improvement

3Short answerMarked by AI

Now critique your own photo. Open one recent photo that disappointed you. Use the five-step framework to write a 200-400 word critique. Include: the original intent, what you found at each step, and the single improvement you will remember for next time.

Graded on Follows the step order and mentions each of the five checks · Identifies a specific, relevant issue in at least two steps · Relates findings to original intent · Proposes one clear, actionable improvement

Lesson 73

Capstone: a photo essay in manual mode

You will plan, shoot, and present a series of 5-10 images on a theme, all taken in manual mode with intentional exposure, focus, and composition choices. Covers selecting a theme, scouting, shooting, and writing a brief reflection on your decisions. Prevents the feeling that manual mode is only for single shots and not for a coherent body of work.

60 min3 assessments

You can already read a histogram and spot blown highlights on a single frame. This capstone moves that skill up one level: instead of fixing one image, you plan and shoot a series of 5-10 photographs that holds together as one body of work.

The assignment is a photo essay. A photo essay is not a folder of your best single shots. It is a set of images on one theme, each one exposed deliberately in manual mode, arranged so the viewer moves through it and comes away with one feeling or idea.

You will do this in three passes. First, choose a theme you can actually shoot within a few days and within walking distance of where you live. Second, shoot the series in manual mode, using the histogram to check every frame and changing aperture, shutter, or ISO only when the light or the story asks for it. Third, write a short reflection that names at least three manual decisions and why you made them.

Later nodes in this path will refine theme selection, scouting, and sequencing. This capstone is your first complete pass end to end, so it is meant to be finished, submitted, and judged. The project brief below is the contract. The example that follows shows what one planning sheet looks like. The checklist is what you verify before you hand it in.

Project

Manual Mode Photo Essay

Produce a photo essay of 5-10 images on a theme you choose. Every image must be shot in manual mode: the camera's mode dial set to M, not Program, aperture-priority, shutter-priority, or Auto. Set the mode dial before the first shot and leave it there for the whole shoot.

Choose a theme that is visible in every frame, not just in the title. A workable theme is narrow enough to finish in one or two sessions: 'the blue hour from my street', 'tools left on a workbench after closing', 'people waiting in line', 'shadows on concrete walls'. Avoid 'my city' or 'nature' — those are too broad for 5-10 images to cohere.

For each image, make a deliberate choice of aperture, shutter speed, and ISO, and record it. The choice must be yours: if the camera chose it, the image does not count. Use the histogram and the blinking highlight warning on the back of the camera to confirm that you kept detail where you wanted it.

Arrange the images in a sequence and write a reflection of 250-400 words. The reflection must name at least three specific manual choices, for example 'I used f/8 to keep both the railing and the sign sharp', and explain how each choice supports the theme.

Done means: the series hangs together, the exposures are deliberate and defensible, and the reflection shows what manual mode let you do that auto mode would not.

Deliverables

  • 01A series of 5-10 photographs, final edited, on one theme.
  • 02A written shot list or caption file stating aperture, shutter speed, and ISO for every image.
  • 03The images arranged in a sequence you can defend.
  • 04A 250-400 word reflection naming at least three manual decisions and why you made them.
1ProjectMarked by AI

Submit your completed photo essay: 5-10 images on one theme, all shot in manual mode, with a shot list of settings and a 250-400 word reflection on your manual decisions. Your work will be judged against the project brief and the rubric below.

Graded on Manual exposure is demonstrated in every image · The series reads as a coherent photo essay · Reflection links manual decisions to the theme

2Short answerMarked by AI

A photo in your essay has a histogram bunched against the left edge with a tall spike at 0. What does that shape tell you about the exposure, which manual setting would you change first, and roughly by how much?

Graded on Reads underexposure from the histogram shape · Proposes a workable manual fix

3Short answerMarked by AI

For a series shot inside a dim café with people moving, you can raise ISO to 3200 at f/2.8 and 1/60, or drop shutter speed to 1/15 at ISO 800 and keep f/2.8. Which do you choose and why? Name the trade-off between motion blur and noise, and say how your choice affects the series as a whole.

Graded on Weighs motion blur against noise · Applies the choice to the series context

A five-shot planning sheet: After Rain

Theme narrowed to 'what a rainstorm leaves behind on one street'. Light was overcast, so ISO stayed between 100 and 400. Aperture did the storytelling: deep depth of field for scenes, wide aperture for details.

ImageSubjectApertureShutterISOWhy this combination
1Puddle reflecting a shopfrontf/81/125100Both the reflection and the sign must be sharp; bright pavement lets ISO stay low.
2Single wet leaf on concretef/2.81/1000200Shallow depth of field isolates the leaf; fast shutter freezes the drip still falling.
3Broken umbrella against a wallf/5.61/250400Handheld in shade; the narrower aperture keeps more of the umbrella readable.
4Raindrops running down a windowf/41/60800The drops are the subject; motion blur on the street behind says it is still raining.
5Empty bench with a puddle beside itf/81/30100On a tripod, so the slow shutter is safe; deep focus makes the empty scene feel calm.

Every cell in the settings columns is a decision, not a default. If the light changed between shots, the rebalancing rule is to open the aperture or slow the shutter before raising ISO, then re-check the histogram.

Checklist
0/8

Before you submit

Check the metadata, not your memory. If your camera writes EXIF, sort by mode and confirm every frame says M.

  • A photo essay is 5-10 images held together by one theme and deliberate exposure, not a collection of best singles.
  • Shooting the whole series in manual mode makes every change in aperture, shutter, or ISO a decision you can defend.
  • The histogram is your exposure referee: a wall at the left edge blocks shadows, a wall at the right edge blows highlights.
  • Recording settings as you shoot is the only reliable way to write an honest reflection afterwards.
  • A workable capstone theme is narrow enough to finish in one or two sessions and visible in every frame.
  • Submission is the point where claims meet evidence: if you say the series is manual, EXIF must agree.
For you · never graded

Which image in your series demanded the most deliberate manual decision, and what would the automatic mode version of that image have gotten wrong?

Lesson 74

Choosing a theme

Decide on a unifying subject, story, or emotion for your photo essay. Consider what you want to convey and how manual mode choices can support that narrative.

15 min4 assessments

A photo essay without a theme is a folder of random pictures. The theme is the thread that ties your images together—it can be a subject (a market), a story (a day in the life of a baker), or an emotion (solitude). Once you choose a theme, every manual mode decision becomes deliberate: aperture, shutter, ISO, focus, and composition all work to reinforce that story. For example, a theme of 'chaos' might lead you to a fast shutter to freeze motion, a wide aperture to isolate subjects, and a high ISO to add grain. A theme of 'serenity' might call for a slow shutter to blur water, a small aperture for deep focus, and a low ISO for clean lines. The theme is your compass; it tells you which setting to reach for when the light isn't cooperative.

How a theme guides manual mode choices

Analogy

Choosing a theme is like deciding the moral of a short story before you write the first sentence. The words you choose—sentence length, punctuation, vocabulary—create the mood. In photography, aperture, shutter, and ISO are your words. If you want a sleepy, dreamy theme, you might use a slow shutter and wide aperture. If you want a harsh, chaotic theme, you might use fast shutter, small aperture, and high ISO.

Where the analogy breaks down

A story's words directly convey meaning, but a photograph's settings are technical decisions that the viewer may not notice—they feel the mood without seeing the settings. Also, a story can have multiple themes; a photo essay should have one strong, clear theme.

Theme: 'The Night Market's Energy'

Subject: A busy night market. Emotion: Vibrant, chaotic, alive. Manual settings: Fast shutter (1/250) to freeze motion of people and hands, wide aperture (f/2.8) to isolate subjects against the blur of lights, high ISO (3200) to capture the scene without flash, and tungsten white balance to emphasize warm colors. The result is a series of images that feel dynamic and immediate. Contrast with 'The Night Market's Quiet Corners': Slow shutter (1/15), small aperture (f/16), low ISO (100), focus on empty spaces to convey stillness.

Common misconception

“A theme is just the subject, like 'flowers' or 'cars'.”

Many photo essays are titled by the subject, and it's easy to think the subject is the theme.

What is actually true

The theme is the perspective or emotion about that subject. For example, 'flowers' could be a theme of 'Delicate Beauty' (soft focus, pastel tones) or 'Urban Decay' (wilted flowers in grimy settings). The subject is the vehicle; the theme is the message.

Go deeper

These two images illustrate different themes. The jousting scene evokes spectacle and competition; the grain market suggests abundance and daily life. Notice how the lighting, focus, and composition would differ if you were to shoot them in manual mode to reinforce those themes.

Check yourself

Test your understanding of choosing a theme for a photo essay.

1Multiple choiceChecked instantly

Which of the following best describes a theme for a photo essay?

  • AThe subject you photograph, e.g., trees.
  • BThe emotion or story you want to convey.
  • CThe camera settings you use.
  • DThe number of photos you take.
2Short answerMarked by AI

Describe a theme of 'Urban Loneliness'. Suggest one specific manual exposure setting (aperture, shutter, or ISO) and explain why it supports that theme.

Graded on Appropriate setting choice · Explanation of visual effect

3Short answerMarked by AI

Why is it important to choose a theme before shooting, rather than just taking many photos and selecting later?

Graded on Identifies intentionality · Contrasts with random collection

4EssayMarked by AI

Choose a subject you know well. Define a theme (emotion or story) for it. Then describe how you would use at least two of the manual exposure controls (aperture, shutter, ISO) to convey that theme. Be specific about the settings and the visual effect.

Graded on Theme definition · Setting choices · Visual effect and cohesion

Lesson 75

Scouting locations

Identify and visit potential locations that fit your theme. Evaluate lighting, angles, and accessibility, and plan shots that work with manual exposure settings.

15 min3 assessments

You have a theme and a plan for your photo essay. Now you need places that make the theme visible. Scouting is not wandering around hoping for a good shot. It is a deliberate walk-through where you check light direction, background clutter, accessibility, and the angles that manual exposure lets you control.

You already know how aperture, shutter speed, and ISO work together. Scouting tells you which of those you will reach for at each location. A shaded alley demands a wider aperture or slower shutter. A bright coastline lets you stop down and freeze motion. The location decides the exposure strategy, not the other way around.

Scouting workflow: each step feeds into the next, and the outcome is a concrete shot list.

A person stands on a rocky outcrop overlooking a fortress and distant hills, scouting a filming location.
CC BY-SA 3.0· Kigsz source
  • Light direction (front, side, back) determines whether you need fill flash or exposure compensation.
  • Background clutter ruins a photo essay's consistency; scout for clean, theme-supporting backgrounds.
  • Accessibility at the time of day you plan to shoot is non-negotiable – a great location locked after sunset is useless.
  • Note the sun's position at different hours; revisit the location at the planned shooting time to confirm light.
  • Plan 2-3 specific shots per location, including the aperture, shutter speed, and ISO you intend to use.
Steps
0/5

You have a theme: 'Urban decay'. You found an abandoned warehouse. Walk through the scouting process.

  1. Walk the perimeter

    Circle the building. Note where the sun hits the walls. At 10 AM, the south face is lit; the north face is in shadow. Take a reference photo with your phone (or camera in auto) to remember the light.

    Don't step on unstable debris – safety first.

    You have at least one photo of each side.

  2. Identify the best light

    The south face has warm, direct light. The north face has soft, even light. For your theme, you want harsh shadows to emphasize decay. Decide: shoot the south face in late afternoon.

    Harsh midday sun creates deep shadows and blown highlights – avoid it unless you want that look.

    You can state which side you will use and why.

  3. Check backgrounds

    From the south side, look beyond the building. There is a modern apartment block in the frame. Move 20 meters left to crop it out using a wall as foreground.

    A distracting background cannot be fixed in post without heavy cropping.

    Your chosen angle excludes the apartment block.

  4. Plan exposure settings

    Late afternoon sun: aperture f/8 for depth of field, shutter 1/125s, ISO 100. Take a test shot. If the histogram is clipped, adjust shutter speed to 1/250s and increase ISO to 200.

    Don't rely on the camera's meter alone – check the histogram.

    Histogram shows no clipping on either side.

  5. Document the location

    Write down the address, best shooting time, and your planned settings. Note any permits needed. This saves time when you return.

    If you rely on memory, you will forget the exact spot or time.

    You have a written or digital note with all details.

Check yourself

Check your scouting knowledge.

1Multiple choiceChecked instantly

Why is scouting important for a photo essay shot in manual mode?

  • ATo find the cheapest location to shoot
  • BTo pre-visualize shots and plan exposure settings for each location
  • CTo get permission from property owners
  • DTo find the most popular spot for social media
2Short answerMarked by AI

You arrive at a location at 2 PM on a clear day. The sun is high and harsh, creating deep shadows and bright highlights. Describe two adjustments you could make to your shooting plan to still get good results for a photo essay about 'urban decay'.

Graded on Identifies two concrete adjustments that address the harsh light · Connects adjustments to the theme of urban decay

3Fill the blanksChecked instantly

Lesson 76

Consistent exposure

Learn techniques to maintain consistent exposure across a series, using manual mode to control aperture, shutter speed, and ISO so images flow together visually.

20 min3 assessments

When you shoot a photo essay, each image is a sentence in a visual story. If one image is noticeably brighter or darker than the others, it breaks the flow. Consistent exposure means the brightness and contrast feel the same across the series, even when the scene light changes. The goal is not to lock settings blindly, but to adjust them in a controlled way so the final images look like they belong together.

You already know how to set a single exposure. Now you need to keep that exposure consistent across many shots, adjusting for changing light without losing the visual thread.

Steps
0/5

Follow these steps to maintain consistent exposure across a series of images. The order matters: skipping a step or changing settings out of sequence will produce a jarring mismatch.

  1. Set your base exposure

    Start with the first shot in the lighting you'll shoot most often. Choose aperture for depth of field, shutter speed for motion blur, then set ISO to centre the histogram. Note these three values: they are your anchor.

    Don't pick a base in extreme light. If you start in deep shadow, you'll have no room to adjust when the sun comes out.

    The histogram's main peak sits in the middle third of the graph, not touching either edge.

  2. Lock aperture and shutter speed

    Do not change aperture or shutter across the series unless the light shifts by more than two stops. Keep them fixed to preserve depth of field and motion blur consistency.

    Every change to aperture or shutter introduces a new visual variable. A portrait series with varying aperture will have some images with blurred backgrounds and some with sharp ones – that breaks the essay's coherence.

    Your aperture and shutter numbers are the same as step 1.

  3. Adjust ISO for minor light changes

    When the scene gets brighter or darker by up to two stops, change only ISO. Raise ISO if the scene darkens, lower it if it brightens. Keep the histogram in the same zone as the base shot.

    ISO changes affect noise. If you shoot at ISO 6400 in one frame and ISO 100 in the next, the grain difference will be visible. Stay within the same ISO generation if possible.

    After each adjustment, the histogram's peak is in the same horizontal position as the base exposure.

  4. Handle major light shifts with paired changes

    If the light changes by more than two stops, you must change aperture or shutter as well. But keep the exposure value (EV) the same. Example: If you stop down aperture by one stop (f/5.6 to f/8), compensate by slowing shutter by one stop (1/125s to 1/60s) or raising ISO by one stop (400 to 800).

    Don't change just one setting. That alters the EV and the next image will be darker or lighter than the series.

    The new aperture + shutter + ISO combination gives the same EV as the base exposure. You can verify with an EV calculator or by checking the histogram matches.

  5. Review and adjust in post only if needed

    Shoot RAW. If a shot is off by a third of a stop, you can fix it in Lightroom or similar without quality loss. But don't rely on this – aim to get it right in camera. If you find yourself adjusting more than ± 1 stop in post, revisit your process.

    Over-reliance on post-processing leads to sloppy technique. The goal is consistent exposure straight out of camera.

    All images in the series have similar brightness when viewed side by side on a calibrated screen.

Checklist
0/6

Field Checklist for Consistent Exposure

Keep this checklist open while you shoot. Tick each item after every image.

Shooting a portrait series in fading light

You're shooting a series of street portraits in the late afternoon. The sun is going down, so light is fading. You start with a base exposure: f/5.6, 1/125s, ISO 400. The histogram is centred.

  • Shot 1 (base): f/5.6, 1/125s, ISO 400. Histogram centred.
  • Shot 2: Subject moves into shade. Light is 1 stop darker. You keep aperture and shutter, raise ISO to 800. Histogram centred again.
  • Shot 3: Sun goes behind a cloud. Light is 2 stops darker. You raise ISO to 1600. Histogram still centred. (You accept the slight noise at ISO 1600 for consistency.)
  • Shot 4: Sun comes out again, now 1 stop brighter than base. You lower ISO to 200. Histogram centred.

All four images have the same visual brightness. The aperture and shutter never changed, so depth of field and motion blur are identical across the series.

Decision flow for maintaining consistent exposure across a series.

  • Consistent exposure makes a photo essay cohesive – brightness and contrast appear uniform across images.
  • Lock aperture and shutter speed for the majority of shots; adjust ISO for minor light changes (up to 2 stops).
  • Use the histogram as your guide, not the camera's metering – it tells you the actual brightness distribution.
  • When changing both aperture and shutter, maintain the same exposure value (EV) to keep brightness consistent.
  • Shoot in RAW to allow ±1 stop adjustment in post without quality loss, but aim for in-camera consistency.
Check yourself

Test your understanding of consistent exposure techniques.

1Put in orderChecked instantly

Arrange the following steps in the correct order for maintaining consistent exposure when the light changes by 1 stop during a photo essay.

  • ACheck histogram after adjustment
  • BAdjust ISO up or down
  • CDetermine magnitude of light change
  • DKeep aperture and shutter locked
2Short answerMarked by AI

Explain why it is better to adjust ISO rather than shutter speed when the light changes slightly in a portrait series where you want consistent depth of field.

Graded on Identifies that ISO adjustment preserves depth of field and motion blur · Explains the trade-off of noise

3Multiple choiceChecked instantly

While shooting a series, the light suddenly increases by 2 stops. You want to keep the aperture and shutter speed locked to maintain depth of field and motion blur. What is the best adjustment?

  • AIncrease shutter speed by 2 stops, keep aperture and ISO the same.
  • BOpen aperture by 2 stops, keep shutter and ISO the same.
  • CDecrease ISO by 2 stops, keep aperture and shutter the same.
  • DUse auto exposure for the next shot.

Lesson 77

Focus storytelling

Use manual focus and depth of field intentionally to guide the viewer's attention and strengthen the narrative of your photo essay.

15 min3 assessments
Decide

You're editing a photo essay about a street musician named Lena. You have three images that should tell the story of her performance, the crowd, and the moment she connects with a listener. But when you lay them out, the viewer's eye doesn't settle on Lena in any of them. The images feel flat or chaotic. Your task: diagnose the focus issue in each image and choose the fix that strengthens the narrative.

Image 1: Lena playing guitar, full body in frame. The background is a busy street with signs and people. The viewer's eye jumps from the guitar to a sign to a pedestrian. The image is sharp everywhere. What is the most likely focus problem?

Decision tree for diagnosing focus problems in a narrative photo

  • Manual focus gives you precise control over which plane of the image tells the story.
  • Depth of field is a storytelling tool: shallow DoF isolates the subject, deep DoF shows context.
  • In a photo essay, every image should have a clear focal point that supports the narrative arc.
  • Use focus peaking or magnification in your camera's viewfinder to confirm sharpness on the most important element.
  • A common narrative mistake is to have everything in focus—the viewer's eye has no guide.
  • For portraits in a series, focus on the nearest eye to create an emotional connection.

From chaotic to narrative: fixing a street shot

Scenario: You're photographing a street musician for a photo essay about urban life. Your first shot is at f/16, 1/60s, ISO 400, focused on the crowd. The result: the sign, the musician, the passersby, and the bricks are all sharp. The image has no story—it's a random collection of elements.

Diagnosis: Too much depth of field (f/16). The viewer's eye has no priority.

Fix: Change to f/2.8, 1/500s, ISO 100. Use manual focus to lock onto the musician's face. The background blurs into a soft texture of shapes and colors. The viewer's eye now lands on the musician's expression and guitar. The image tells a story: one person making music amid a city that fades into the background.

Result: The narrative is clear. The viewer feels the intimacy of the performance despite the busy environment.

Common misconception

“Manual focus is only for macro or low-light situations where autofocus cannot work.”

Autofocus is fast and accurate in most conditions. Manual focus requires practice and slows you down. It's easy to think it's a backup mode, not a creative tool.

What is actually true

Manual focus is a deliberate storytelling tool. By controlling exactly where the plane of sharpness falls, you direct the viewer's attention. In a photo essay, you might choose to focus on a hand, an eye, or a distant object to create a narrative hierarchy. Autofocus often picks the closest or highest-contrast element, which may not be the storyteller's choice.

Check yourself

Check your understanding of focus as a narrative tool.

1Select all that applyChecked instantly

Which of the following are valid reasons to use manual focus in a photo essay? (Select all that apply.)

  • ATo ensure the subject's eyes are sharp when they are not the closest element.
  • BTo prevent the camera from refocusing between shots when the composition changes slightly.
  • CTo create a consistent depth of field across all images in the series.
  • DTo lock focus on a specific element that carries the narrative, even if it moves.
2Put in orderChecked instantly

Imagine you are shooting a photo essay about a baker. You want a sequence that shows: the baker's hands kneading dough, his face as he checks the oven, and the final loaf. Arrange these steps in the order you would set your focus for each shot, from the first to the last.

  • AFocus on the oven door handle to show the heat.
  • BFocus on the baker's eyes to capture his expression.
  • CFocus on the dough to show the texture and action.
  • DFocus on the loaf's crust to highlight the final product.
3Short answerMarked by AI

You have a photo of a child playing in a park. The background is a chaotic playground. The child is sharp, but the viewer's eye still jumps to the bright yellow slide behind her. What is the most likely cause, and what is the fix?

Graded on Identifies the correct cause (distracting element or depth of field issue) · Proposes a realistic fix involving focus or depth of field · Explains how the fix improves the narrative

Lesson 78

Selecting and sequencing

Choose the strongest images from your shoot and arrange them in a sequence that builds a coherent story, considering visual flow and pacing.

20 min3 assessments

You've returned from your shoot with dozens of images. The essay you planned is a story, but the raw material is a pile of frames. Your job now is to cut ruthlessly — the strongest images are not the ones that are technically perfect, but the ones that each move the story forward. Selection is about asking: Does this image add something new, or does it repeat what another already says better? Once you have a shortlist, sequencing is about the order they are seen. The sequence controls emotional pace, visual rhythm, and narrative arc. A good sequence makes the viewer feel the change from one image to the next — a shift in light, a change in expression, a move from wide to close. The first image sets the scene; the last one lingers. The middle ones build tension or contrast. You can sequence chronologically (following the event) or thematically (grouping related moments). Both are valid, but each serves a different kind of story.

Two common sequencing strategies for a photo essay. Each decides the order of images differently.

Chronological

Narrative clarity
High — viewer follows the timeline naturally
Emotional arc
Moderate — depends on event progression
Editing difficulty
Low — order is given by time stamps
Versatility
Low — only works for events with a clear time line

Best for A documentary of a single event (e.g., a festival, a protest, a sunrise-to-sunset day)

Thematic

Narrative clarity
Moderate — narrative is built through juxtaposition, not time
Emotional arc
High — you can create contrast and build tension deliberately
Editing difficulty
High — you must reorder images to find the best flow
Versatility
High — works for abstract concepts, portraits, or any set where time is not the main driver

Best for A conceptual essay (e.g., 'solitude', 'urban textures') where the goal is to evoke a feeling across images, not to tell a story in order of occurrence

Morning at the Market

Scenario: You photographed a local market from 6 AM to 9 AM. You have 40 images. The essay theme is 'Morning at the Market'.

Selection – You choose 6 images that each show a distinct aspect: the empty stalls at dawn, a vendor arranging produce, a customer haggling, the steam from a food stall, a close-up of hands counting money, and the crowd at peak hour. You discard duplicates and images that are out of focus or poorly exposed, even if they are emotionally interesting.

Sequence – You arrange them in this order:

  1. 1.Empty stalls at dawn (wide, calm)
  2. 2.Vendor arranging produce (medium, slow movement)
  3. 3.Close-up of hands counting money (detail, intimacy)
  4. 4.Steam from a food stall (sensory, atmosphere)
  5. 5.Customer haggling (action, tension)
  6. 6.Crowd at peak hour (wide, chaotic)

Why this sequence: It starts quiet and wide, builds through detail and atmosphere, peaks with the human interaction, and ends with the full energy of the market. It is not strictly chronological (the haggling likely happened earlier than the peak crowd), but the emotional arc is stronger than a simple time order would be.

Decide

You have a set of 5 images from a photo essay about a child's first day at school. The images are:

  • A: The child's backpack on the car seat
  • B: The child standing nervously at the gate
  • C: The child laughing with a new friend
  • D: The mother waving goodbye
  • E: The empty classroom after the bell

You need to select 4 to form a sequence. You must choose the order.

Which image should you leave out to keep the story tight?

Common misconception

“I should keep the images in the order I shot them – that's the most honest story.”

Chronological order feels natural and avoids manipulation. It's simple and respects the timeline.

What is actually true

A photo essay is a curated story, not a log. The order of shooting rarely produces the best emotional rhythm. Rearranging images to create contrast, build tension, or slow down the pace is not dishonest – it's editing. The viewer experiences the sequence, not the shoot day. The best sequence often moves key moments earlier or later to strengthen the narrative arc.

Check yourself

Check your understanding of selection and sequencing.

1Multiple choiceChecked instantly

You are sequencing a photo essay about a rainy afternoon in a city. Which of the following sequences best builds an emotional arc from calm to dynamic and back to calm?

  • AWide street empty → close-up of raindrops on window → person running with umbrella → puddle reflections at dusk
  • BPerson running with umbrella → wide street empty → puddle reflections at dusk → close-up of raindrops
  • CClose-up of raindrops → puddle reflections → wide street empty → person running
  • DWide street empty → puddle reflections → person running → close-up of raindrops on window
2Select all that applyChecked instantly

Which of the following are valid criteria for selecting an image to include in a photo essay? (Select all that apply.)

  • AThe image is in sharp focus
  • BThe image shows a unique moment that no other image captures
  • CThe image is the most recent one taken
  • DThe image adds emotional variety to the sequence
  • EThe image was shot with a wide aperture
  • FThe image has a strong composition that draws the eye
3Short answerMarked by AI

You have 5 images for a photo essay titled 'The Last Day of Summer'. The images are: a melting ice cream cone, a child jumping into a pool, an empty beach at sunset, a pair of flip-flops abandoned on the sand, and a close-up of a wilting sunflower. Select 4 images, describe the sequence you would use, and explain why you left one out and why you chose that order.

Graded on Selection justification · Sequence reasoning · Thematic coherence

Lesson 79

Reflection and presentation

Write a brief reflection on your technical decisions and present your photo essay, explaining how manual mode helped you achieve your vision.

15 min3 assessments

You've shot your photo essay in manual mode. Now you need to present it—not just show the images, but explain the choices behind them. A good reflection makes your work stronger: it shows you understood why you set the aperture to f/2.8, why you chose ISO 400, and how manual mode let you control the light and focus exactly as you wanted.

This isn't a technical lecture. It's a short walkthrough of your process, aimed at someone who can see the photo but not the thinking. You'll practice saying it out loud, then field questions as if you were at a small exhibition.

  • A reflection covers at least one technical decision per image: aperture, shutter speed, or ISO, and why you chose it.
  • You explain how manual mode made that decision possible, not just what you did but what you achieved.
  • Mention one challenge you solved in manual mode (e.g., low light, fast motion, shallow depth of field).
  • Keep your spoken presentation to 2–4 sentences per image; the audience can ask follow-ups.
  • Practice your presentation aloud before recording to find natural phrasing.

Sample reflection for one image

Image: A street portrait at dusk. Reflection: "For this shot I wanted the background lights to melt into soft circles, so I set the aperture to f/2.8. That wide opening also let in enough light at 1/100s and ISO 800, keeping the subject sharp despite the fading daylight. In auto mode the camera would have closed the aperture to f/8 and boosted ISO to 3200, which would have given me noise and a distracting sharp background. Manual mode let me prioritise the shallow depth of field."

Say it

Record yourself explaining one of your photo essay images. Use the structure: what you set (aperture/shutter/ISO), why, and how manual mode helped. Speak naturally, as if to a friend at a gallery.

For this image, I chose a wide aperture to blur the background and keep the focus on the subject.

For this image, I chose a wide aperture to blur the background and keep the focus on the subject.

Because the light was low, I increased the ISO to 800, which gave me a fast enough shutter speed to freeze motion.

Because the light was low, I increased the ISO to 800, which gave me a fast enough shutter speed to freeze motion.

Manual mode allowed me to set each control independently, so I could balance the exposure exactly as I wanted.

Manual mode allowed me to set each control independently, so I could balance the exposure exactly as I wanted.

Role-play

You're presenting your photo essay at a small exhibition. An audience member asks about your technical choices.

You are the presenter; you're talking to the audience member.

Goal: Explain why you used a particular aperture setting for your portrait shot.

Check yourself

Check your understanding of presenting your photo essay.

1Short answerMarked by AI

Write a 3–5 sentence reflection for one of your photo essay images. Include: the aperture or shutter speed or ISO you chose, why you chose it, and how manual mode helped you achieve the shot.

Graded on Specifies a technical setting (aperture, shutter, or ISO) with a reason · Explains how manual mode enabled the choice · Clarity and conciseness

2Fill the blanksChecked instantly
3Multiple choiceChecked instantly

Which of the following is NOT a reason to shoot in manual mode when working on a photo essay?

  • AYou want full control over exposure.
  • BYou need consistent exposure across a series of shots.
  • CYou want the camera to automatically adjust to changing light.
  • DYou are making creative decisions about depth of field.